Auditor Workflow
In this workflow, you will learn how to annotate your own dataset, train a model, validate it, and deploy it on the browser — all in the cloud without requiring target hardware.
Copy Dataset
To copy a dataset, navigate to the dataset you would like to copy. On the dataset card, select "Copy Dataset" from the dataset options as shown below.
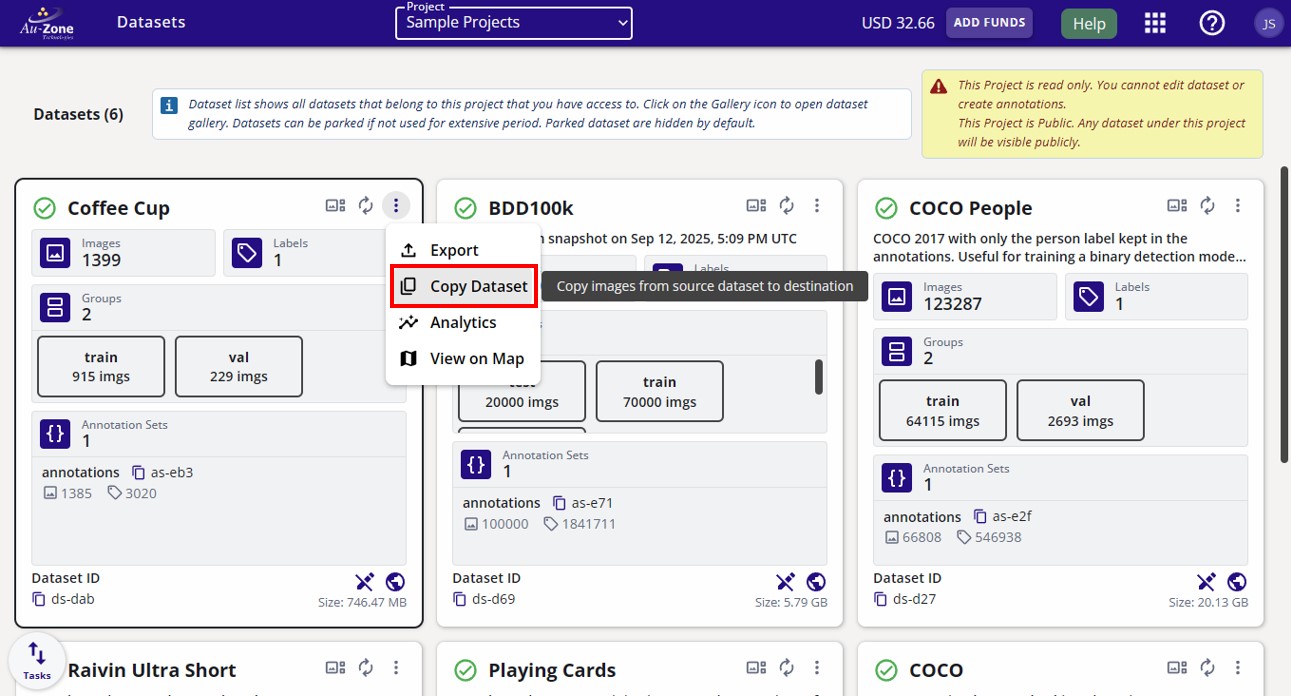
This action opens a dialog where you can specify the source and destination for the dataset copy operation.
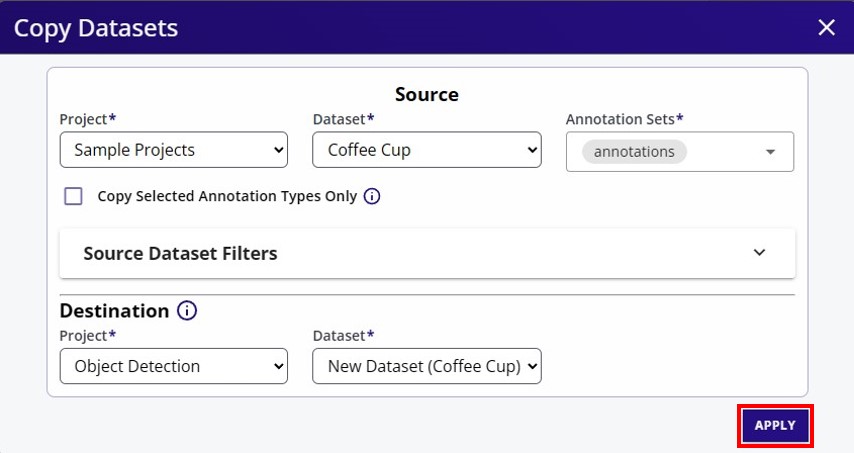
- Source: The current location of the dataset being copied. This field is automatically populated with the dataset card you selected before opening the dialog.
- Destination: The location where the copied dataset will be created.
In the example below, the source is the "Coffee Cup" dataset in "Sample Project". The copied dataset will be created in the location specified by the destination fields.
By default, the copy operation creates a new dataset container in the selected destination project. Alternatively, you can create a dataset container before starting the copy operation and then select that existing container as the destination.
Once you have made your selection, click "Apply" at the bottom right to start the copy process.
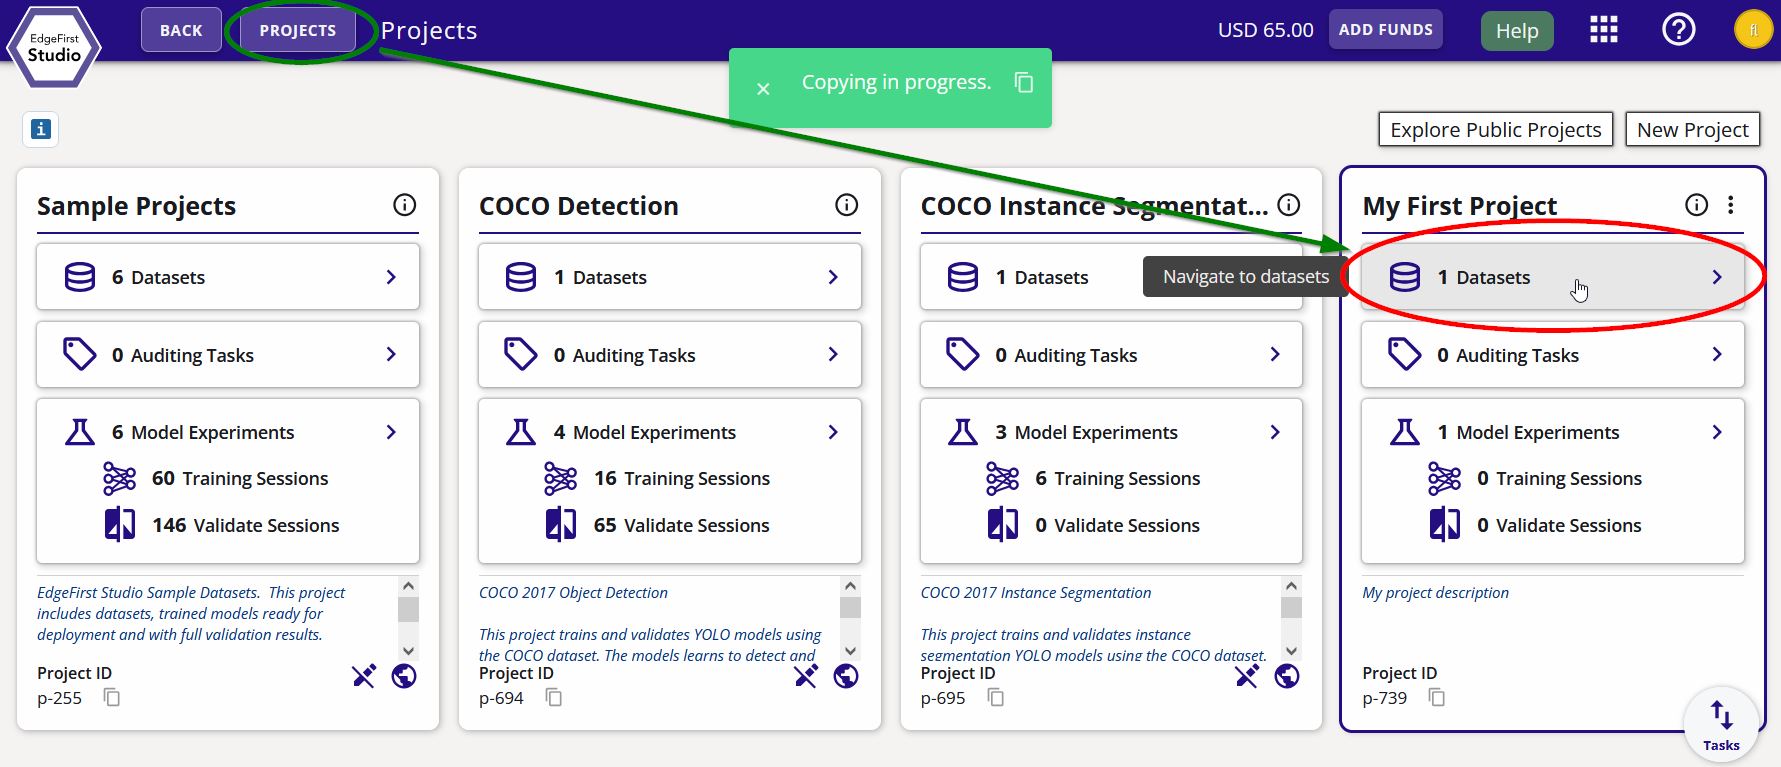
You can navigate to the copied dataset by clicking the "Project" button and then clicking on the "Datasets" button on your project as shown below.
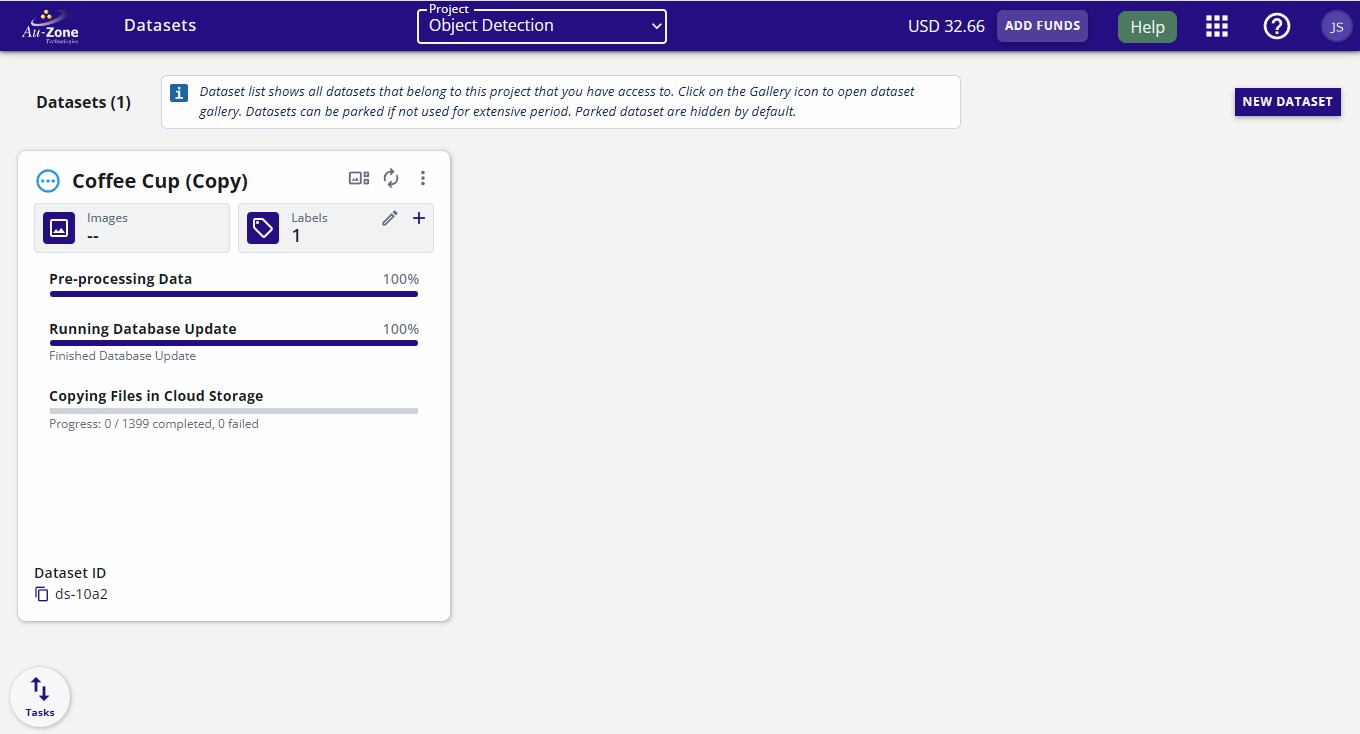
The progress for the dataset copy will be shown on the dataset card.
Once the copying process completes, the frames and the annotations would have been copied.
| Original Dataset | Copied Dataset |
|---|---|
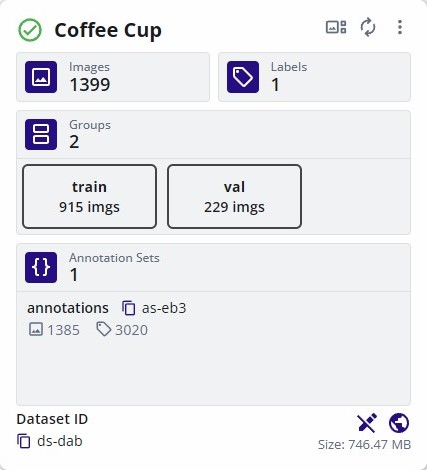 |
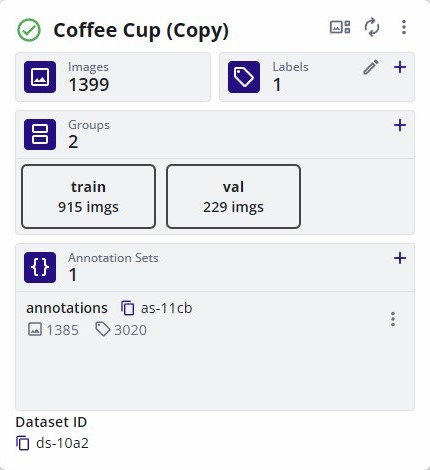 |
Tag Dataset
Before a dataset can be used for training, it must be tagged. To preserve its current state, assign a version tag to the dataset.
Click on the dataset options at the top right of the dataset card (three vertical dots). Then click the "History" button.
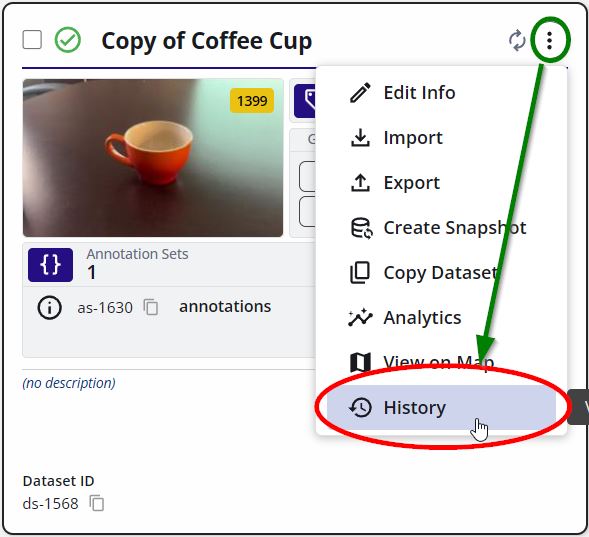
Add a new tagged version of the dataset by clicking the + green button on the right of the page as shown.
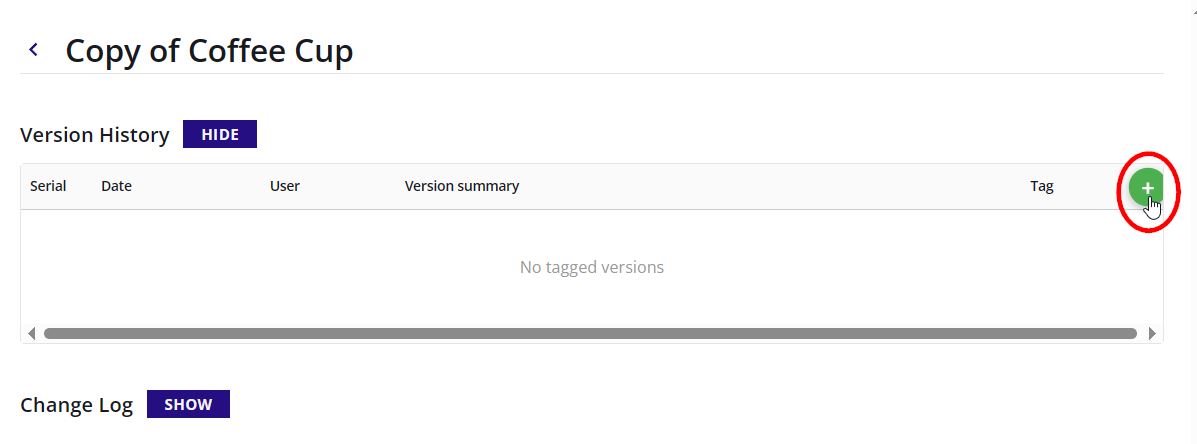
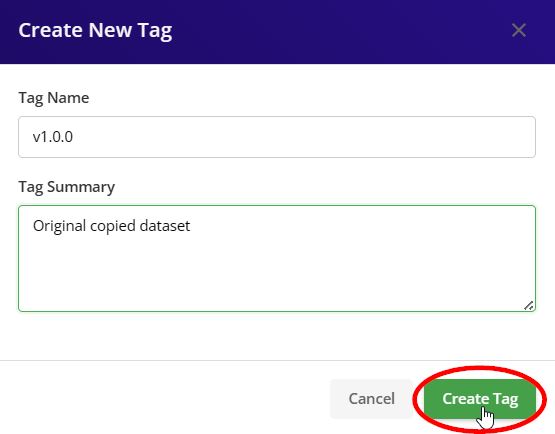
Specify the tag version and tag description. Click "Create Tag" to tag the dataset.
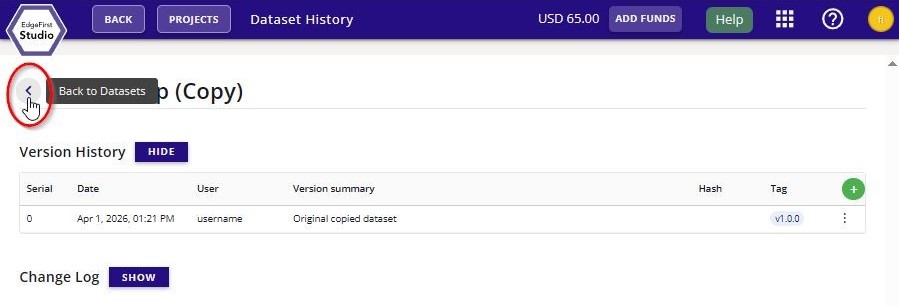
The new dataset tag will appear under "Version History" of this page. You can go back to the dataset card by clicking the "Back to Datasets" button.
Annotate Dataset
Now that you have a dataset in your project, you can start annotating the dataset. This will briefly show the steps for annotating the dataset, but for an in depth tutorial on the annotation process, please see Dataset Annotations.
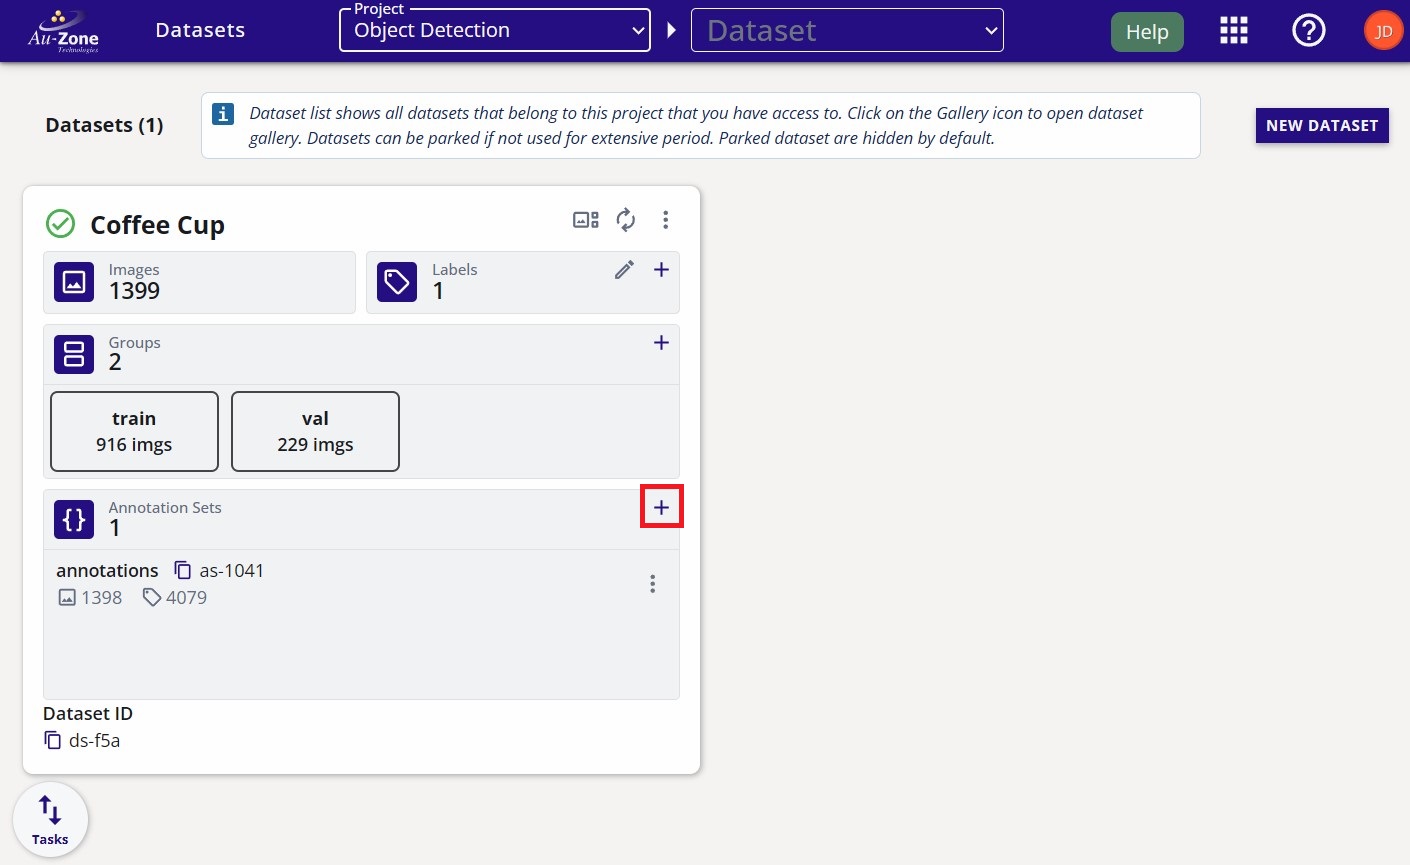
To annotate a dataset, first create an annotation set on the dataset card.
Provide the name of the new annotation set and its description
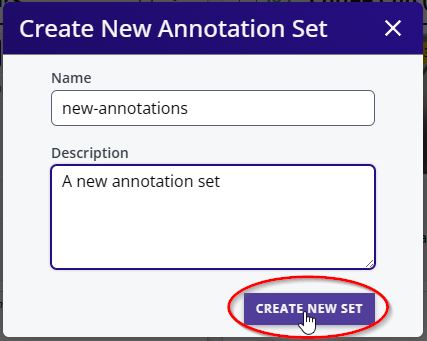
A new annotation set is now created called "new-annotations".
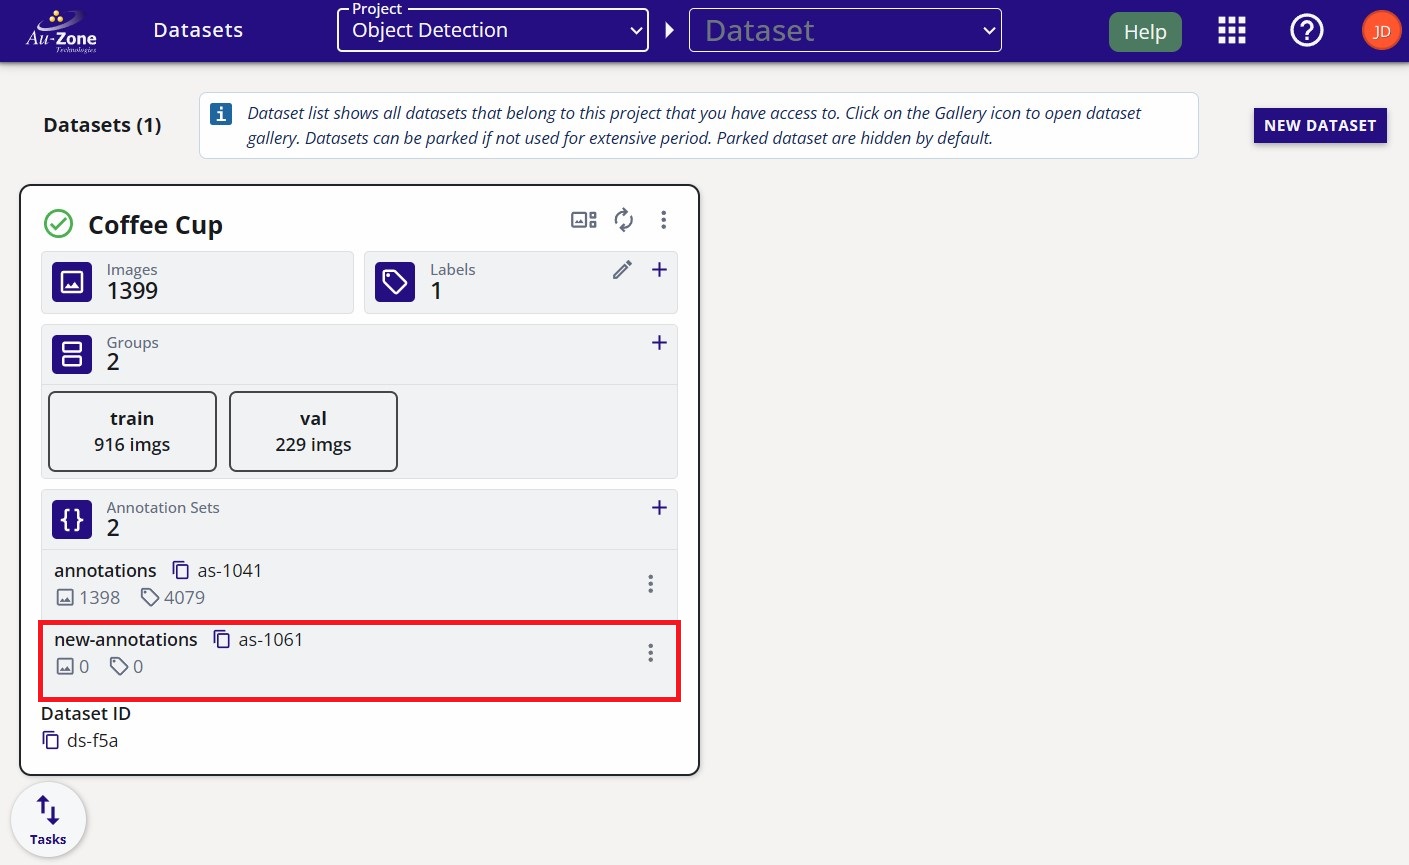
Next, open the dataset gallery, by clicking on the image preview of the dataset card.
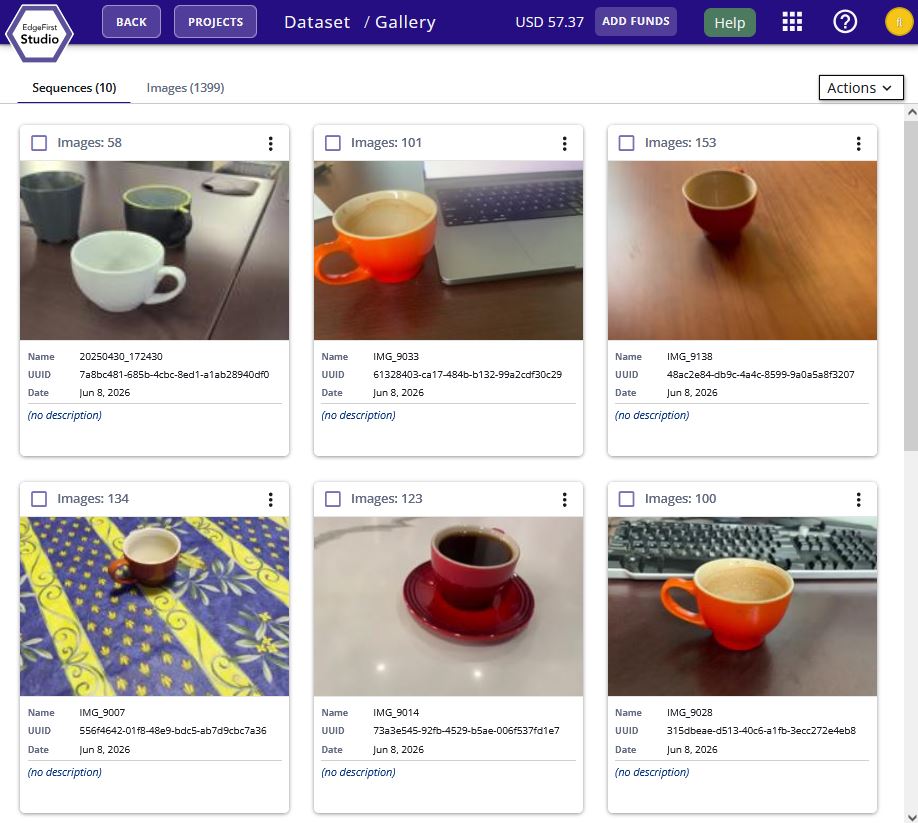
The dataset will contain sequences (video) and images. Click on any sequence card to start annotating sequences.
On the top navbar, switch to the annotation set you created.

Start the AGTG server by clicking on the "AI Segment Tool" and follow the prompts as indicated.
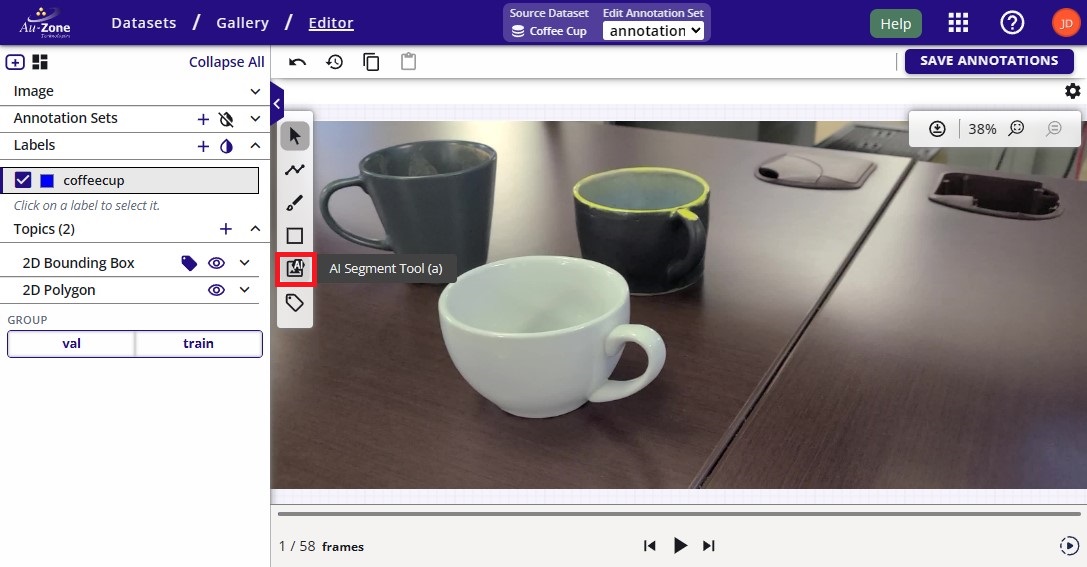
Go ahead and launch the AGTG server. Please allow ~5mins for the server to initialize.
AGTG Server Did Not Start
If the AGTG server has not started after 5 minutes, refresh your browser and click the AI Segment Tool button again.
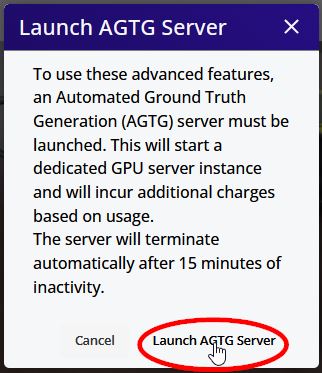
Once the AGTG server has started, go ahead and annotate the starting frame. Once the starting frame has been annotated, go ahead and propagate the annotations throughout the rest of the frames.
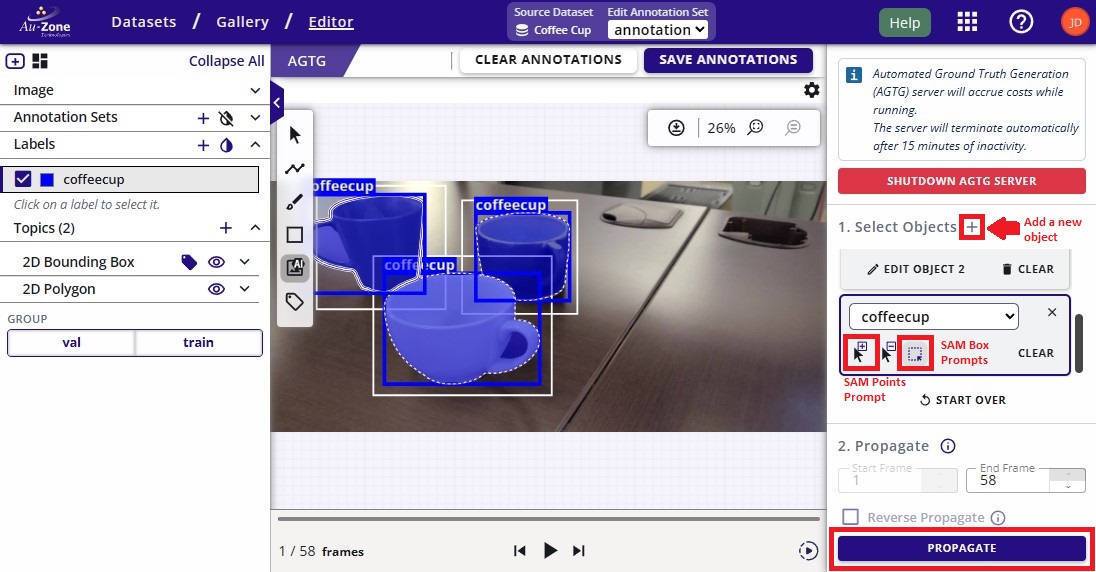
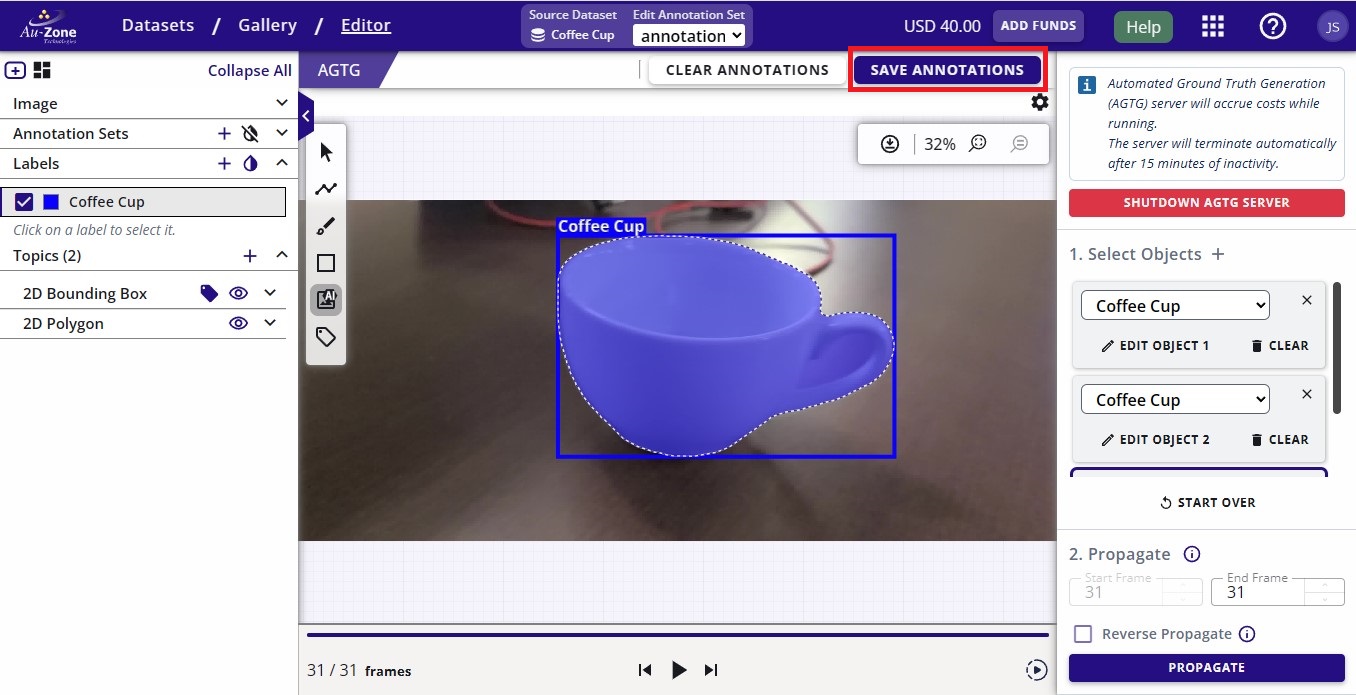
Once the propagation completes, click "Save Annotations" to save the propagated annotations.
Audit Annotations
Run the video playback to browse through the generated annotations and verify that the generated annotations are correct.
If an annotation was missed, you can quickly add the annotation using the same process and click "Save AIGT Annotations" as shown.
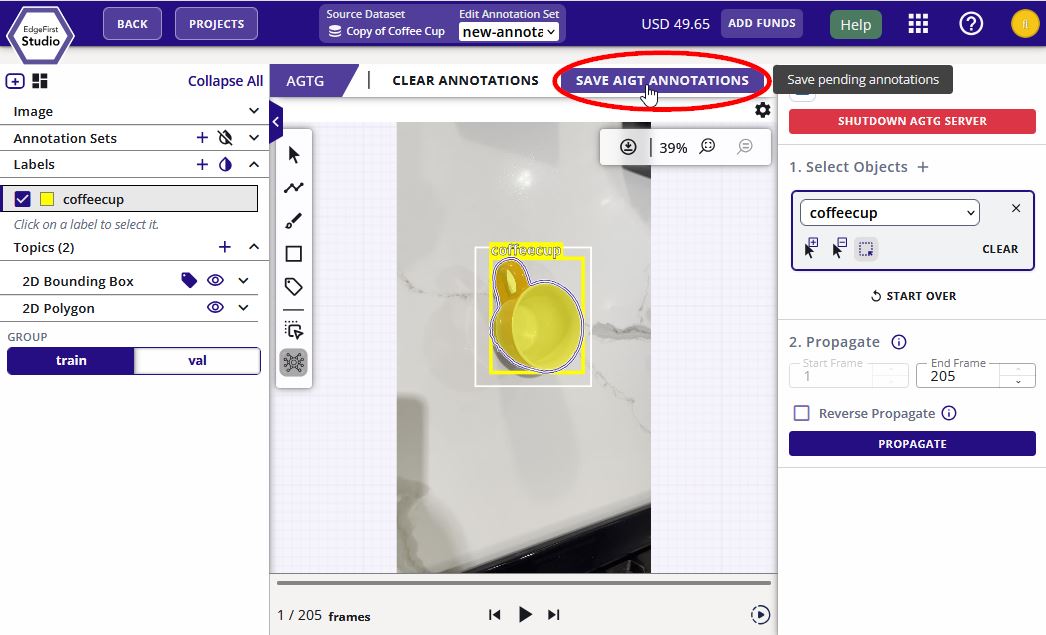
For objects that were improperly annotated, you can remove annotations. For annotations that require minor adjustments, EdgeFirst Studio has the features for adjusting annotations. Please click on the links as provided for further instructions on each of these features.
Repeat the steps for all the sequences in the dataset. You can go back to the dataset sequences by pressing the back button on the top left corner.
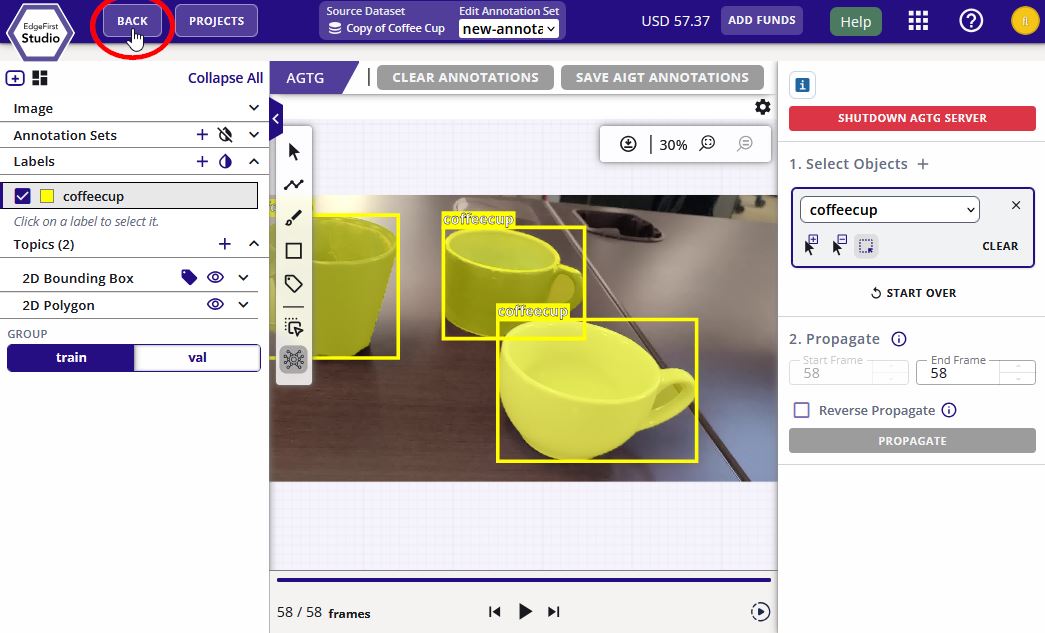
For the case of individual images, the same steps apply except there is no propagation step. You can still use the AGTG feature to quickly annotate images as shown in Add 2D annotations.
Train Vision Model
Now that your dataset is fully annotated, versioned, and split into training and validation partitions, you are ready to begin training your model. This will briefly show the steps for training a model, but for an in depth tutorial, please see Training Vision Models.
Navigate back to the "Projects" page. You can go back to the "Projects" page by clicking the Apps Menu waffle button on the top right of the Navigation bar. Click the first selection to take you to the "Projects page".
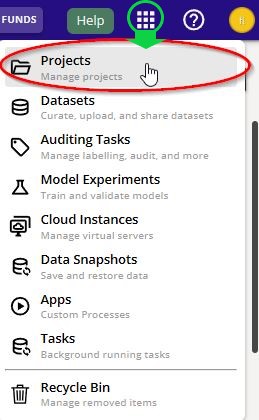
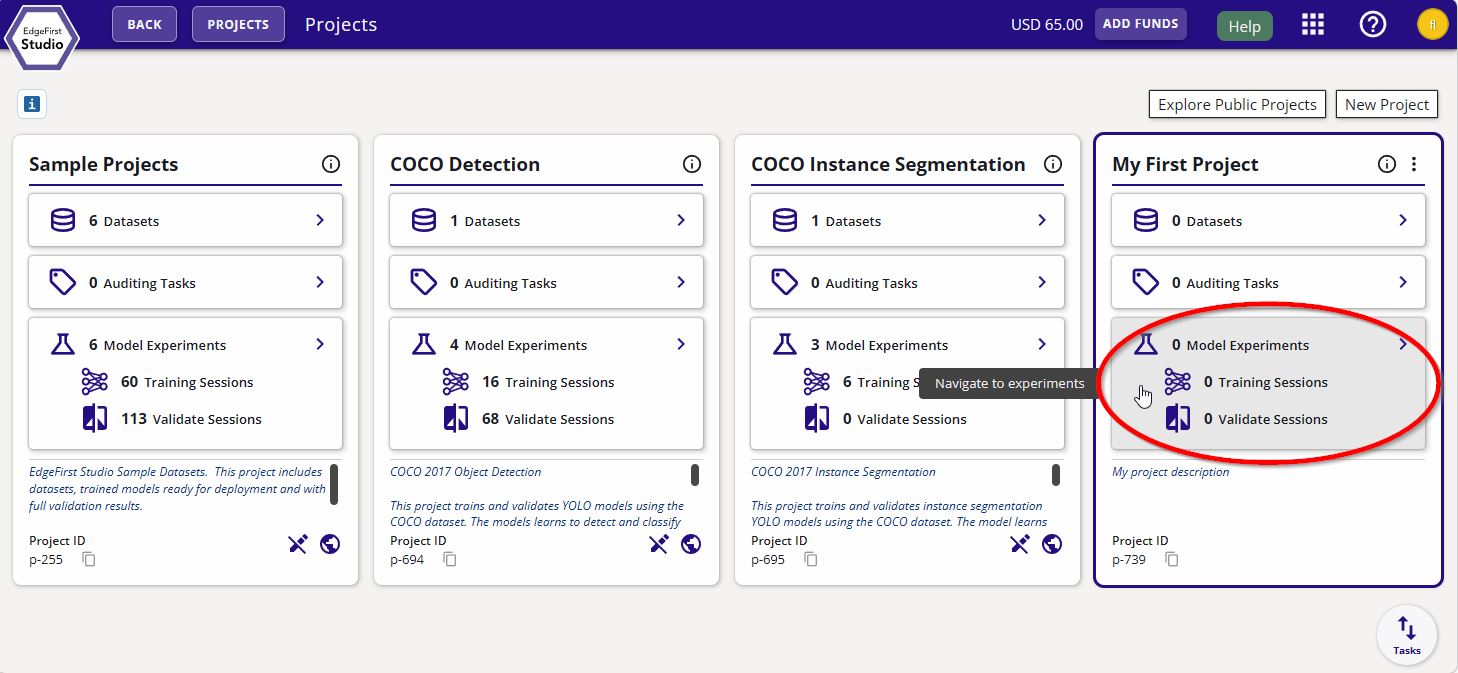
From the "Projects" page, click on "Model Experiments" of your project.
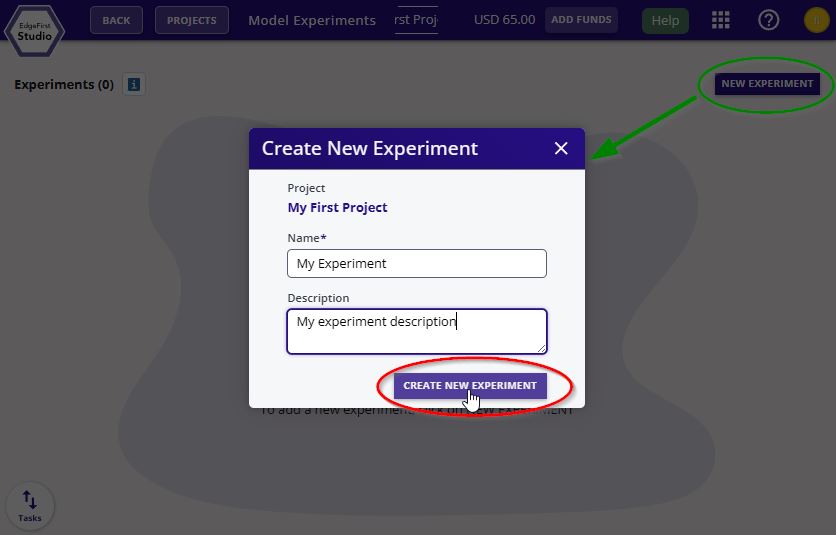
Create a new experiment by clicking "New Experiment" on the top right corner. Enter the name and the description of this experiment. Click "Create New Experiment".
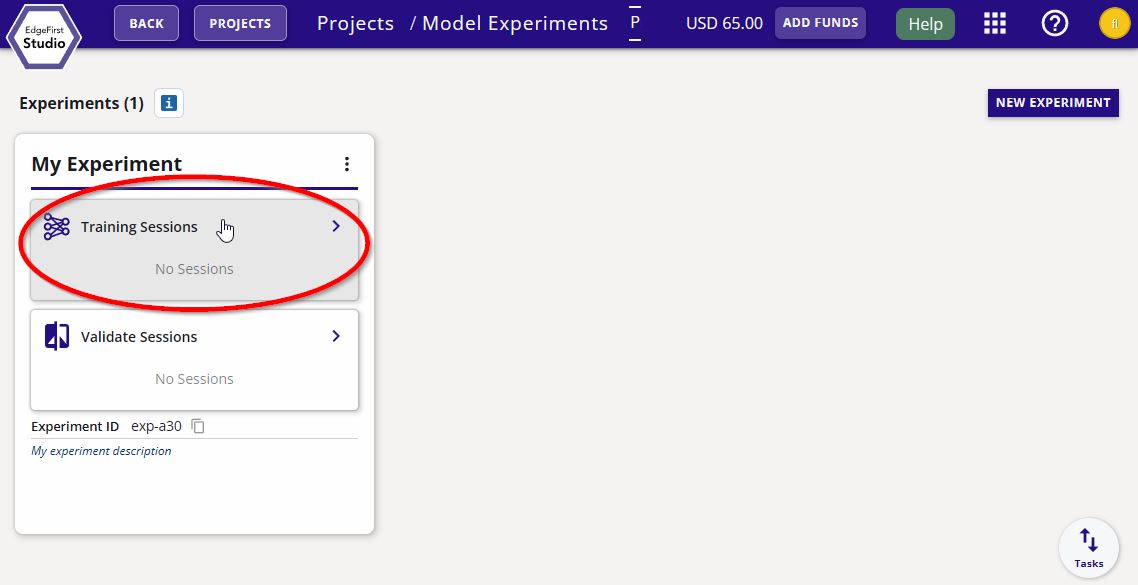
Navigate to the "Training Sessions".
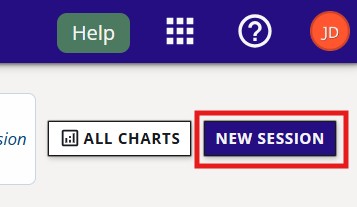
Create a new training session by clicking the "Actions" dropdown menu on the top right of the page and then click the "+ New" button.
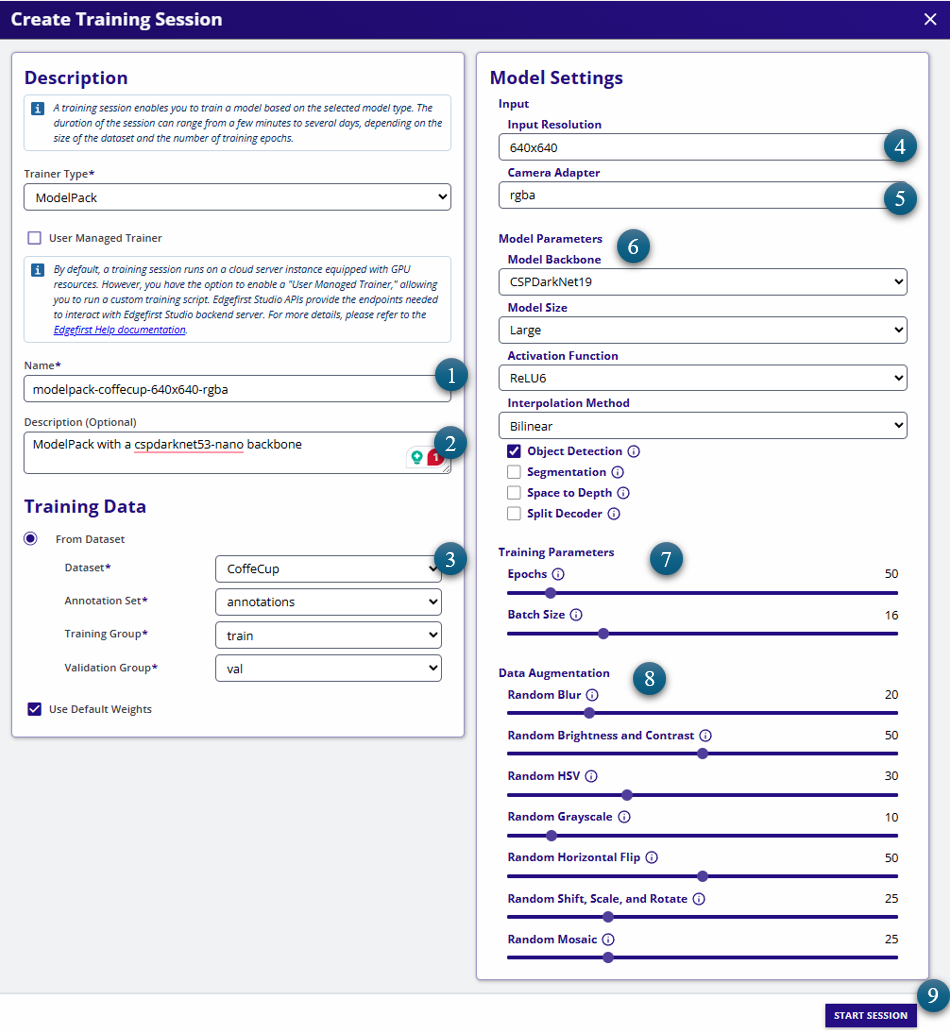
Follow the settings indicated and keep the rest of the settings default. Click "Start Session" to start the training session.
InsufficientInstanceCapacity

If you see this error after starting your training session, retry creating the session. This can happen when AWS reports that no EC2 instances are currently available to launch; the current workaround is to retry.
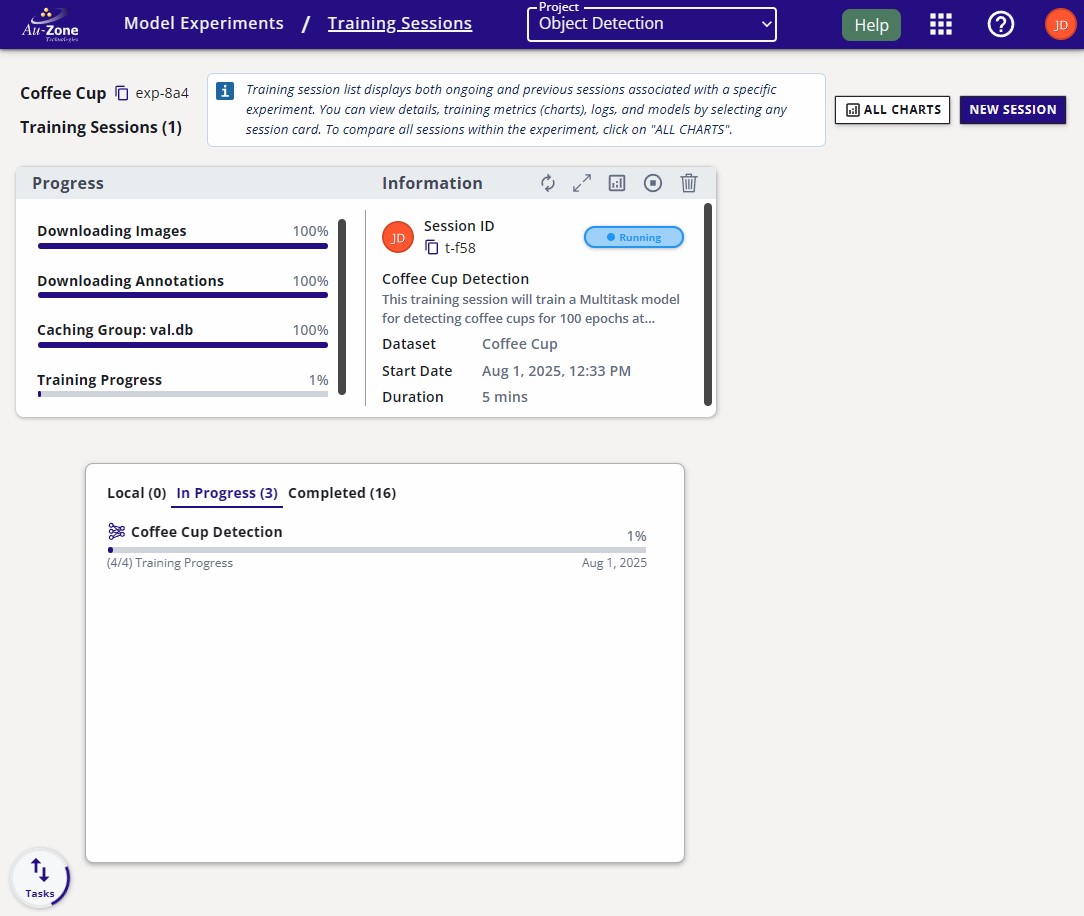
The session progress will be shown like the following below.
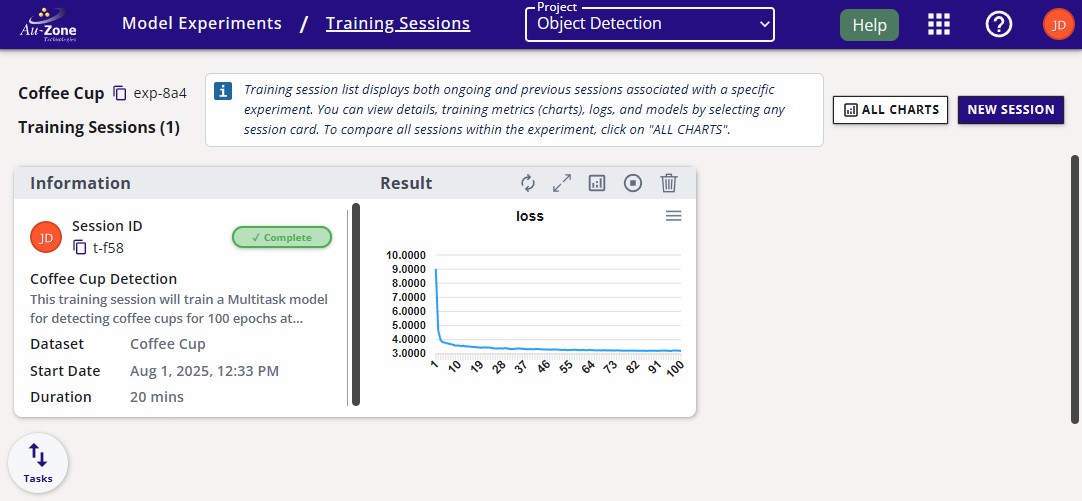
Once the session is complete, the session card will appear like the following.
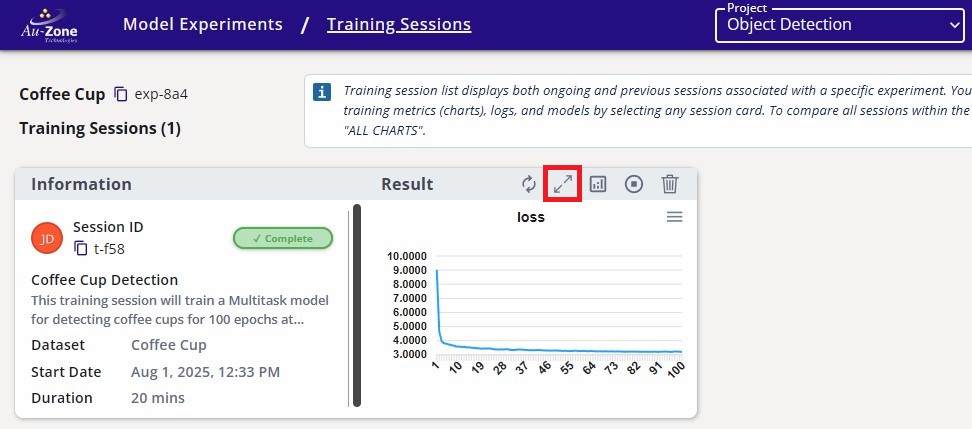
Click the training session card for more information.
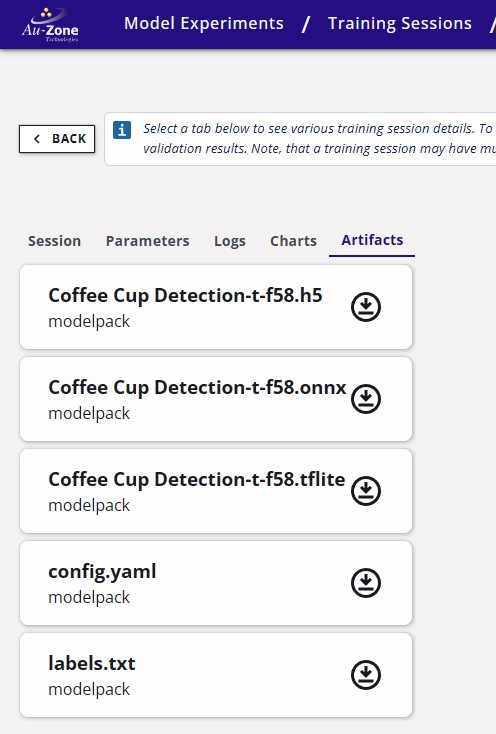
The trained models will be listed under the "Artifacts" tab. The download button next to these artifacts will download the artifacts to your machine.
Validate Vision Model
Now that you have trained a model, you can validate its performance. The purpose of validation is to determine whether the selected model meets the performance requirements before deployment. EdgeFirst Studio offers two validation paths depending on your goal:
| Path | Where it runs | Supported formats |
|---|---|---|
| Cloud Validation (this guide) | EdgeFirst Studio EC2 | ONNX, Keras, TFLite |
| On-Target Profiling | Your edge platform | All converted formats (.tflite, .hef, .dvm, .engine) |
Validating on target hardware?
Cloud validation only supports ONNX, Keras, and TFLite artifacts. If you want to measure real inference latency and accuracy on your target device — including NPU-compiled formats like Neutron, Hailo, Ara2, or TensorRT — use the EdgeFirst Profiler.
Cloud Validation
If you haven't already, click on the training session card for more information.
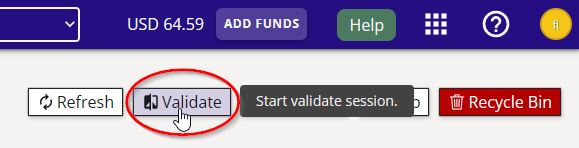
On the top right corner of the page, click on the "validate" button as indicated.
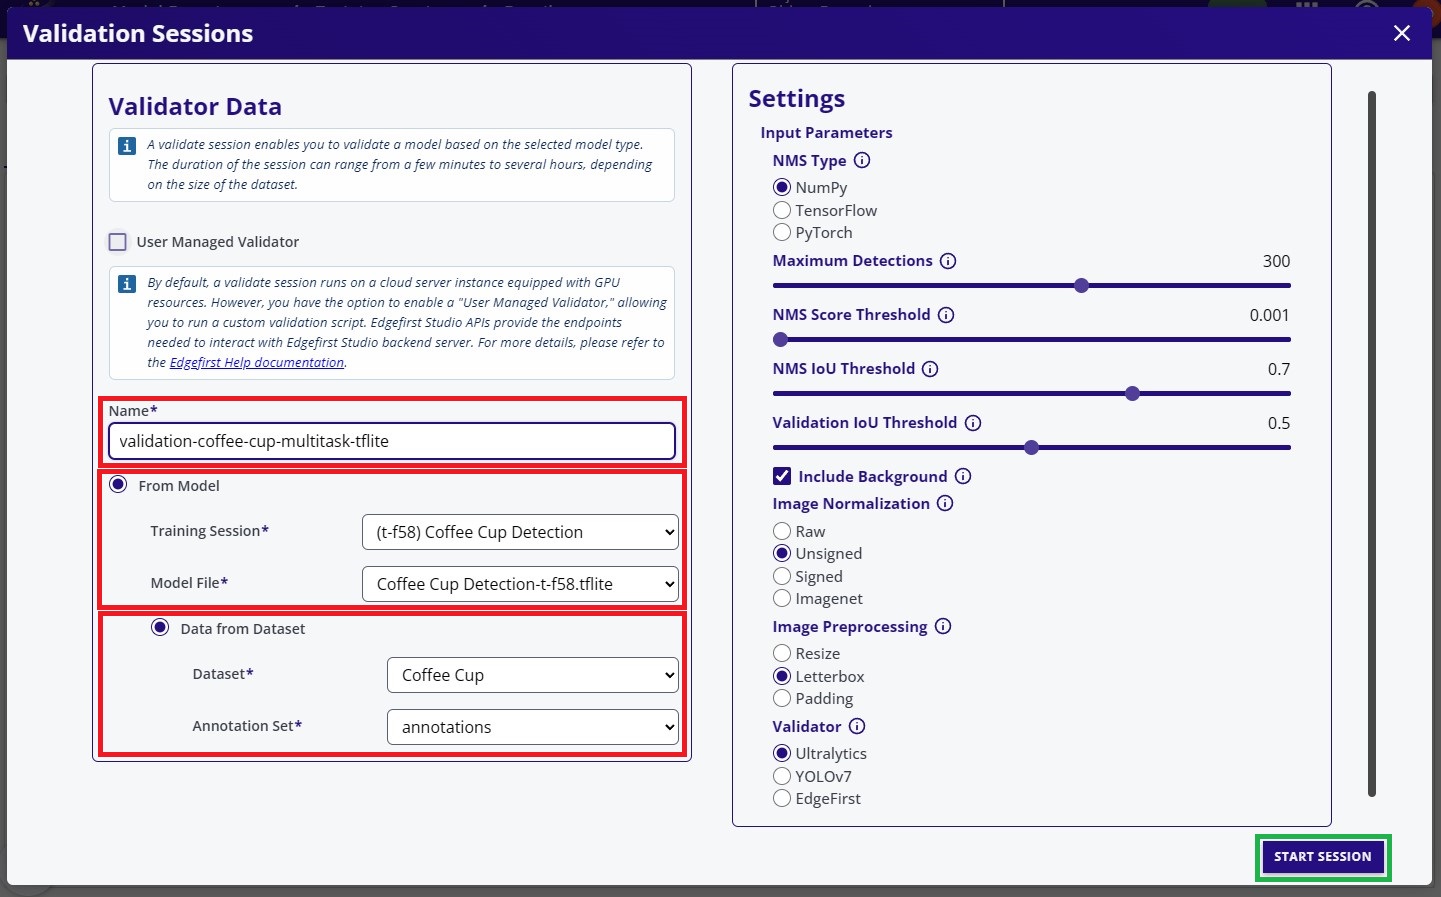
Enter a name for the validation session, then select the model and dataset to use for validation.
Under Model Selection, choose an ONNX, Keras, or TFLite artifact — these are the formats supported by cloud validation.
For this example, all remaining settings were left at their default values. When you are ready, click Start Session at the bottom of the page to begin the validation process.
InsufficientInstanceCapacity
If you see this error after starting your validation session, retry creating the session. This can happen when AWS reports that no EC2 instances are currently available to launch; the current workaround is to retry.
Go to the created validation session by first going back to the "Model Experiments" page.
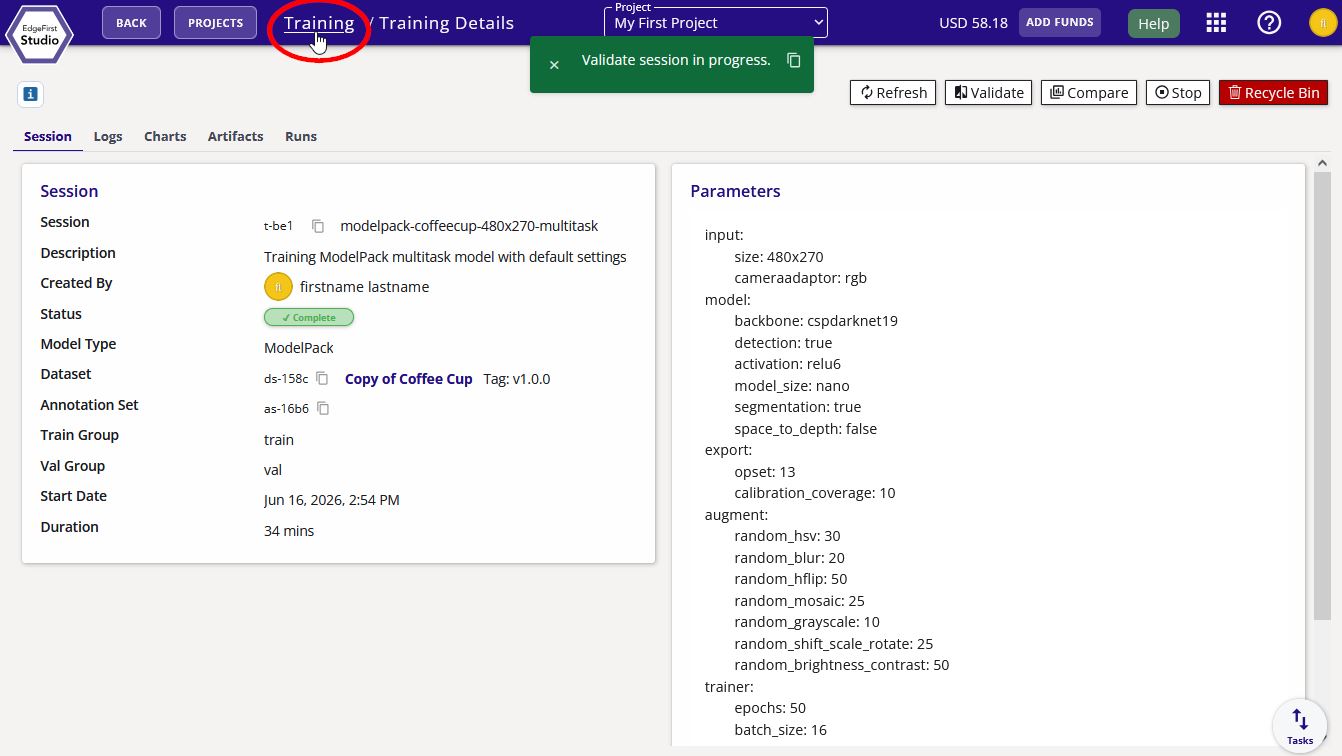
Next, click the validation sessions of the model experiments.
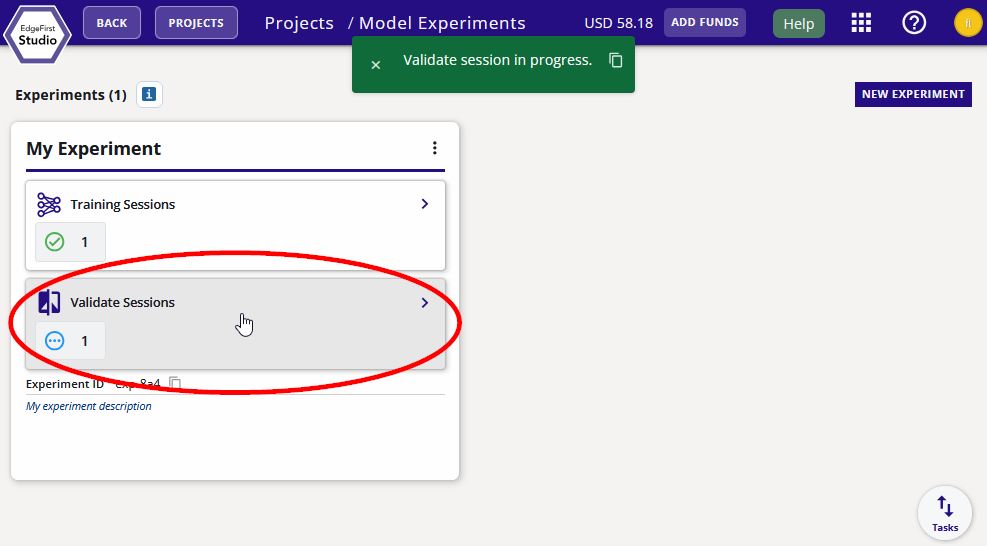
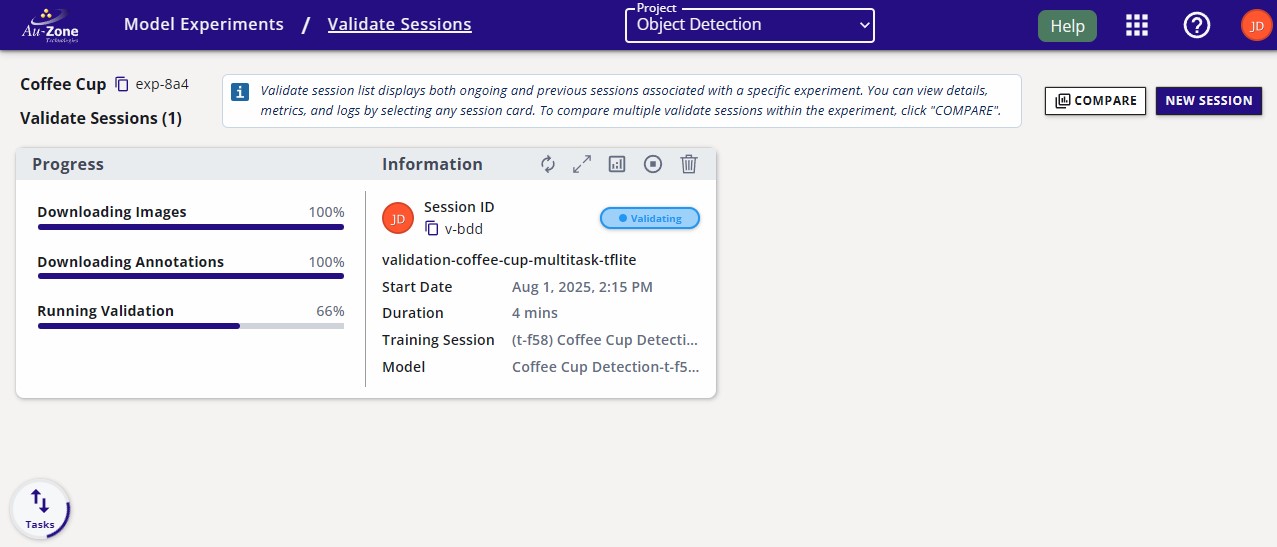
The validation session progress will appear in the "Validation" page as shown below.
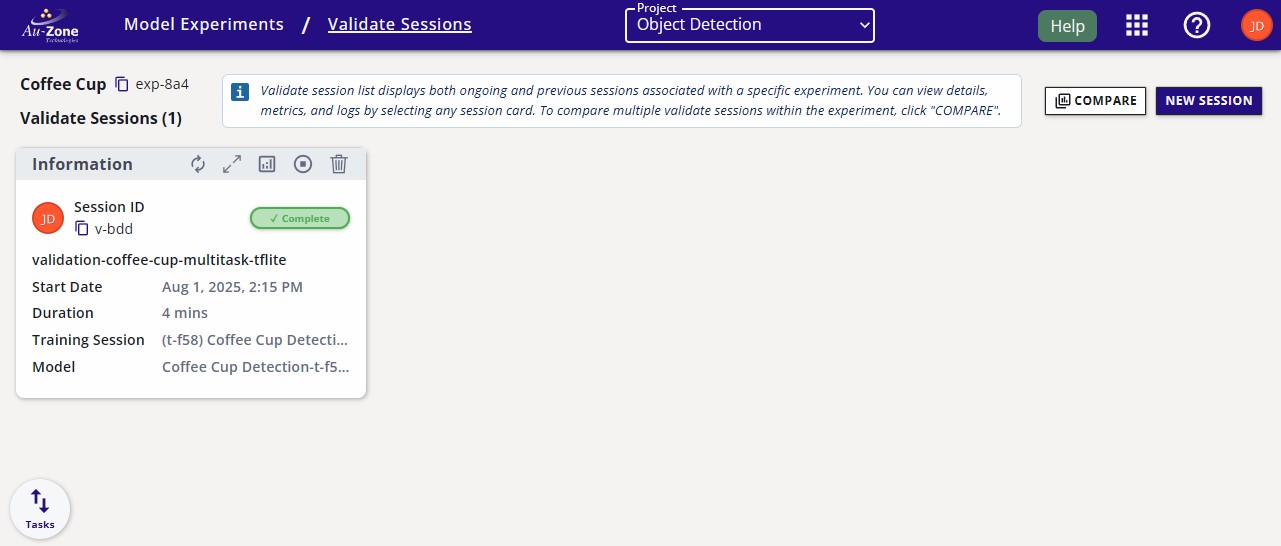
Once the session is complete, the session card will appear like the following. To view the validation metrics, click the validation charts button as indicated.
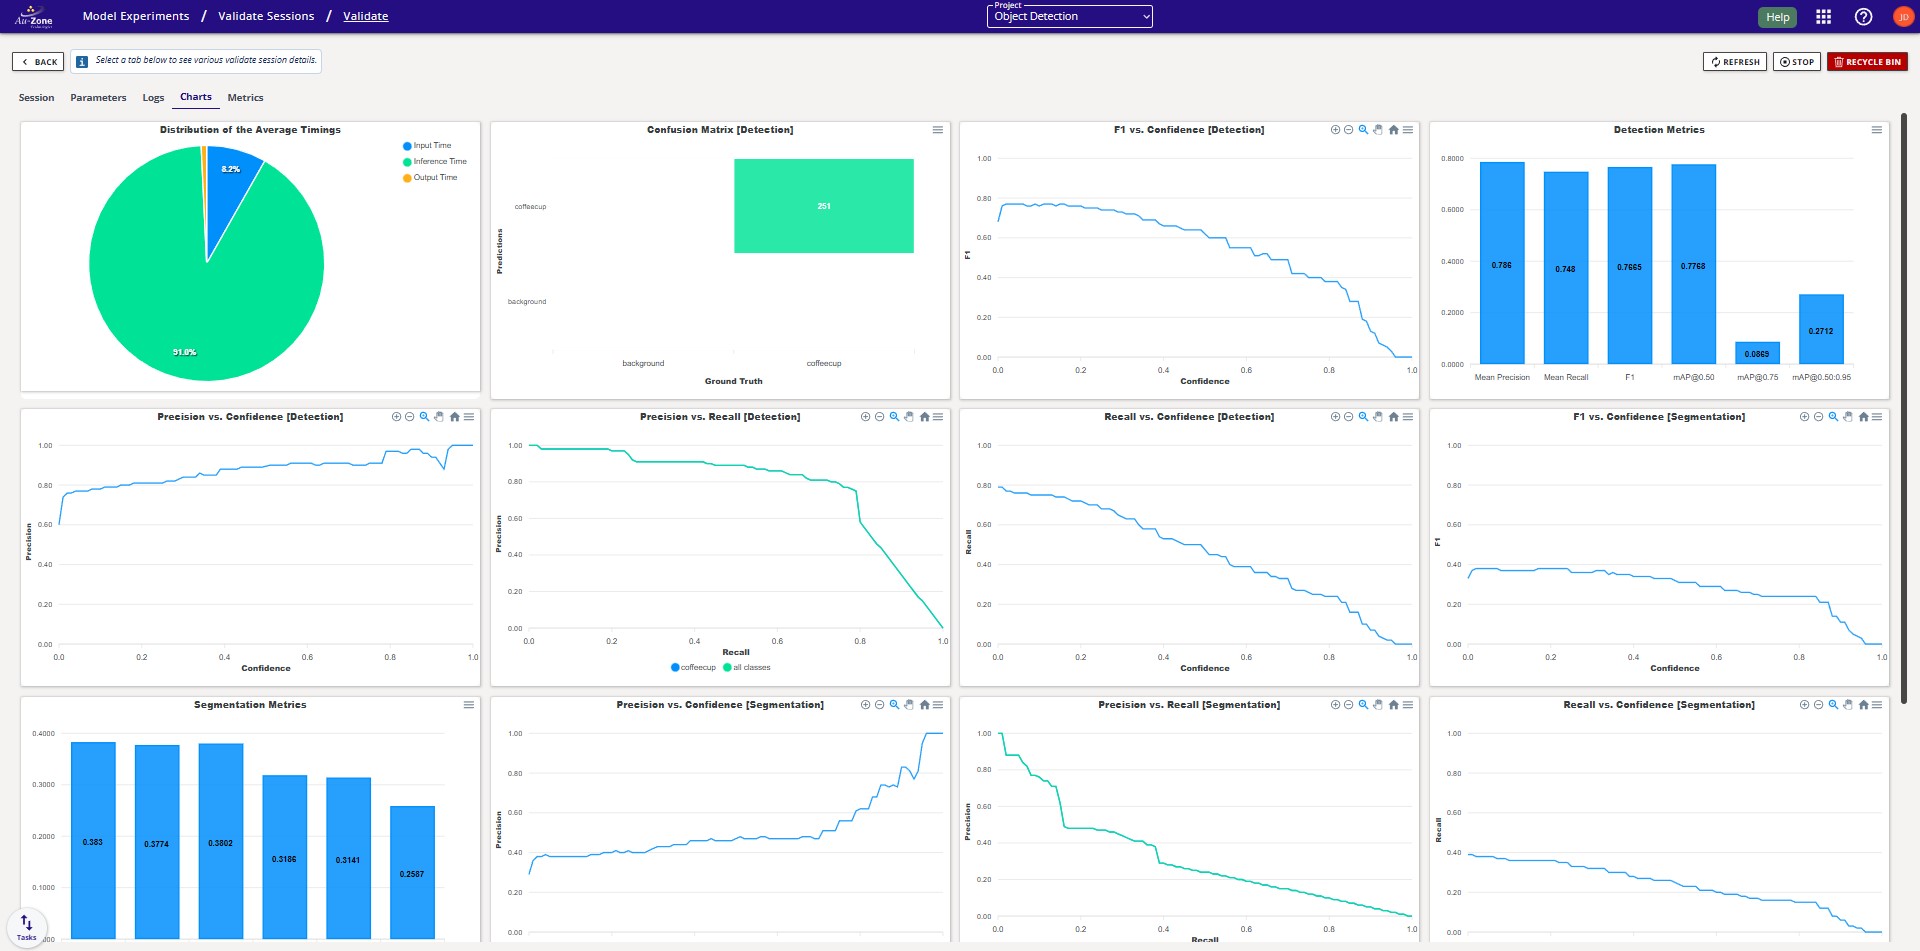
The validation metrics should appear like the following. For more information, please see the Validation Metrics section.
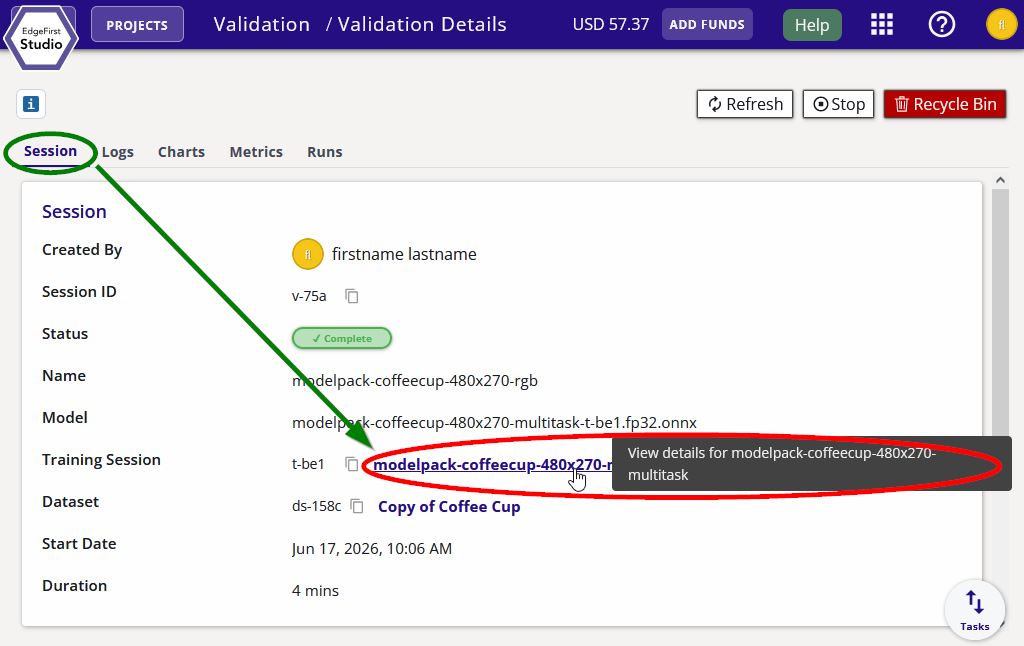
You can navigate back to the training session by clicking on the "Training Session" link under the "Session" tab.
After training a Vision model in EdgeFirst Studio, you can deploy the ONNX model on any device connected to a browser with access to a camera (for example, your phone or your PC). This guide will show you the steps for deploying the model using EdgeFirst Studio.
ONNX models only
Live browser-based model running only supports ONNX format. To validate or profile models in other formats (TFLite, Neutron, Hailo, TensorRT, etc.) on real hardware, use the EdgeFirst Profiler.
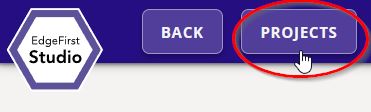
Navigate to the training session you wish to deploy by going back to the "Projects" page by clicking the "Projects" button at the top left of the page.
Click on the model experiments of your project.
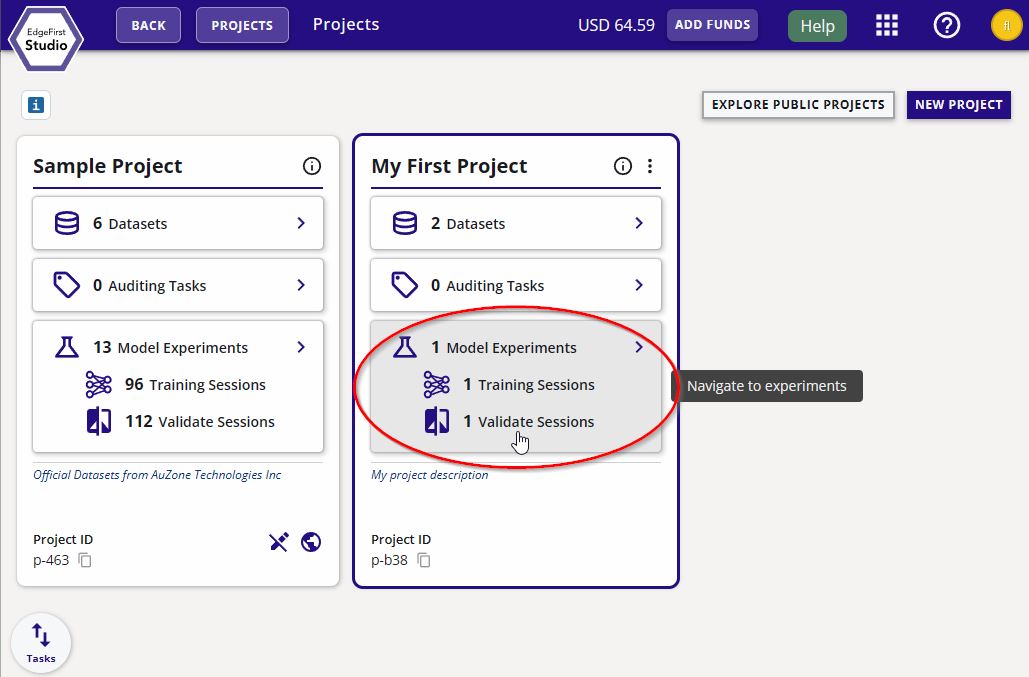
Click on the training sessions of your experiment.
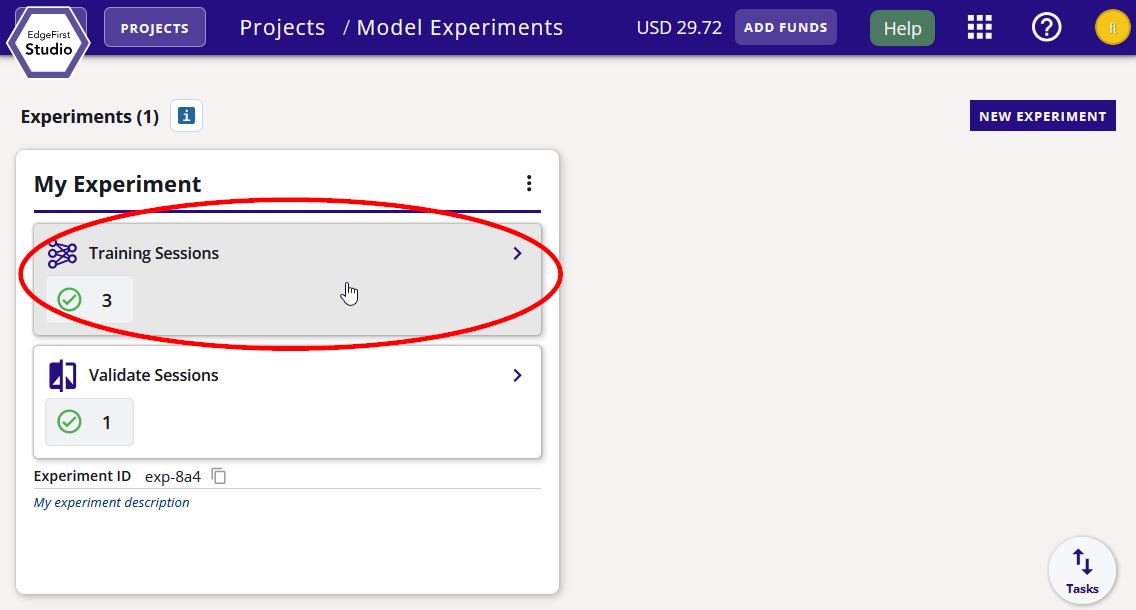
Click on the selected training session.
Click the "Run Model" button on the top right of the page.
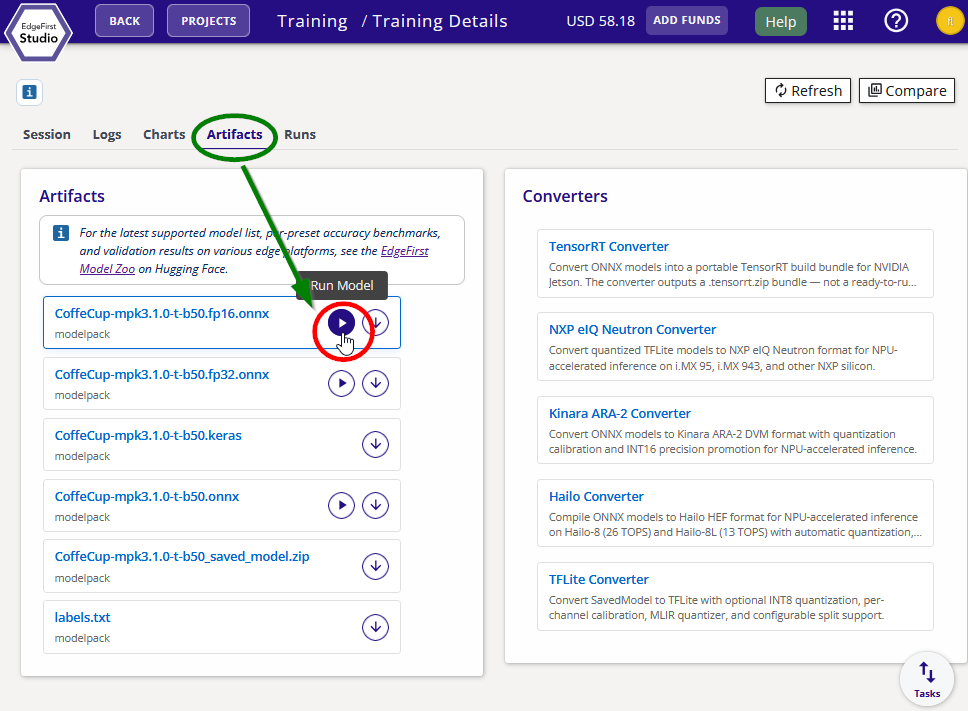
Live Inference
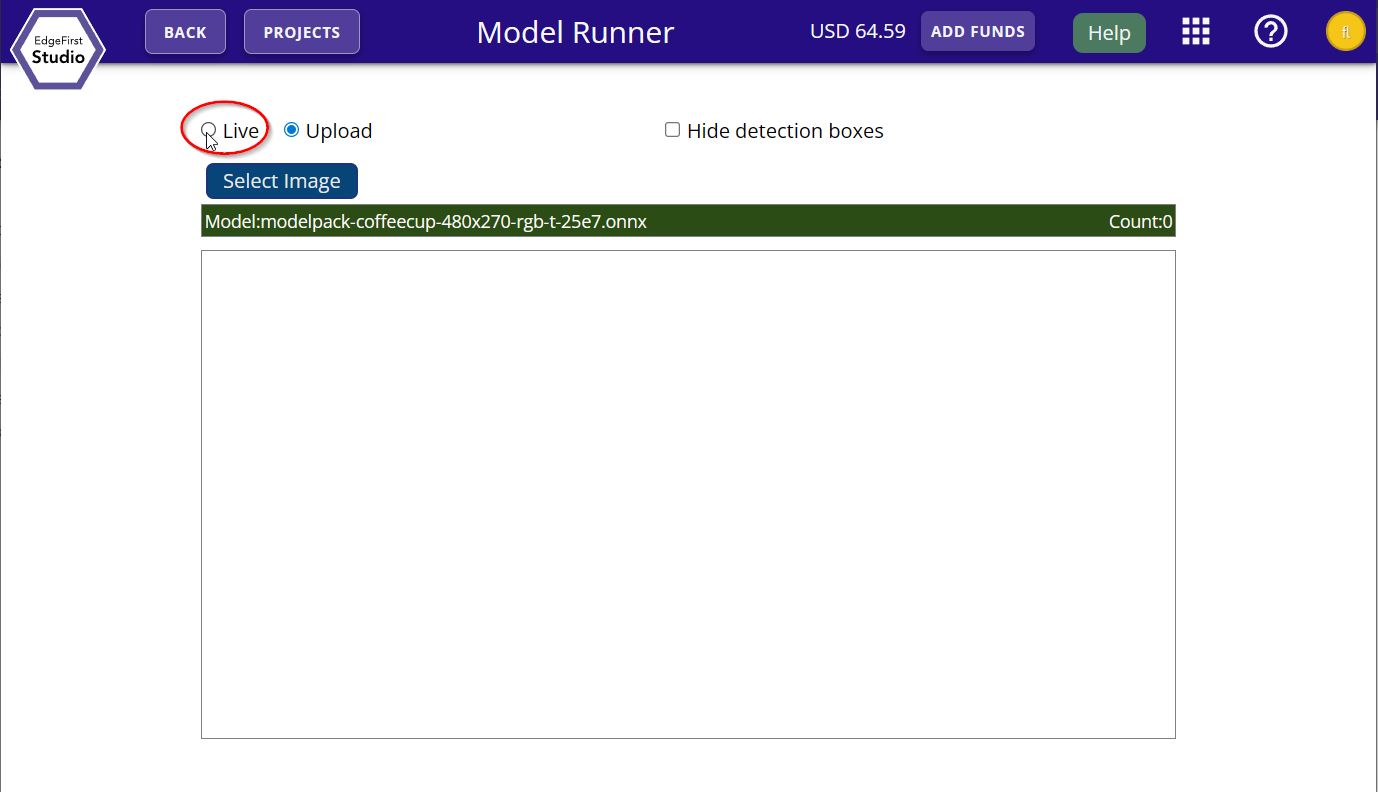
You will be given the option for either live inference or inference from a file upload. Go ahead and demo the live inference feed by clicking the "Live" option.
You should now see the live inference feed on your browser running the trained model.
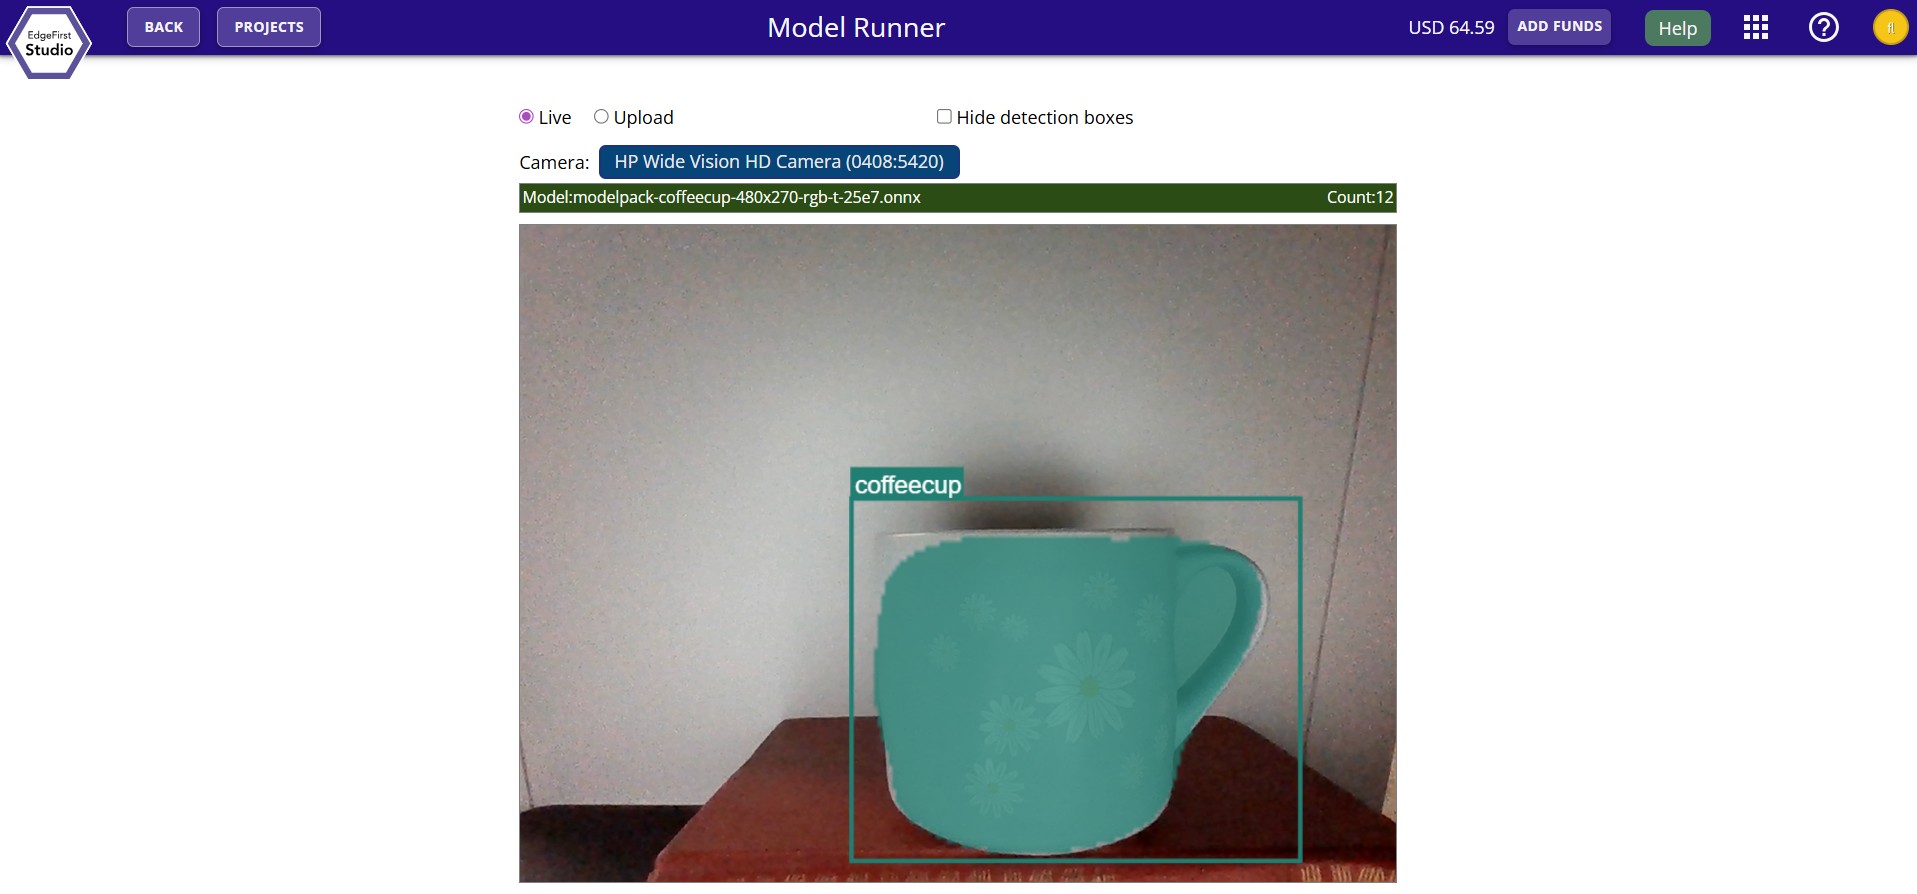
Image Inference
Alternatively, you can also select the "Upload" option where you can select any image in your filesystem to pass to the model for inference.
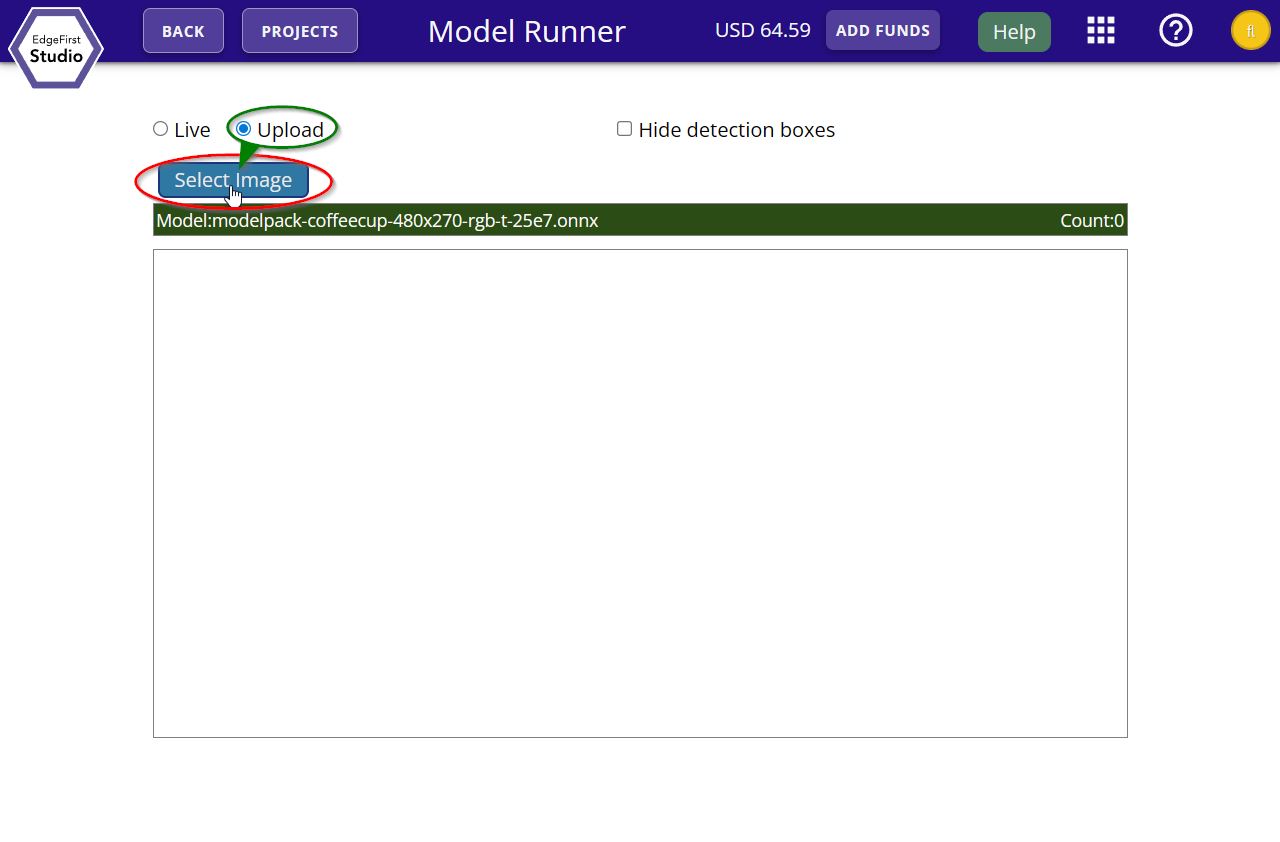
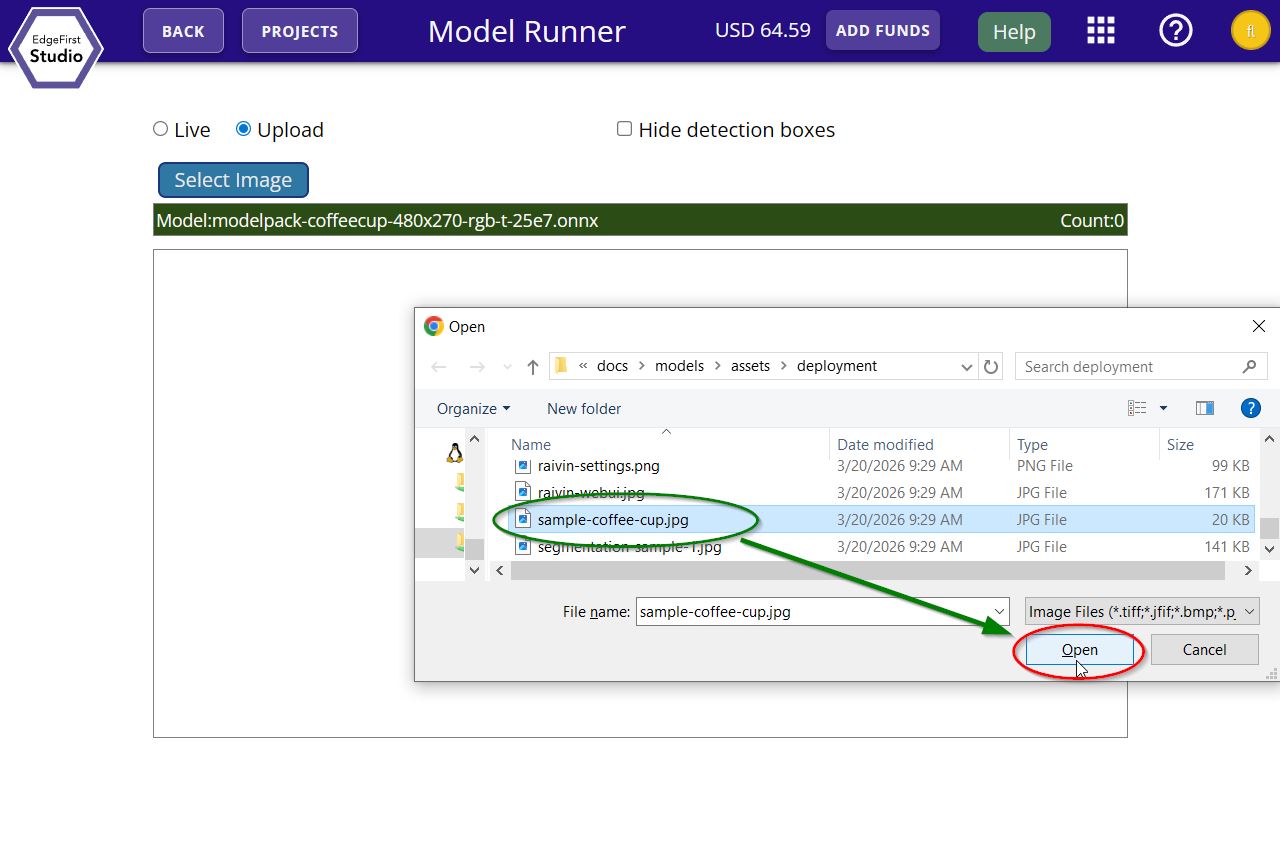
Select an image from the filesystem to run inference.
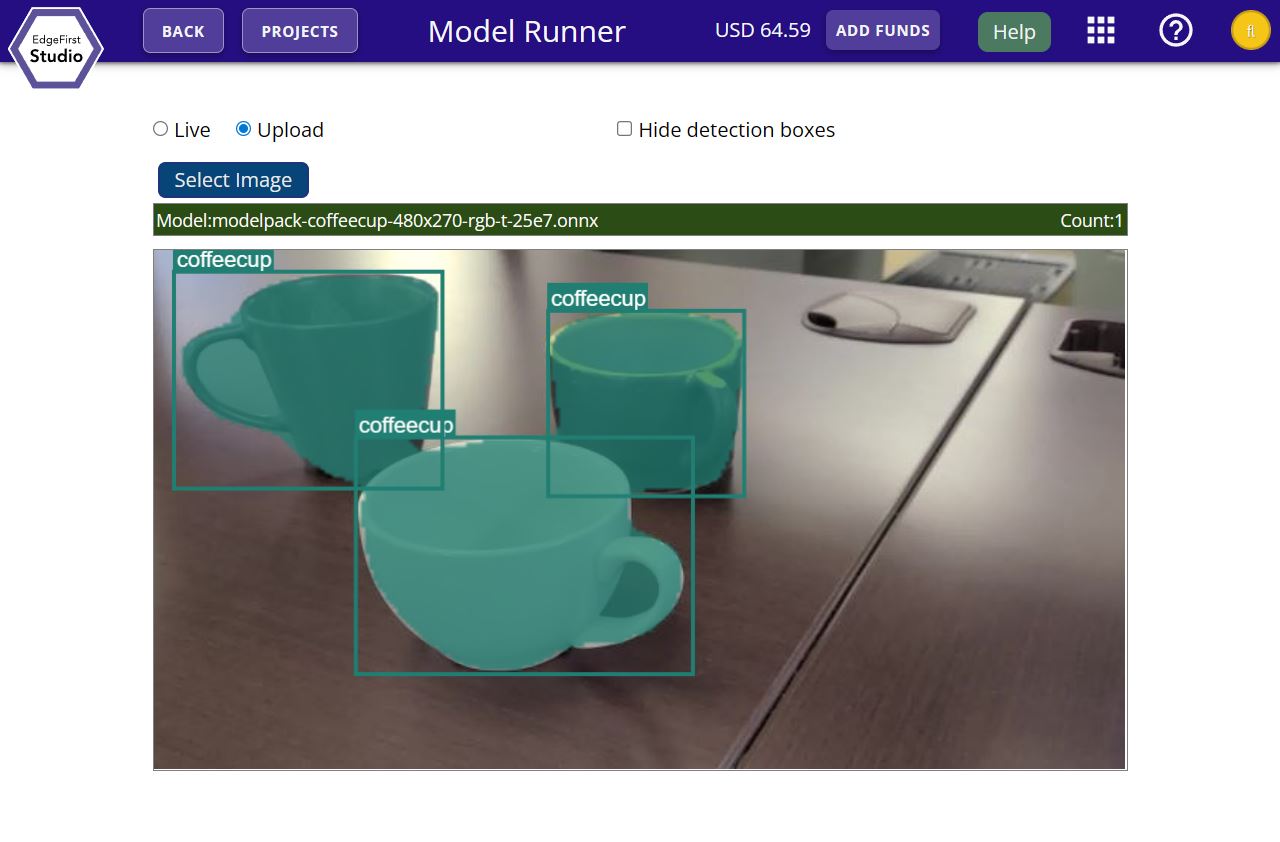
You should now see the image with the model inference displayed in EdgeFirst Studio.
Next Steps
Want to bring your own dataset? Check out the Web Persona Workflow.