Dataset Management
This page will provide tutorials for managing datasets in EdgeFirst Studio.
View Dataset
This tutorial will show how to open the gallery of the dataset to see the individual samples in the dataset.
From the "Projects" page, you can click on the dataset button indicated in red to view the datasets contained in the project.
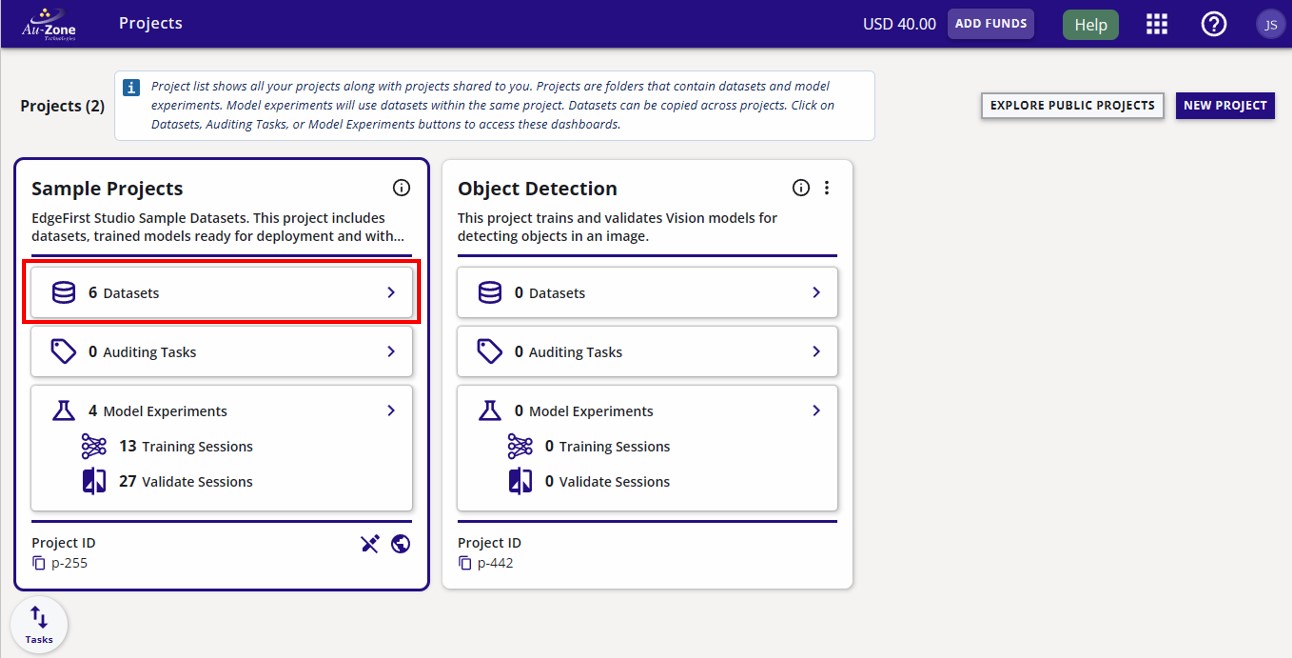
You will now see the datasets contained in the project. Each dataset has a gallery.
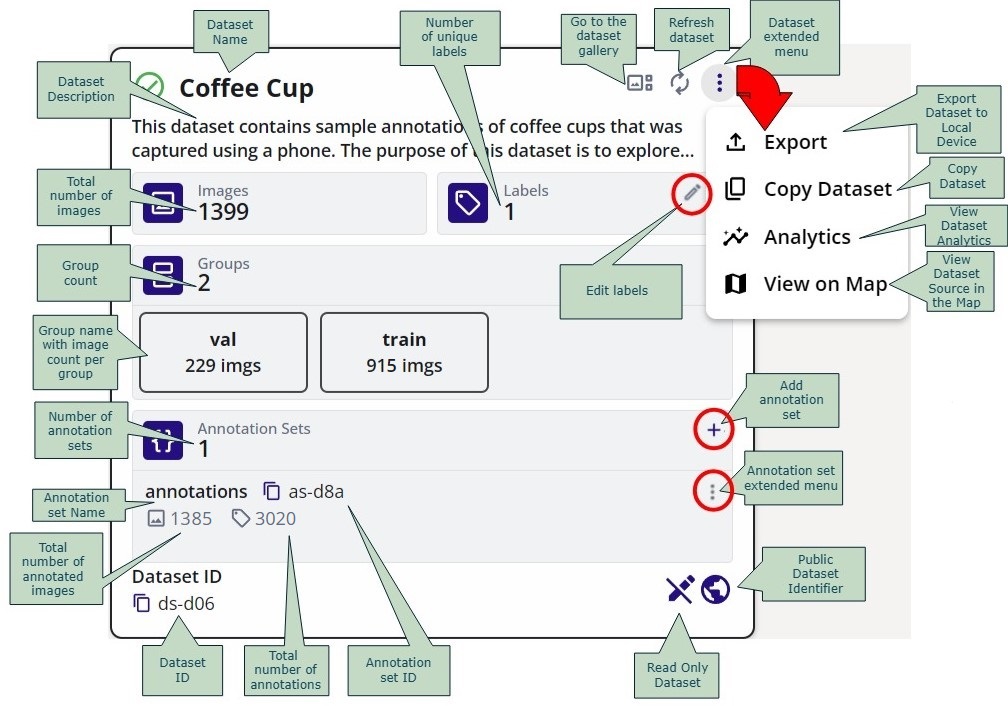
This dataset has a total of 1399 images and single label "coffeecup". It has two partitions; "train" and "val". There is a total of 1119 images for the training group ("train") and 280 images for the validation group ("val").
Click the image preview to view the dataset gallery. The dataset gallery will look like the following below.
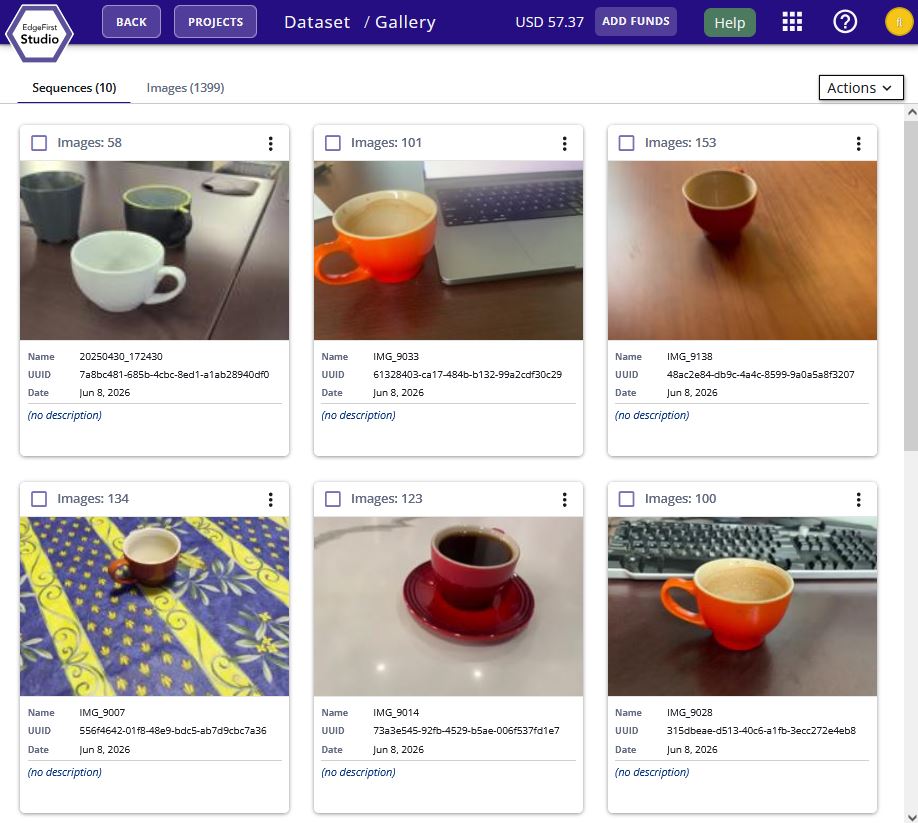
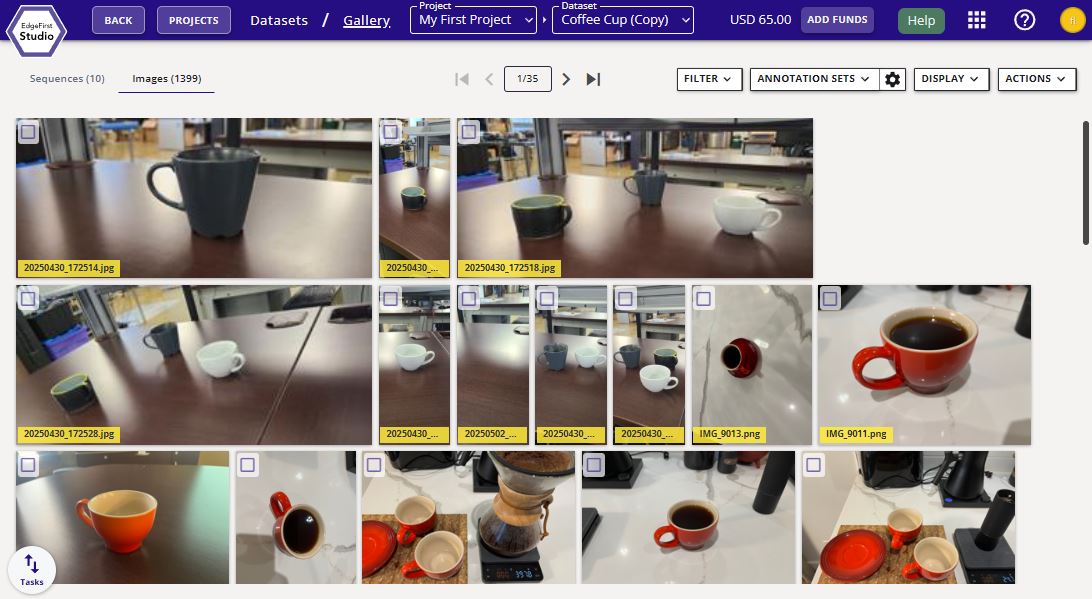
This dataset will contain both sequences (videos) and images. Clicking on the sequences will provide video playback of the sequence. Otherwise, clicking on images will expand the image view and allow playback of all images in the dataset.
This dataset has a complete set of 2D annotations (masks and bounding boxes) of coffee cups. Additional features are also available to the user by expanding the image previews of the dataset such as annotation features and visualization, and image information.
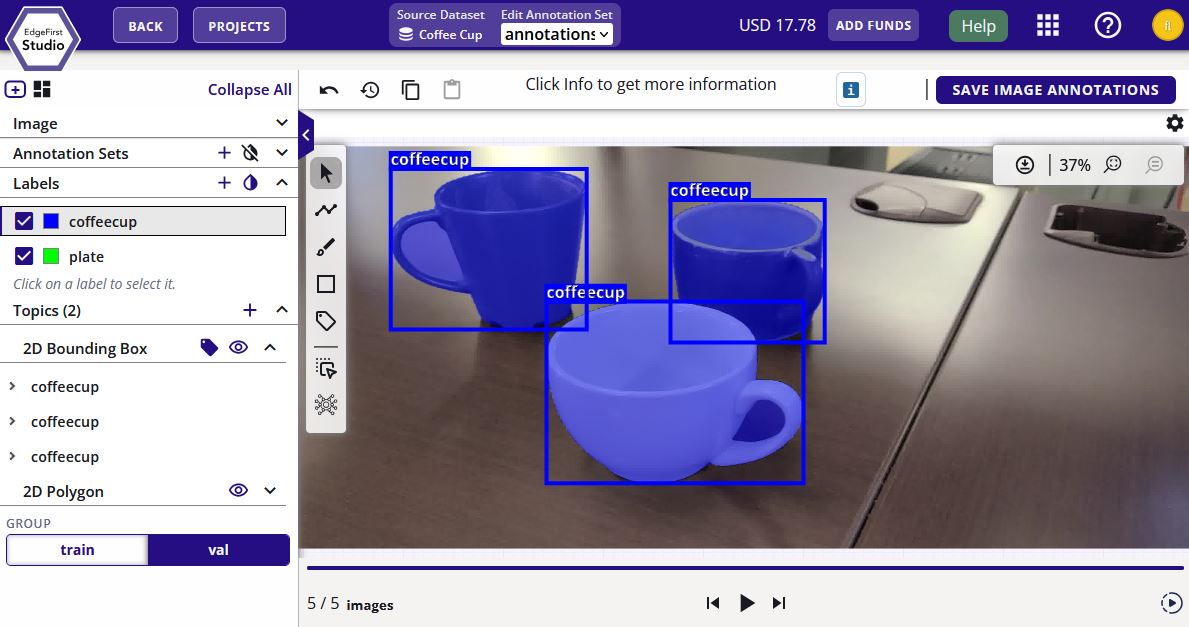
Fast Annotations
This dataset was quickly annotated using the Automatic Ground Truth Generation (AGTG) feature of EdgeFirst Studio.
Edit Dataset Information
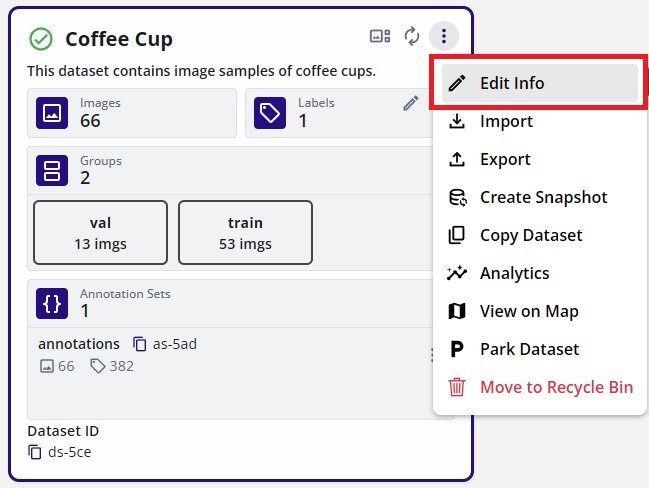
The dataset name and description can be edited by clicking on the dataset extended menu on the top right portion of the dataset card. This should bring up the options and "Edit Info" as the first in the list. Click on "Edit Info".
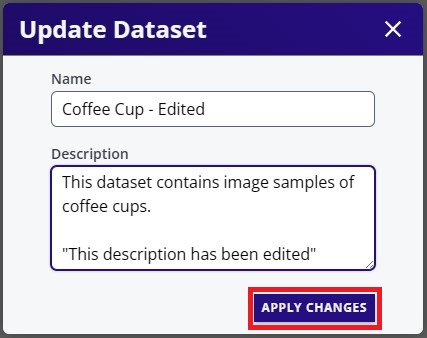
This will bring up the window to edit the dataset "Name" and the "Description". Once the changes are made, click "Apply Changes" to save the changes.
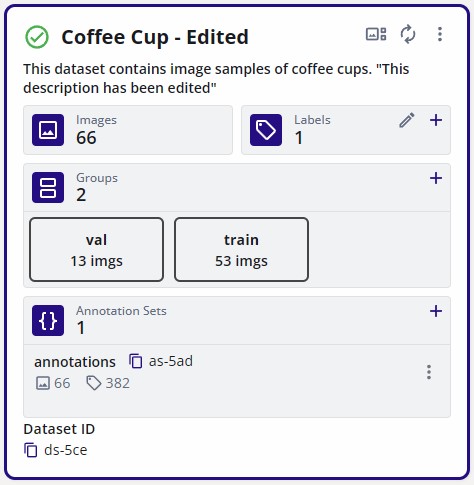
The changes should appear on the dataset card as shown below.
View Fusion Dataset
This tutorial will show an example of a dataset that is ready for training.
Verify that the dataset has a training and validation split. The sample dataset shown below has a dedicated split for training (16854 samples) and validation (2133 samples).
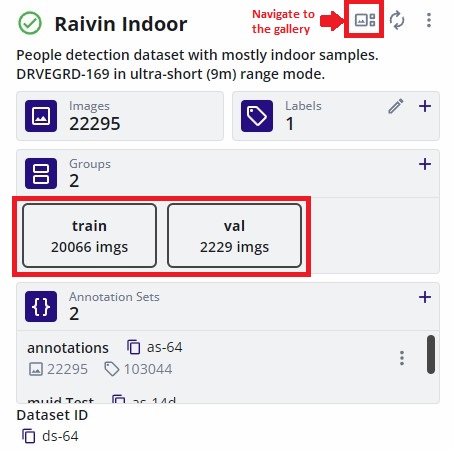
Verify the contents of the dataset and the annotations. Click on the image preview of the dataset to navigate to the gallery. This will show the contents of the dataset. The dataset may be comprised of multiple sequences as shown below.
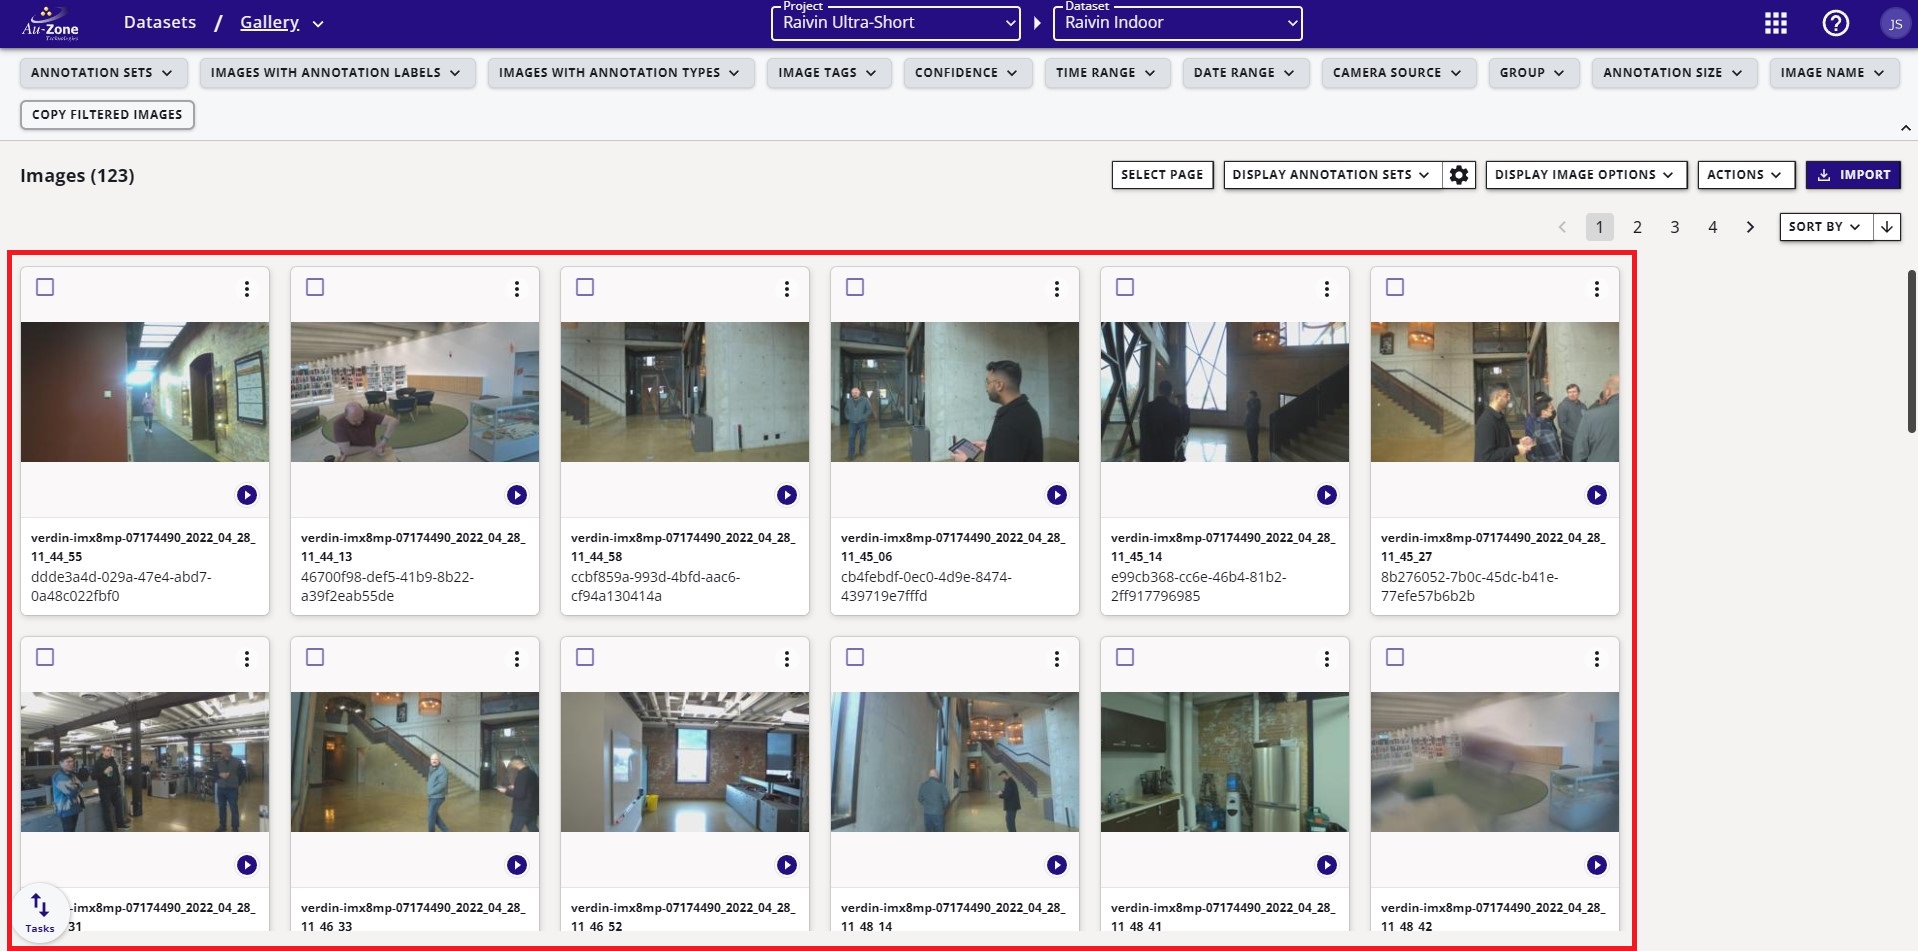
Clicking on any of these sequences will open individual frames in the sequence with the visualizations of the annotations. For more information please see viewing datasets.
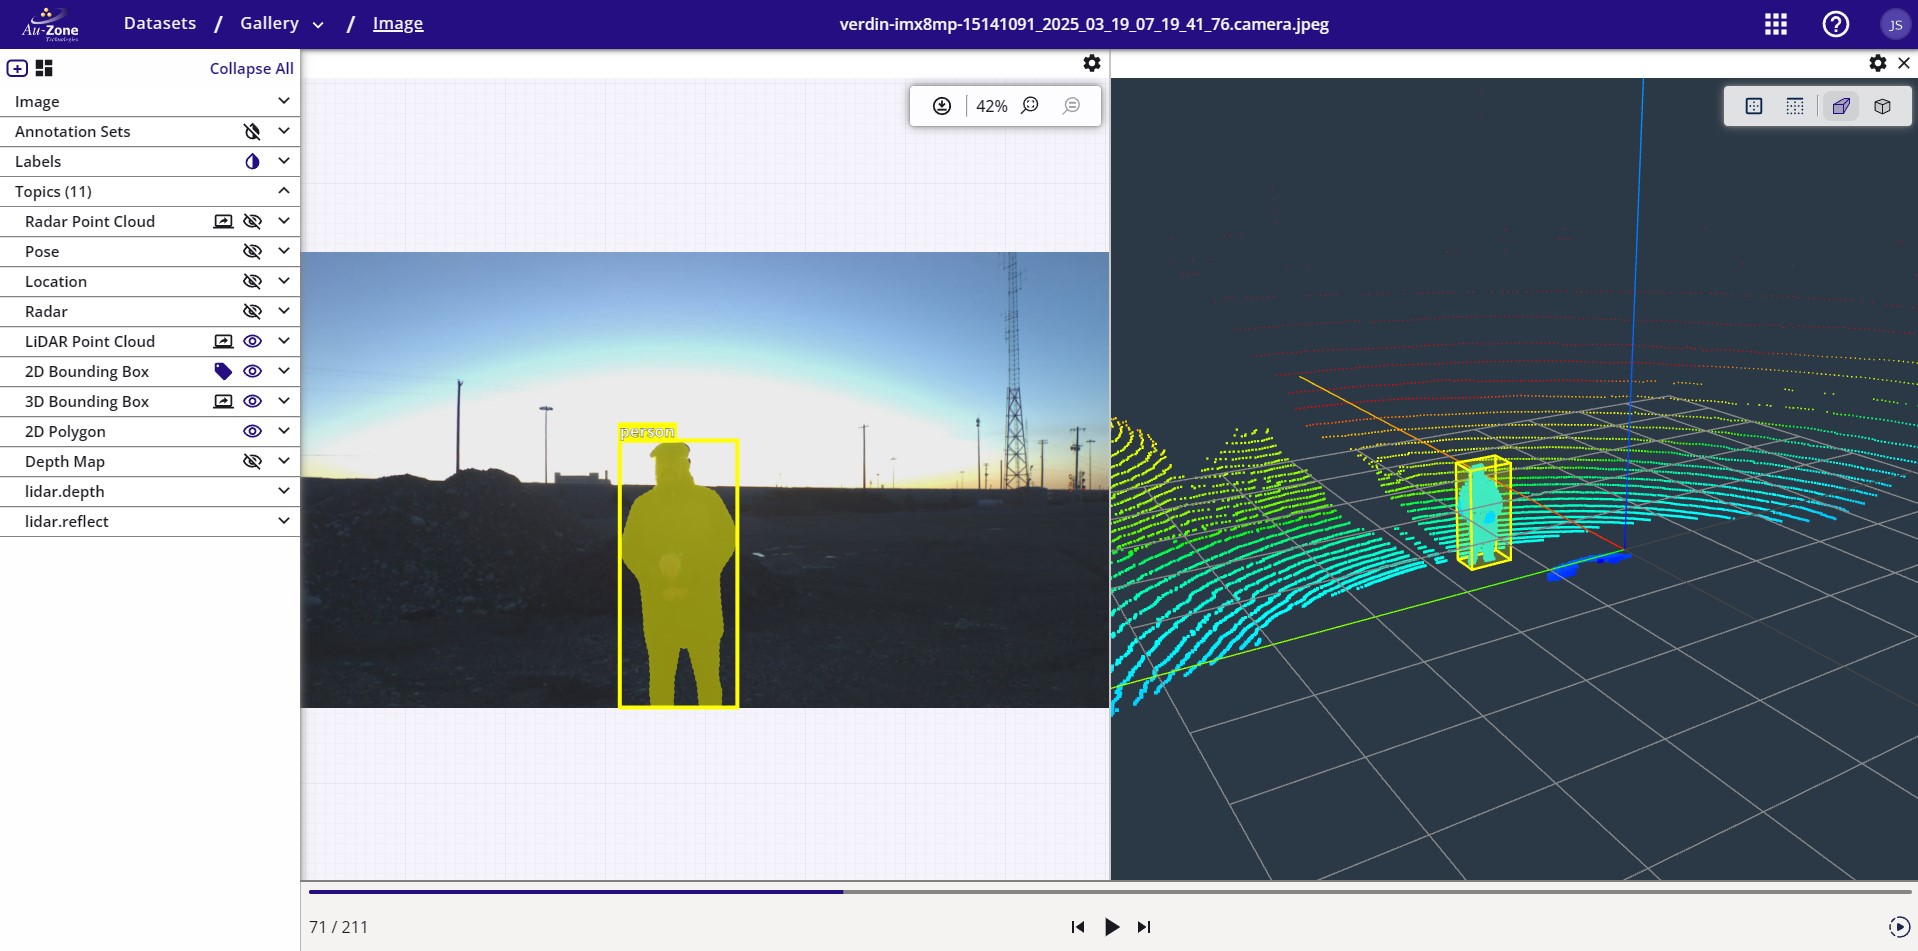
Datasets that train Fusion models provide annotations of the object's 3D bounding box. For more information on the dataset annotations, please see the EdgeFirst Dataset Format.
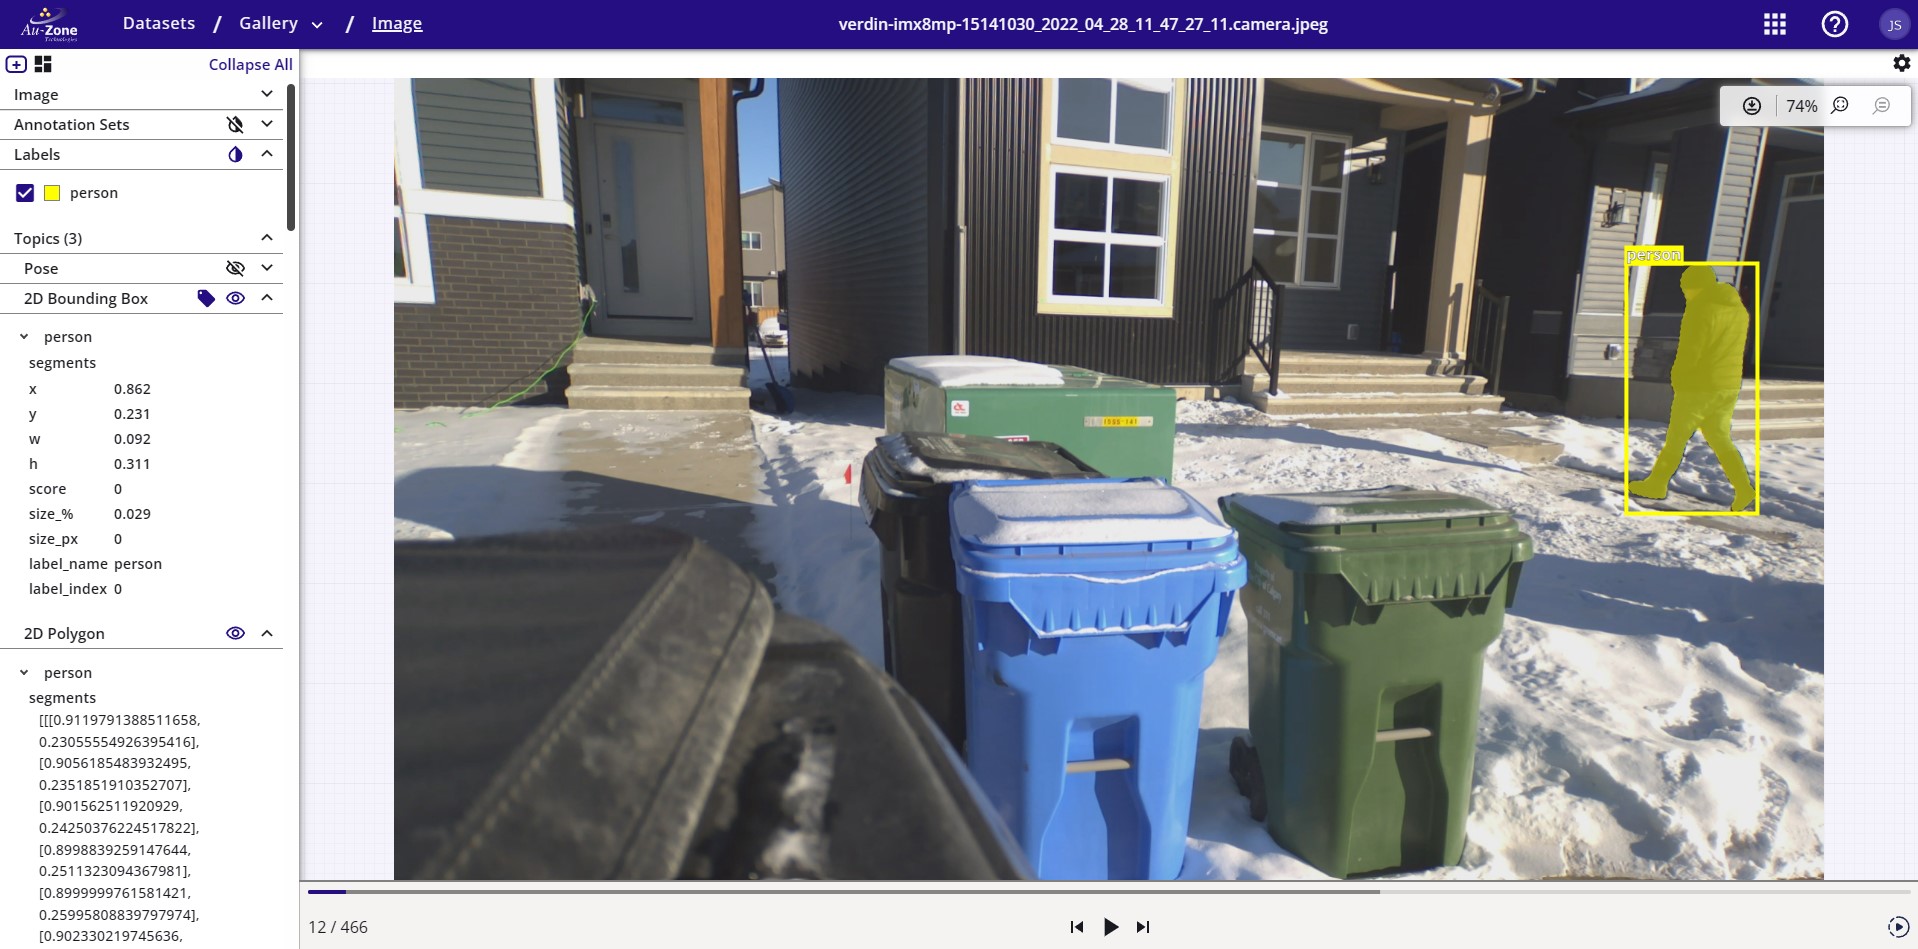
Datasets that train Vision models provide image annotations of the object's 2D bounding box and segmentation mask. For more information on the dataset annotations, please see the EdgeFirst Dataset Format.
For cases where the annotations need corrections, please see Manual 2D Annotations or Manual 3D Annotations for more details.
Create Dataset
If you have a video recording or sample images for your dataset, you can create a dataset container in EdgeFirst Studio to contain your video frames or images and annotations.
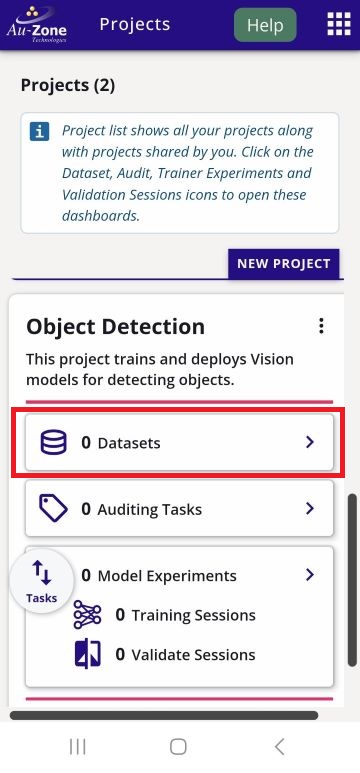
Navigate to a web browser and login to EdgeFirst Studio. Once logged in to EdgeFirst Studio, navigate to your project. In this case the project name is "My First Project". Click on the "Datasets" button that is indicated in red below.
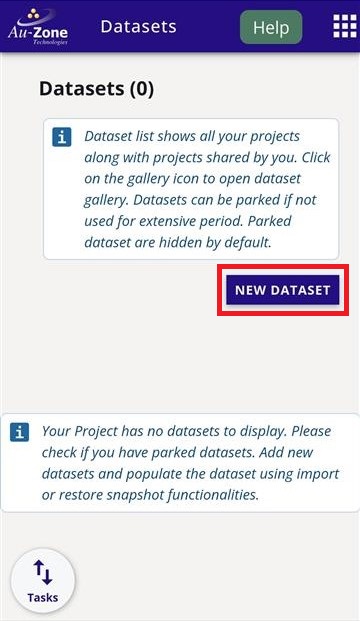
This will bring you to the Datasets Dashboard of the selected project. Create a new dataset container by clicking the "Actions" dropdown on the top right and then click the "New" button that is indicated in red.
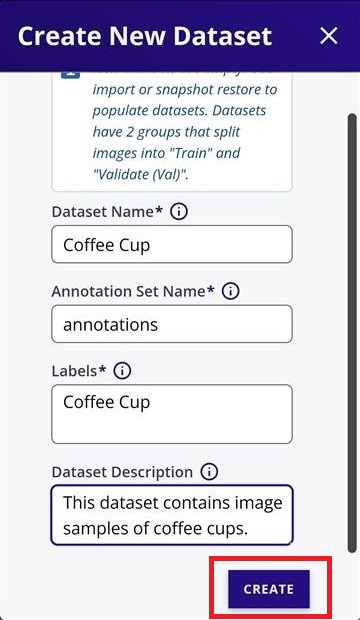
Enter a name for the dataset and annotation container, specify the labels, and provide a dataset description in the fields shown below. The values are entirely up to you and do not need to match the example. Once all required fields have been completed, click "Create" to create the dataset.
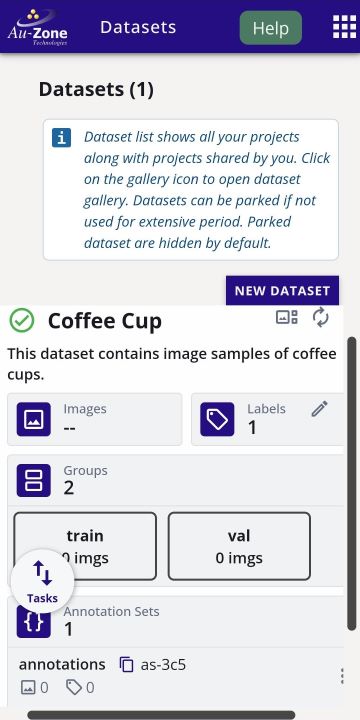
Your created dataset will look as follows.
Copy Dataset
To copy a dataset, navigate to the dataset you would like to copy. On the dataset card, select "Copy Dataset" from the dataset options as shown below.
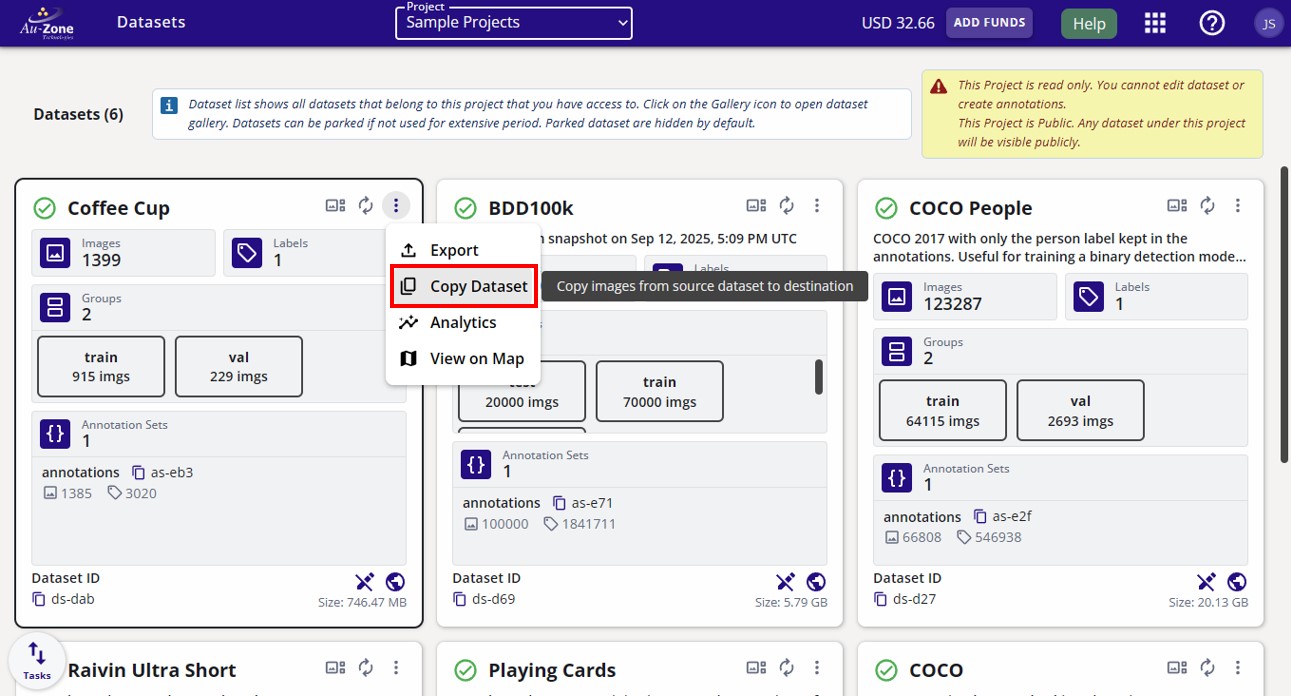
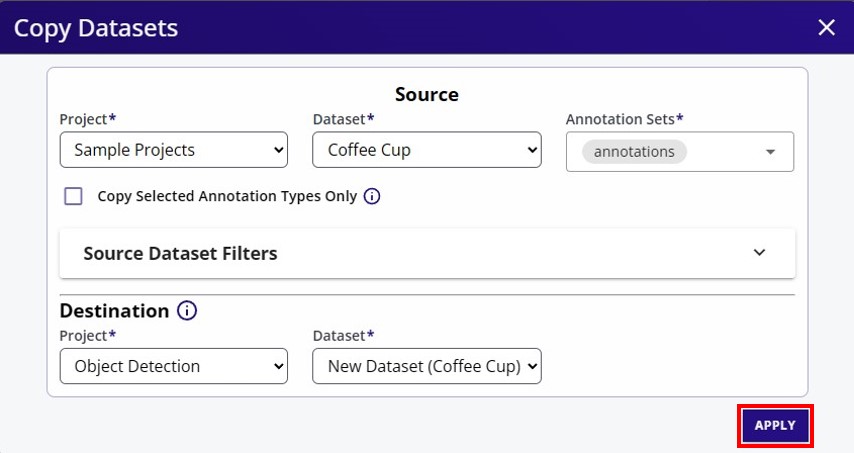
This action opens a dialog where you can specify the source and destination for the dataset copy operation.
- Source: The current location of the dataset being copied. This field is automatically populated with the dataset card you selected before opening the dialog.
- Destination: The location where the copied dataset will be created.
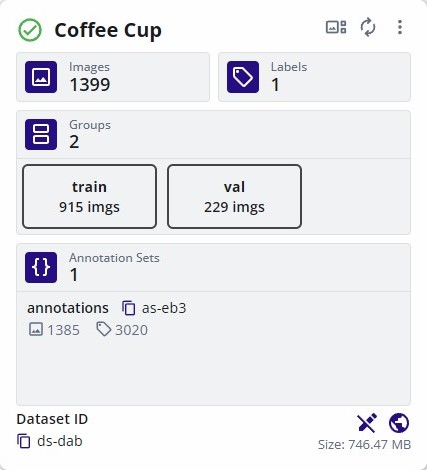
In the example below, the source is the "Coffee Cup" dataset in "Sample Project". The copied dataset will be created in the location specified by the destination fields.
By default, the copy operation creates a new dataset container in the selected destination project. Alternatively, you can create a dataset container before starting the copy operation and then select that existing container as the destination.
Once you have made your selection, click "Apply" at the bottom right to start the copy process.
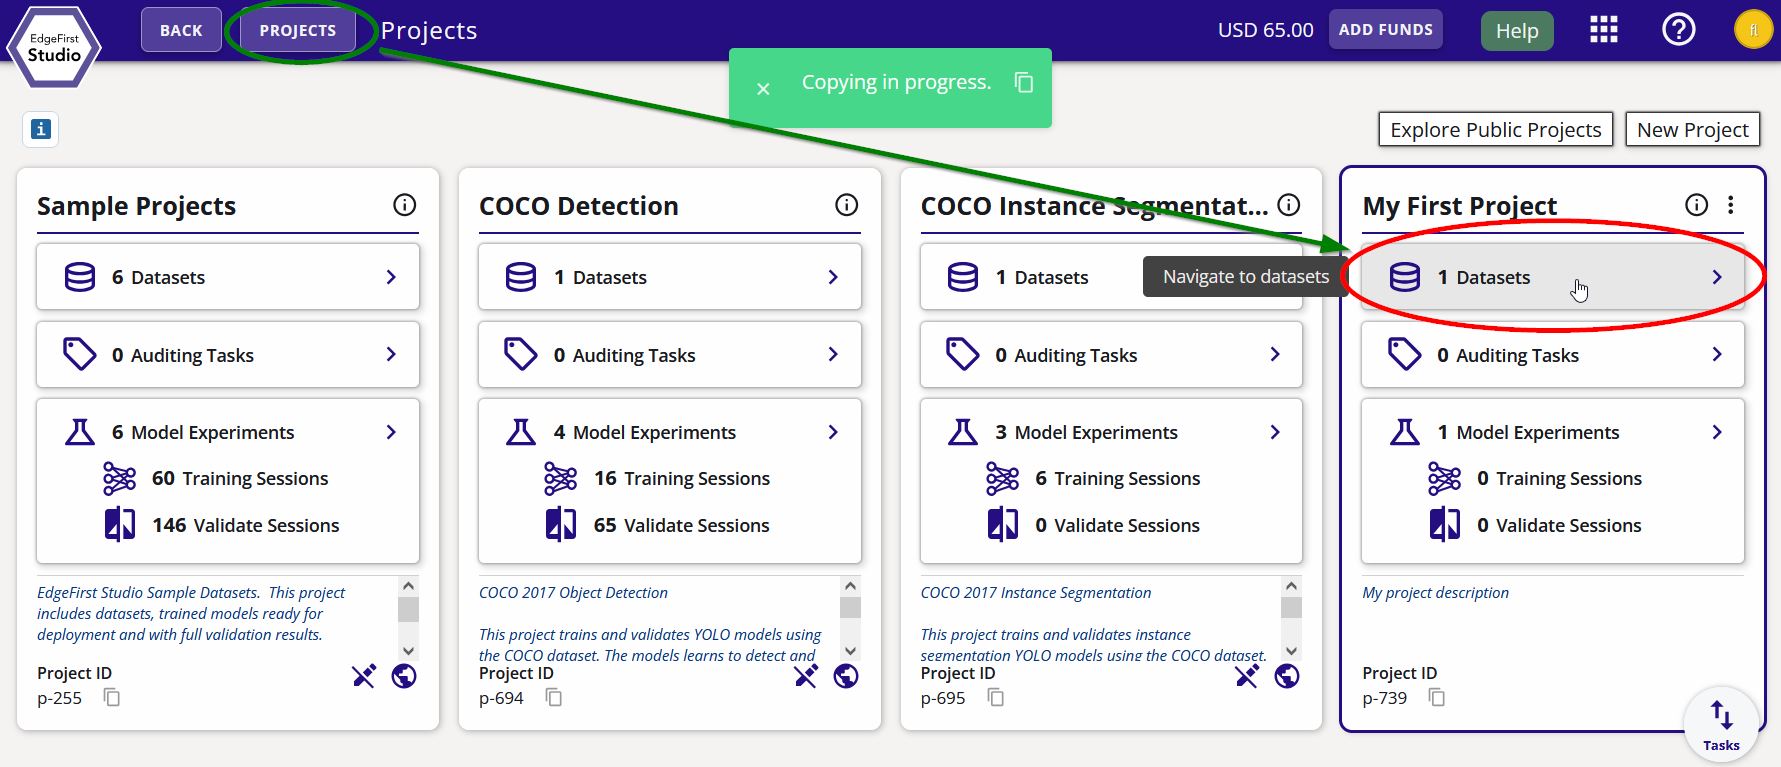
You can navigate to the copied dataset by clicking the "Project" button and then clicking on the "Datasets" button on your project as shown below.
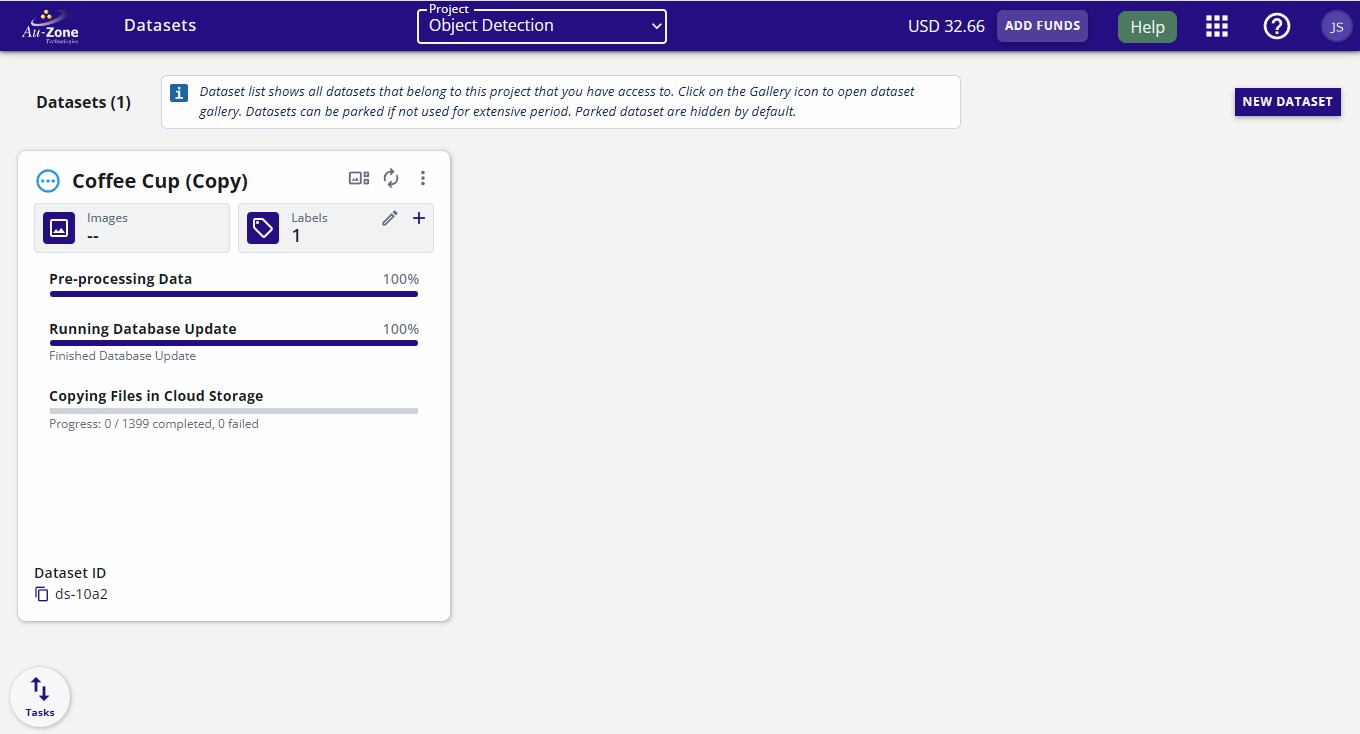
The progress for the dataset copy will be shown on the dataset card.
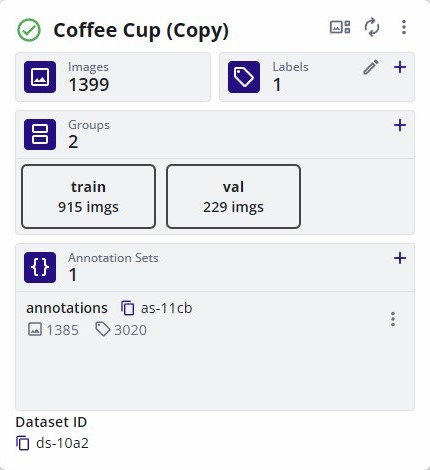
Once the copying process completes, the frames and the annotations would have been copied.
| Original Dataset | Copied Dataset |
|---|---|
 |
 |
Tag Dataset
Before a dataset can be used for training, it must be tagged. To preserve its current state, assign a version tag to the dataset.
Click on the dataset options at the top right of the dataset card (three vertical dots). Then click the "History" button.
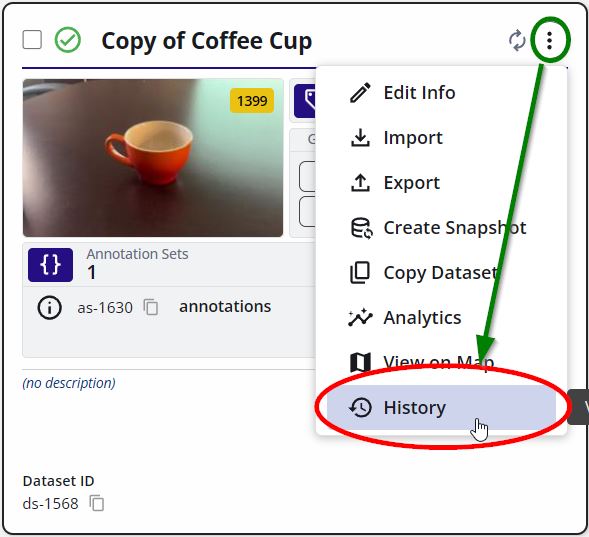
Add a new tagged version of the dataset by clicking the + green button on the right of the page as shown.
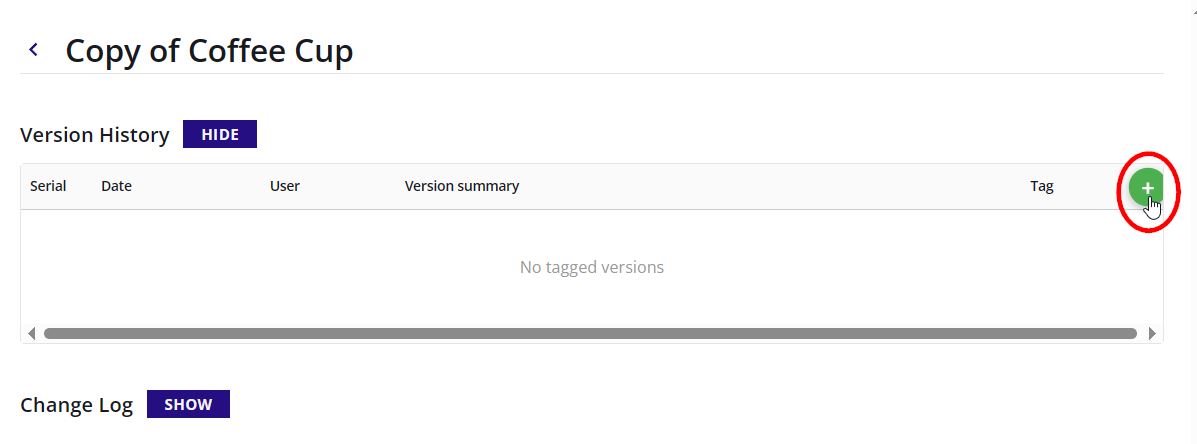
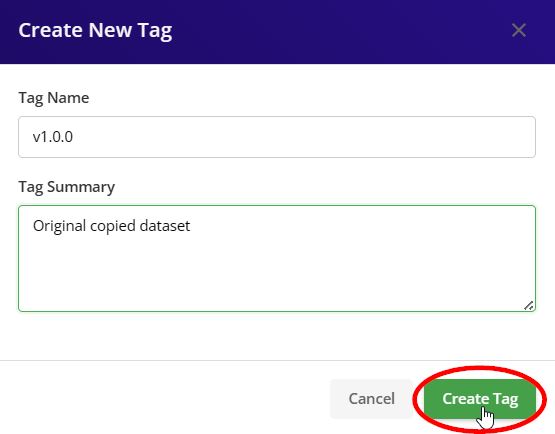
Specify the tag version and tag description. Click "Create Tag" to tag the dataset.
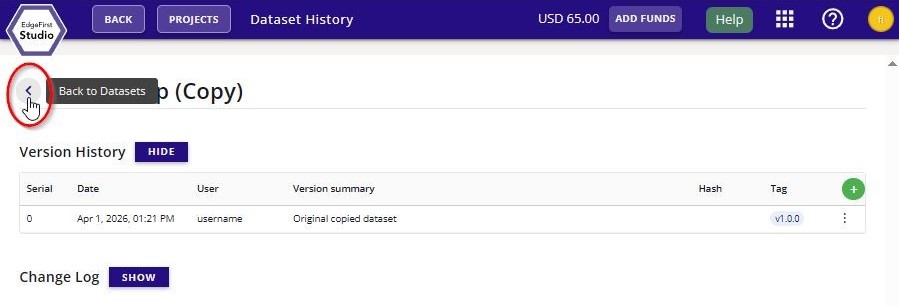
The new dataset tag will appear under "Version History" of this page. You can go back to the dataset card by clicking the "Back to Datasets" button.
Split Dataset
Partitioning the dataset is crucial in reserving dataset portions used for training and portions used for validation to assess the performance of the model. In EdgeFirst Studio, the partitions are 80% towards training and 20% towards validation. This operation randomly shuffles the data prior to assigning them to the specified groups.
Warning
The dataset needs to be re-split whenever new sample images or frames are added to the dataset. Newly added samples are not automatically added to any group that already exists.
Consider the following dataset without any groups reserved.
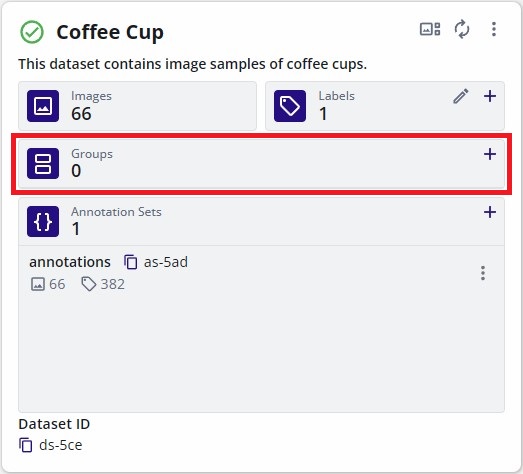
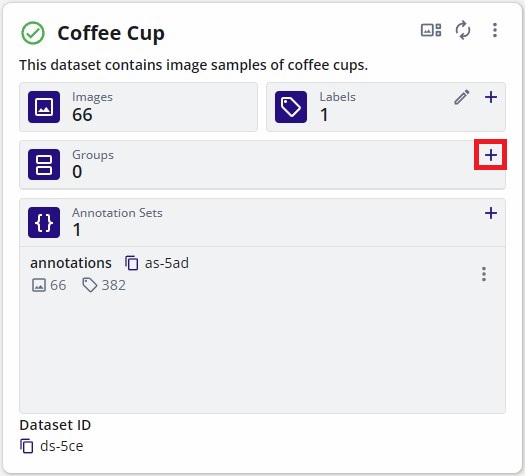
To create the dataset groups, click on the "+" button in the "Groups" field.
This will open a new dialog to specify the percentages of the partition belonging to the "Training" group or "Validation" group. By default 80% of the samples will be dedicated to training and 20% remaining will be dedicated towards the validation samples.
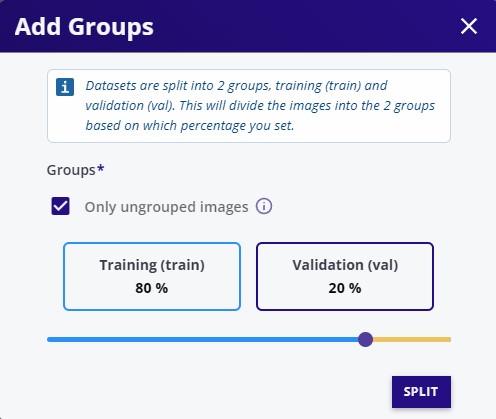
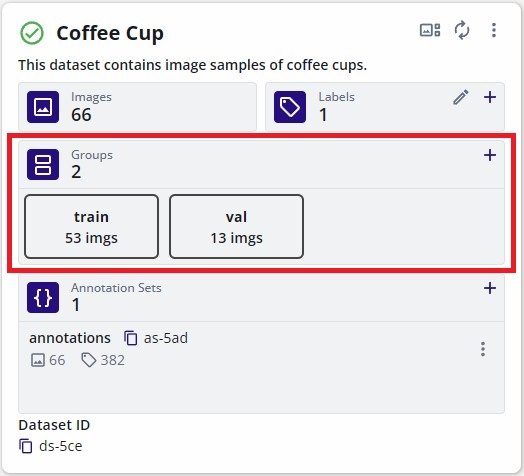
Once the groups are specified, click "Split" to create the groups. This will automatically divide the samples in the dataset based on the percentages of each group specified.
Combine Datasets
Combining datasets in EdgeFirst Studio is done by copying multiple source datasets into a single destination dataset container.
Prerequisite
- Create the destination dataset container first: Create Dataset Container.
Steps
- Open the first source dataset and run the Copy Dataset workflow.
- Select the destination dataset container created earlier.
- Repeat the same copy process for each additional source dataset.
Each copy operation appends samples to the same destination container, resulting in one combined dataset.
Next
After combining datasets, split the merged dataset for training and validation: Split Dataset.