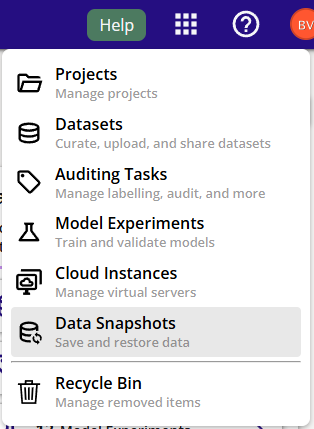
Snapshots Dashboard
Snapshots are portable, frozen copies of datasets in the EdgeFirst Dataset Format. Each snapshot consists of a ZIP + Arrow file pair:
- ZIP file: Contains sensor data (images, point clouds, etc.)
- Arrow file: Contains annotations (labels, bounding boxes, masks, metadata)
This format makes snapshots easy to download, share, archive, and re-import into any EdgeFirst Studio project.
The snapshots menu shows the list of snapshots with its name and status.

Create Snapshot
The tutorial for creating snapshots can be found under the Dataset Annotations section. This will create a ZIP/Arrow file pair also known as an EdgeFirst Dataset for each sequence in a dataset and stored in the cloud storage. This snapshot can be later restored (into another dataset) or can be downloaded to a local folder on a PC.
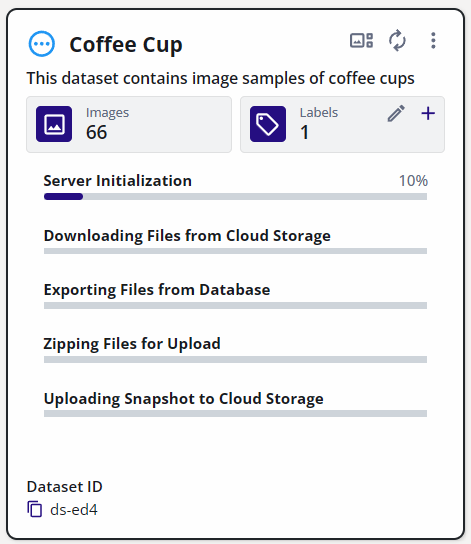
The stages for creating a snapshot are shown below.
A snapshot can be created by the following ways:
- Create from Existing Dataset.
- Upload from MCAP File.
- Upload from ZIP/Arrow File
Create from Existing Dataset
- From the dataset card, open the context menu and select "Create Snapshot".
- Select the dataset and annotation set to create a snapshot from and give it a description.
- This will trigger the creation of a snapshot.
- The status of the snapshot generation will be shown in the dataset card.
- When completed, the snapshot will appear in the snapshots dashboard.
Upload from MCAP File
- Go to the snapshots dashboard.
- Click on the "FROM FILE" button or drag and drop an MCAP file on the dashboard.
Upload from ZIP/Arrow File
This format is the EdgeFirst Dataset Format where the ZIP file contains sensor readings and measurements and the Arrow file contains dataset annotations.
- Go to the snapshots dashboard.
- Click on the "FROM FILE" button and then select the ZIP and Arrow file pairs to import or drag and drop as a folder containing ZIP and Arrow file pairs onto the dashboard.
- Once the files are selected, this will start the import sequence progress shown below.
Pipeline
When creating a snapshot a pipeline with the following stages are deployed.
- Server Initialization: Initialize the backend server for handling the processes.
- Downloading Files from Cloud Storage: Fetches the dataset images from the S3 bucket.
- Exporting Files from Database: Fetches the dataset annotations from the Studio database.
- Zipping Files for Upload: Formulation of the EdgeFirst Dataset Format and placing the fetched dataset files as a single ZIP file.
- Uploading Snapshot to Cloud Storage: Uploading the dataset into S3 bucket.
Restore Snapshot
This action will take an MCAP or ZIP/Arrow files and create a dataset in EdgeFirst Studio. The backend pipelines for auto depth map generation, object detection, and Automated Ground Truth Generation can also be selected at this time while restoring.
The tutorial for restoring snapshots can be found under the Dataset Annotations section.
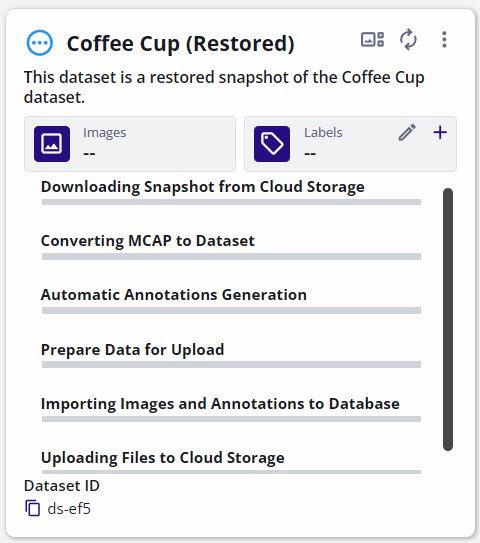
The stages for restoring a snapshot are shown below.
- Click on the snapshot context menu (three dots).
- Select "Restore".
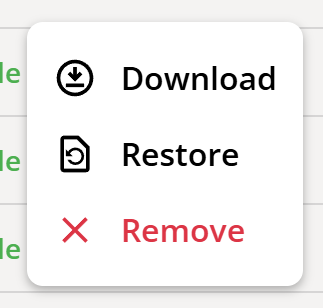
- This will open the restore dialog for specifying the options.
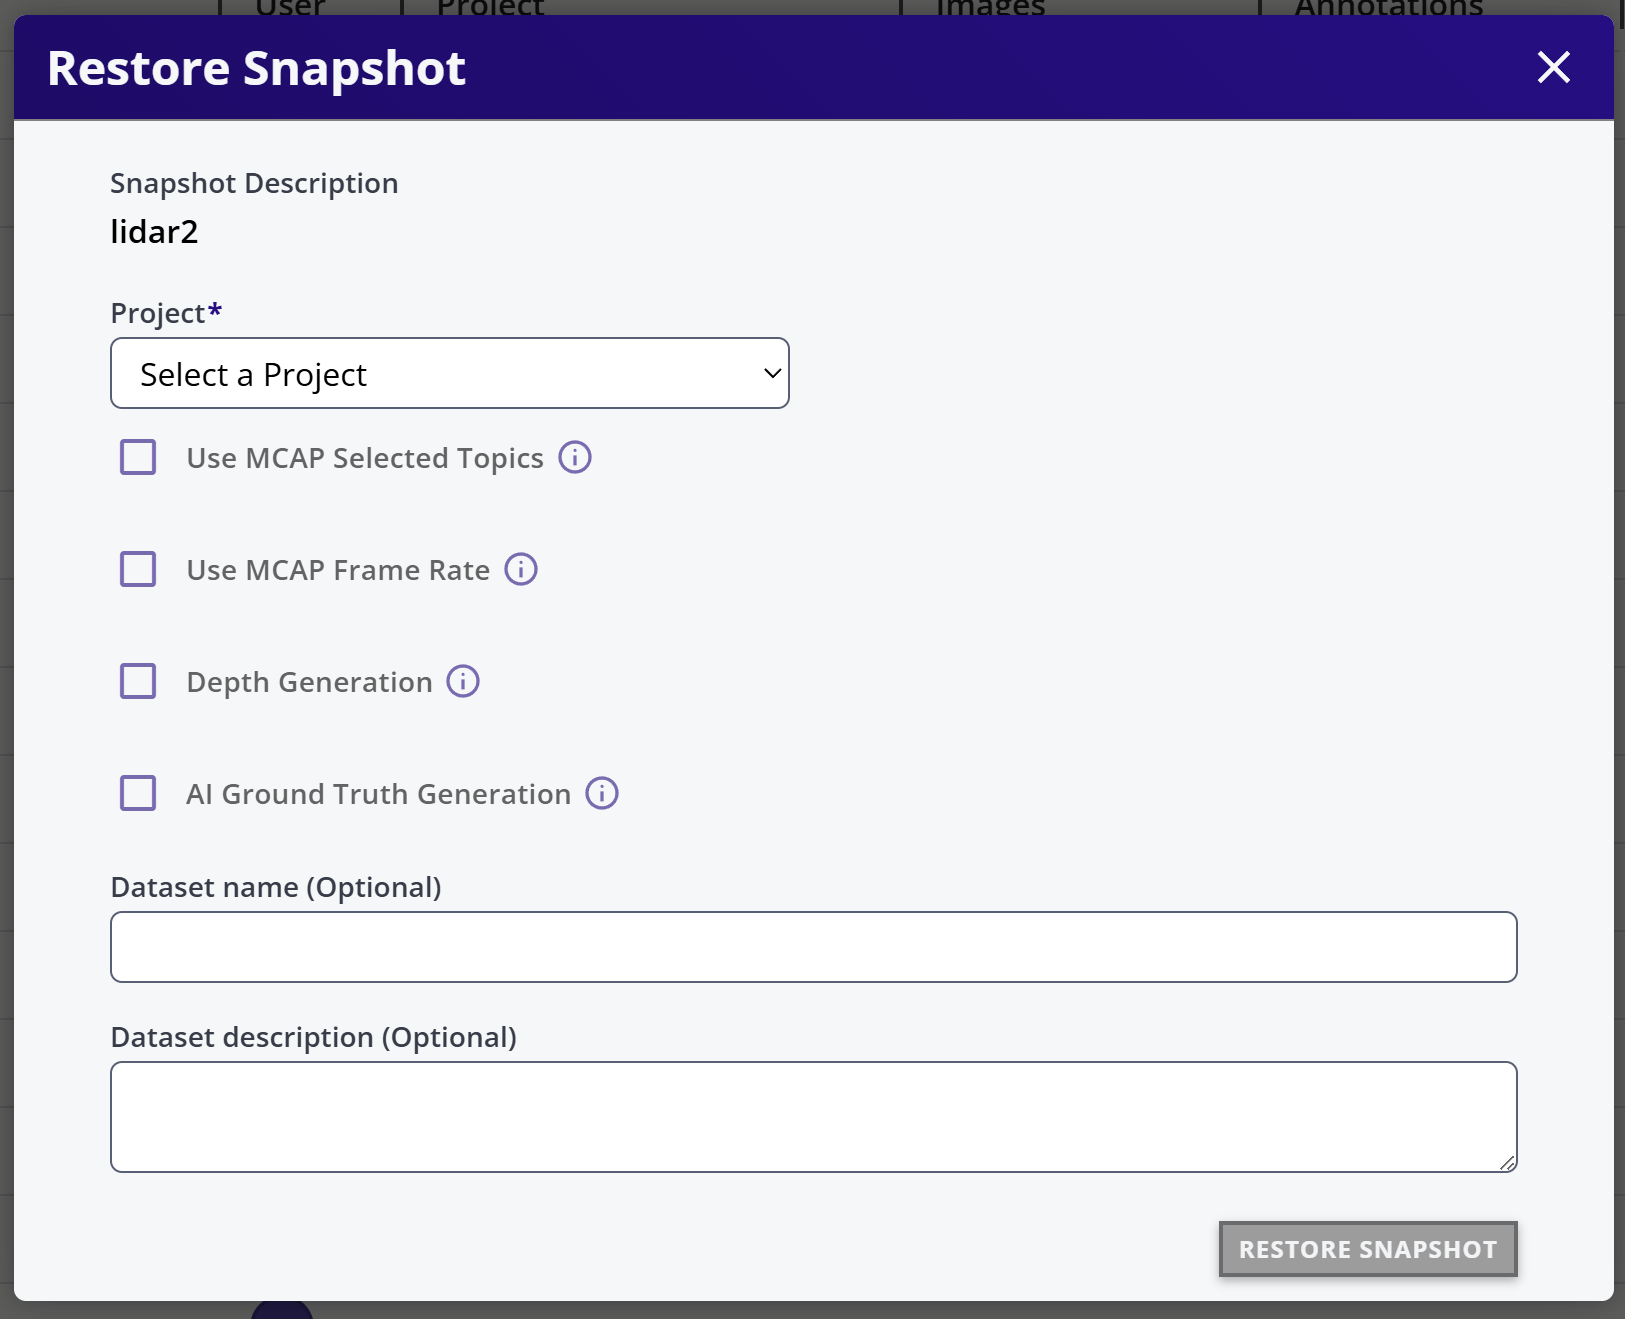
- Select "Project" where the dataset will be created.
- Enter the dataset name and description. If the dataset name is not provided a dataset, a dataset with the snapshot name will be created.
- Check "Use MCAP Selected Topics" if selected topics are to be imported (for example ignoring Radar and only importing Segmentation).
- Select "Use MCAP Frame Rate" to select a custom frame rate.
- Select "Depth Generation" to use AI Model based depth map generation.
- Select "AI Ground Truth Generation" to enable auto generation of 2D boxes, 3D boxes, and segmentation masks.
- Click "RESTORE SNAPSHOT".
- The dataset dashboard will have a new dataset with progress indication.
- The progress for different stages will be at different rates.
Pipeline
When restoring a snapshot a pipeline with the following stages are deployed.
- Download Snapshot from Cloud Storage: Fetches the dataset from the S3 server.
- Converting MCAP to Dataset: This is only present when the method of creating a snapshot is from an MCAP file.
- Automatic Annotations Generation: Runs AGTG to auto annotate the dataset with COCO labels.
- Prepare Data for Upload: Data preparation processes.
- Importing Images and Annotations to Database: Uploading the images and annotations to the Studio database.
- Uploading Files to Cloud Storage: Uploading the annotated dataset back into S3 bucket.
Download Snapshot
- Click on the snapshot context menu (three dots).
- Select "Download".
This downloads the snapshot as a ZIP + Arrow file pair to your local machine:
my_snapshot.zip       # Sensor data (images, point clouds)
my_snapshot.arrow     # Annotations (labels, boxes, masks)
These files follow the EdgeFirst Dataset Format and can be:
- Re-imported into any EdgeFirst Studio project as a new snapshot
- Used for offline analysis with Python/Polars
- Shared with collaborators or archived for backup
- Processed by custom ML pipelines outside of Studio
See Dataset Organization for details on the internal structure of these files.
Delete Snapshot
- Click on the snapshot context menu (three dots).
- Select "Remove".
Next Steps
Now that you are familiar with the Snapshots Dashboard, proceed to the next section for a proper introduction to the auto-annotation process in EdgeFirst Studio known as Automatic Ground Truth Generation (AGTG).