Foxglove Studio
Foxglove Studio is an open source application developed by FoxGlove Technologies, Inc. It is part of the Robot Operating System (ROS) ecosystem and supports playback for MCAP recordings. You can download Foxglove Studio as well as our EdgeFirst plug-in for Foxglove and customized Raivin Foxglove layout
Topic names in layouts
Recordings made with Torizon for Maivin 2026.08 name their channels without the rt/ prefix used by earlier releases, for example /camera/h264 and /model/output. Layouts saved from older recordings need their panel topics updated, and the detection overlays now read the unified /model/output topic through the EdgeFirst plug-in. The Raivin layout linked above is configured for 2026.08 recordings.
Getting Started
Let's discuss how to install our custom plugins once you've installed Foxglove Studio.
Installing EdgeFirst Plugin
Note
These guidelines describes installation of version 1.1.3 of the EdgeFirst plug-in for Foxglove, which is current as of time of writing.
-
Open Foxglove Studio
-
If necessary, uninstall any existing versions of the EdgeFirst plug-in
- Click the User Settings button on the right side of the top menu bar.
-
Select the Extensions option in the pull-down menu.
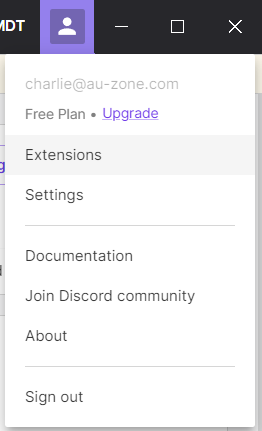
Foxglove Settings -
Click the EdgeFirst Schemas plugin (or the older EdgeFirst Detect plugin)

Foxglove Extension View -
Click the "Uninstall" button.
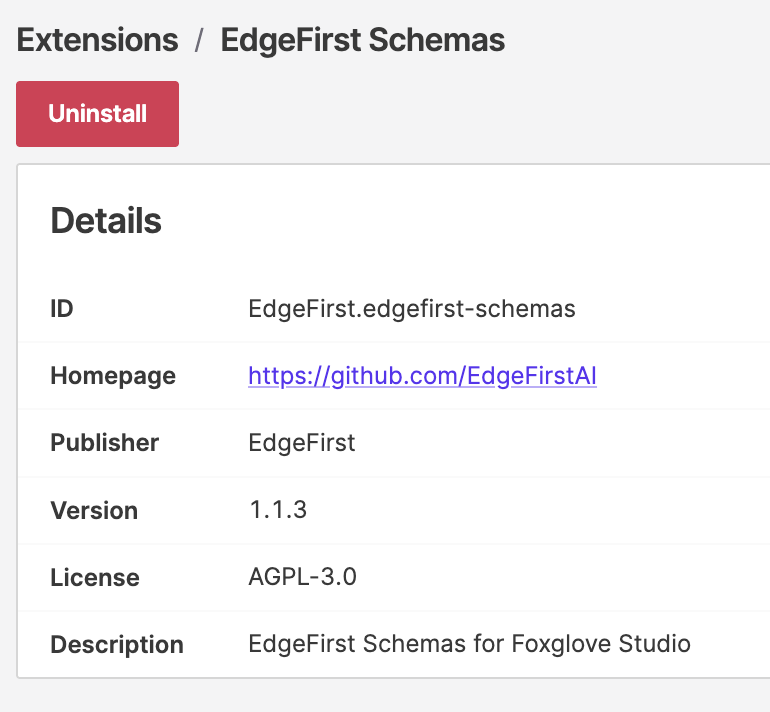
Foxglove Install Extension -
Click the "Back to dashboard" button in the top-left corner of the application main window.
-
Install the current version of the EdgeFirst plug-in.
-
Click the User Settings button on the right side of the top menu bar.
-
Select the Extensions option in the pull-down menu.
Foxglove Settings -
Click the "Install local extension..." button.

Foxglove Extension View -
Select the
edgefirst.edgefirst-schemas-1.1.3.foxefile or a later version from the downloads directory. -
Confirm that the 1.1.3 version was installed or the latest version available.
Foxglove Extension View with 1.1.3 -
Close Foxglove Studio and restart it.
Installing Foxglove Layout
We have included a Custom Raivin Layout for Foxglove Studio. Please download it and follow the instructions below.
- Open Foxglove Studio.
- Load an MCAP file downloaded from the Raivin.
- Click the "Layout" button in the top taskbar.
-
Select the "Import from file..." option in the Layout menu.
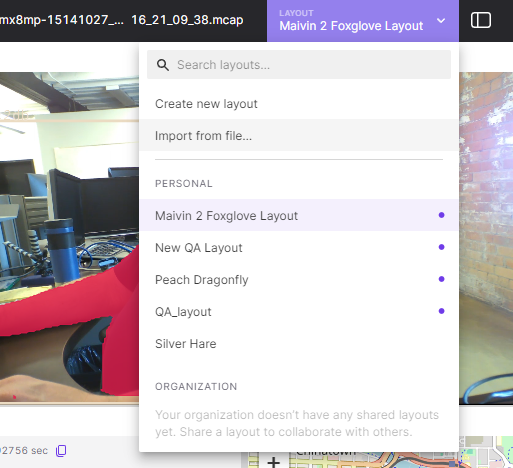
Foxglove Layout -
Go to the download directory holding the JSON layout file and select the file.
-
Confirm the layout JSON file is loaded.
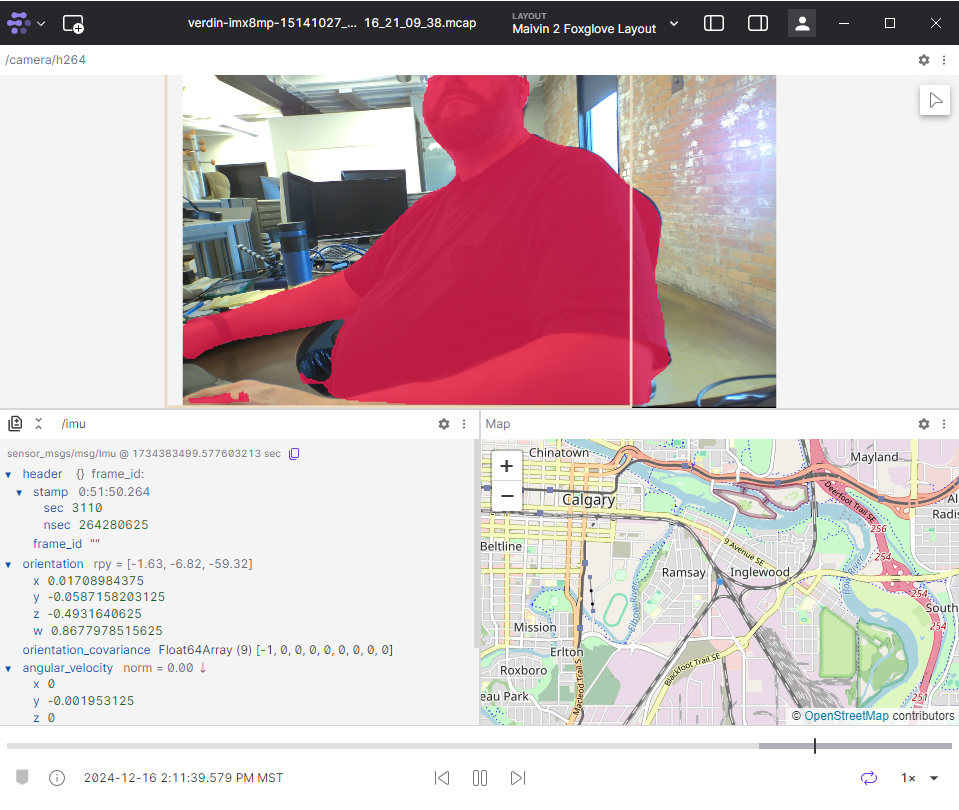
Foxglove Scene
Layout Features
The default Raivin layout includes:
- Top panel: H.264 camera stream with bounding box overlays
- Shows detection results (i.e. the colored boxes around people when using a detection model)
- Shows segmentation masks (i.e. the colored blobs covering detected objects when using a segmentation model)
- Bottom right panel: GPS coordinates map view
- Interactive map with zoomable blue target showing camera position
- Bottom left panel: IMU sensor readings
- Can be configured to show real-time plots
- Bottom timeline: Playback controls for navigation
Visualization Features
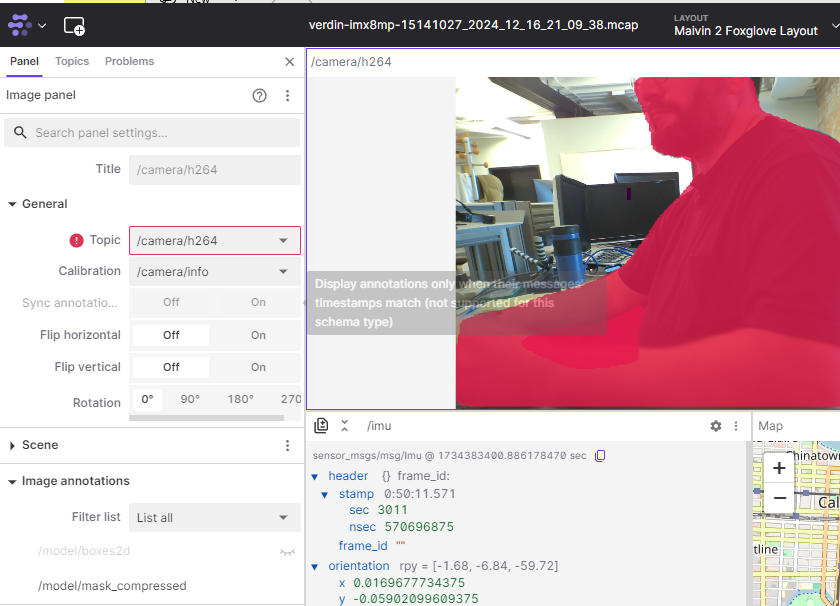
In the example above, we see both detection boxes and segmentation masks in the H.264 Camera topic.
Viewing Detection Messages
The detection boxes and the segmentation masks are contained in the /model/output topic, which the recorder captures by default. The EdgeFirst Foxglove plug-in draws them as image annotations over the camera stream.
Note
Not all vision models are able to produce detection results. The default model on the Raivin can produce both detection and segmentation results.
- Record a MCAP file that captures the
/model/outputtopic. -
Confirm with the "Details" button that the newly recorded MCAP has a
/model/outputtopic.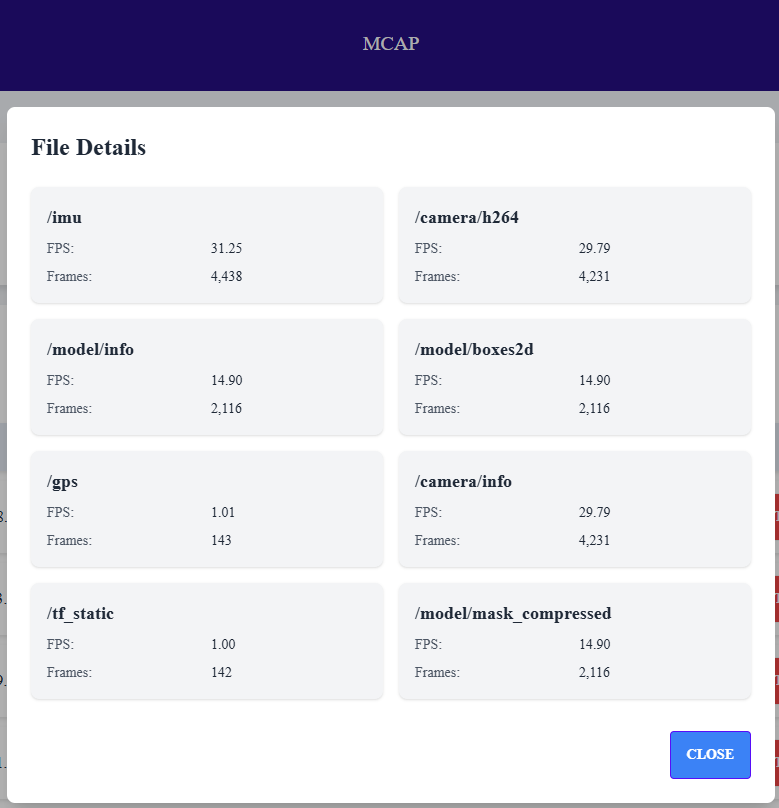
MCAP Details -
Download the file from the Raivin and load it in Foxglove Studio.
- Click the "Settings" gear icon on the right side of the
/camera/h264/panel task bar. -
The
/model/outputoption should appear in the "Image annotations" dropdown menu in the "Image Panel" settings sidebar (bottom left of image below).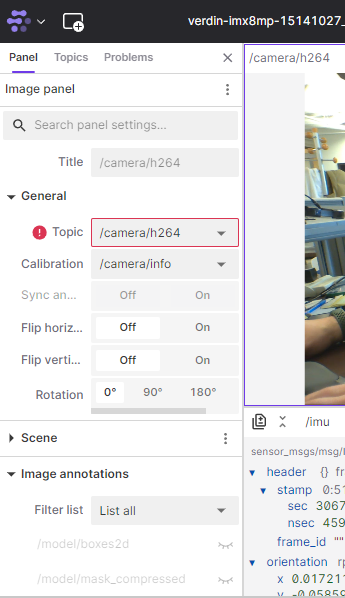
Foxglove Detect Plugin View -
Enable the
/model/outputimage annotations by clicking the closed eye icon. This will draw boxes around the detected objects.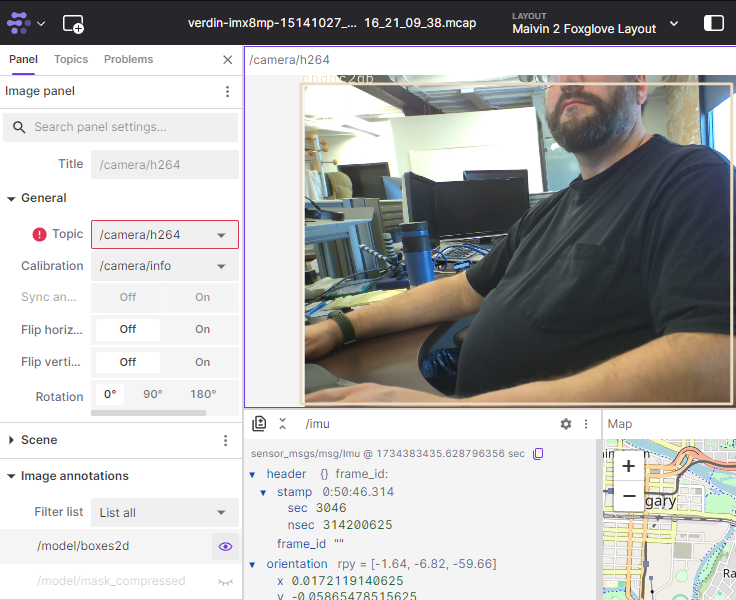
Foxglove Detect Boxes Enabled
Viewing Segmentation Messages
The segmentation masks travel in the same /model/output message as the detection boxes. Because of the amount of data included within this stream, the masks are not compatible with the default Image drawing API in Foxglove Studio, the EdgeFirst Foxglove plug-in must be installed to view segmentation masks in Foxglove.
The masks are drawn by the same /model/output image annotations as the boxes, enabling the annotations shows both.
Viewing /radar/cube Messages
The radar cube is only published when cube streaming is enabled on the radar service. The Image panel in Foxglove can viewer can:
- Record a MCAP file that has the
/radar/cubemessage in it. See Maivin Dataset Recording for details. - Play the MCAP file in Foxglove Studio. See Playback MCAP with Foxglove Studio for details.
-
In the image panel, the
/radar/cubetopic should appear under the list of valid image topics.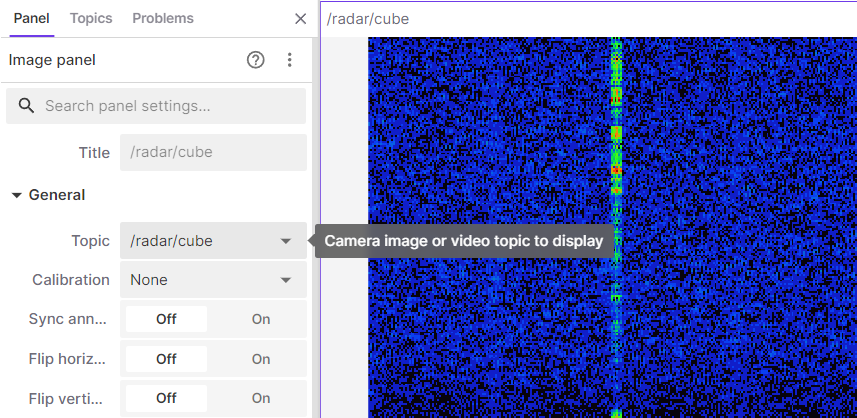
Foxglove Radar Mask -
Select the
/radar/cubetopic. -
Change the color mode to Color Map, and select Turbo for the color map.
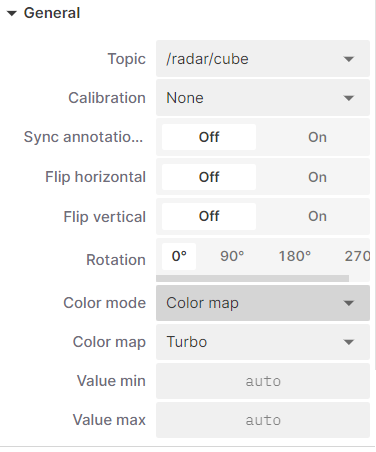
Foxglove Radar Message -
Leave the value min and value max on auto.
-
You can now see the
/radar/cubemessage.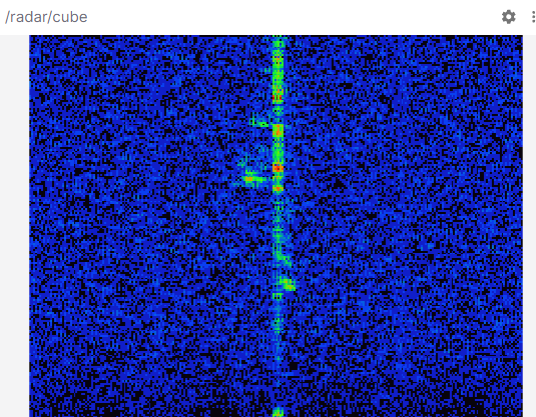
Foxglove Final Radar View
IMU Data Plotting
To create IMU sensor plots:
- Convert bottom left panel to Plot view
- Click "Add a Series"
- Select
/imuas the topic - Choose desired parameters (e.g, angular_velocity, x, y, z)
-
Repeat to add additional plot series as needed.
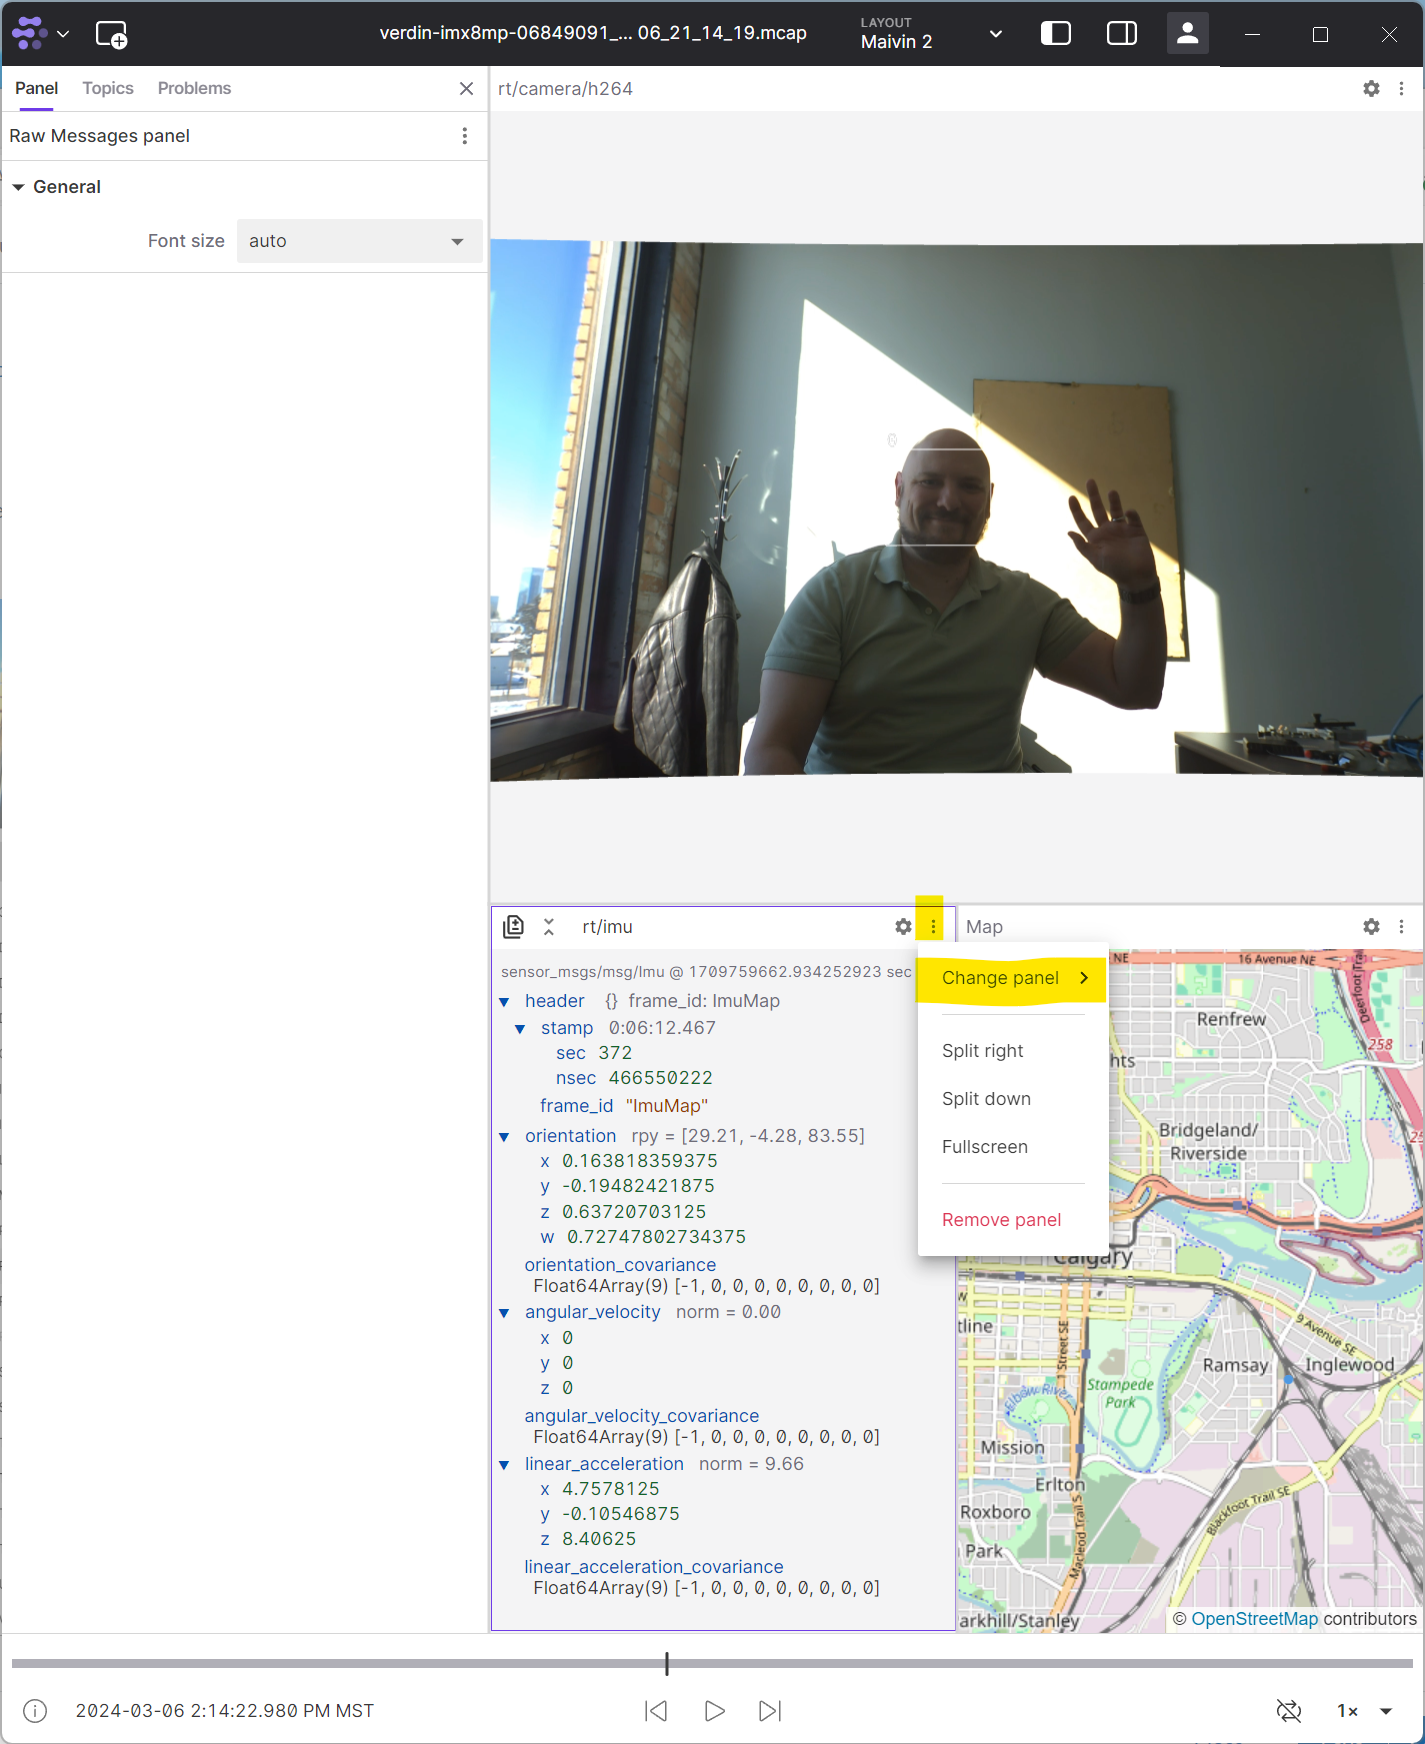
IMU 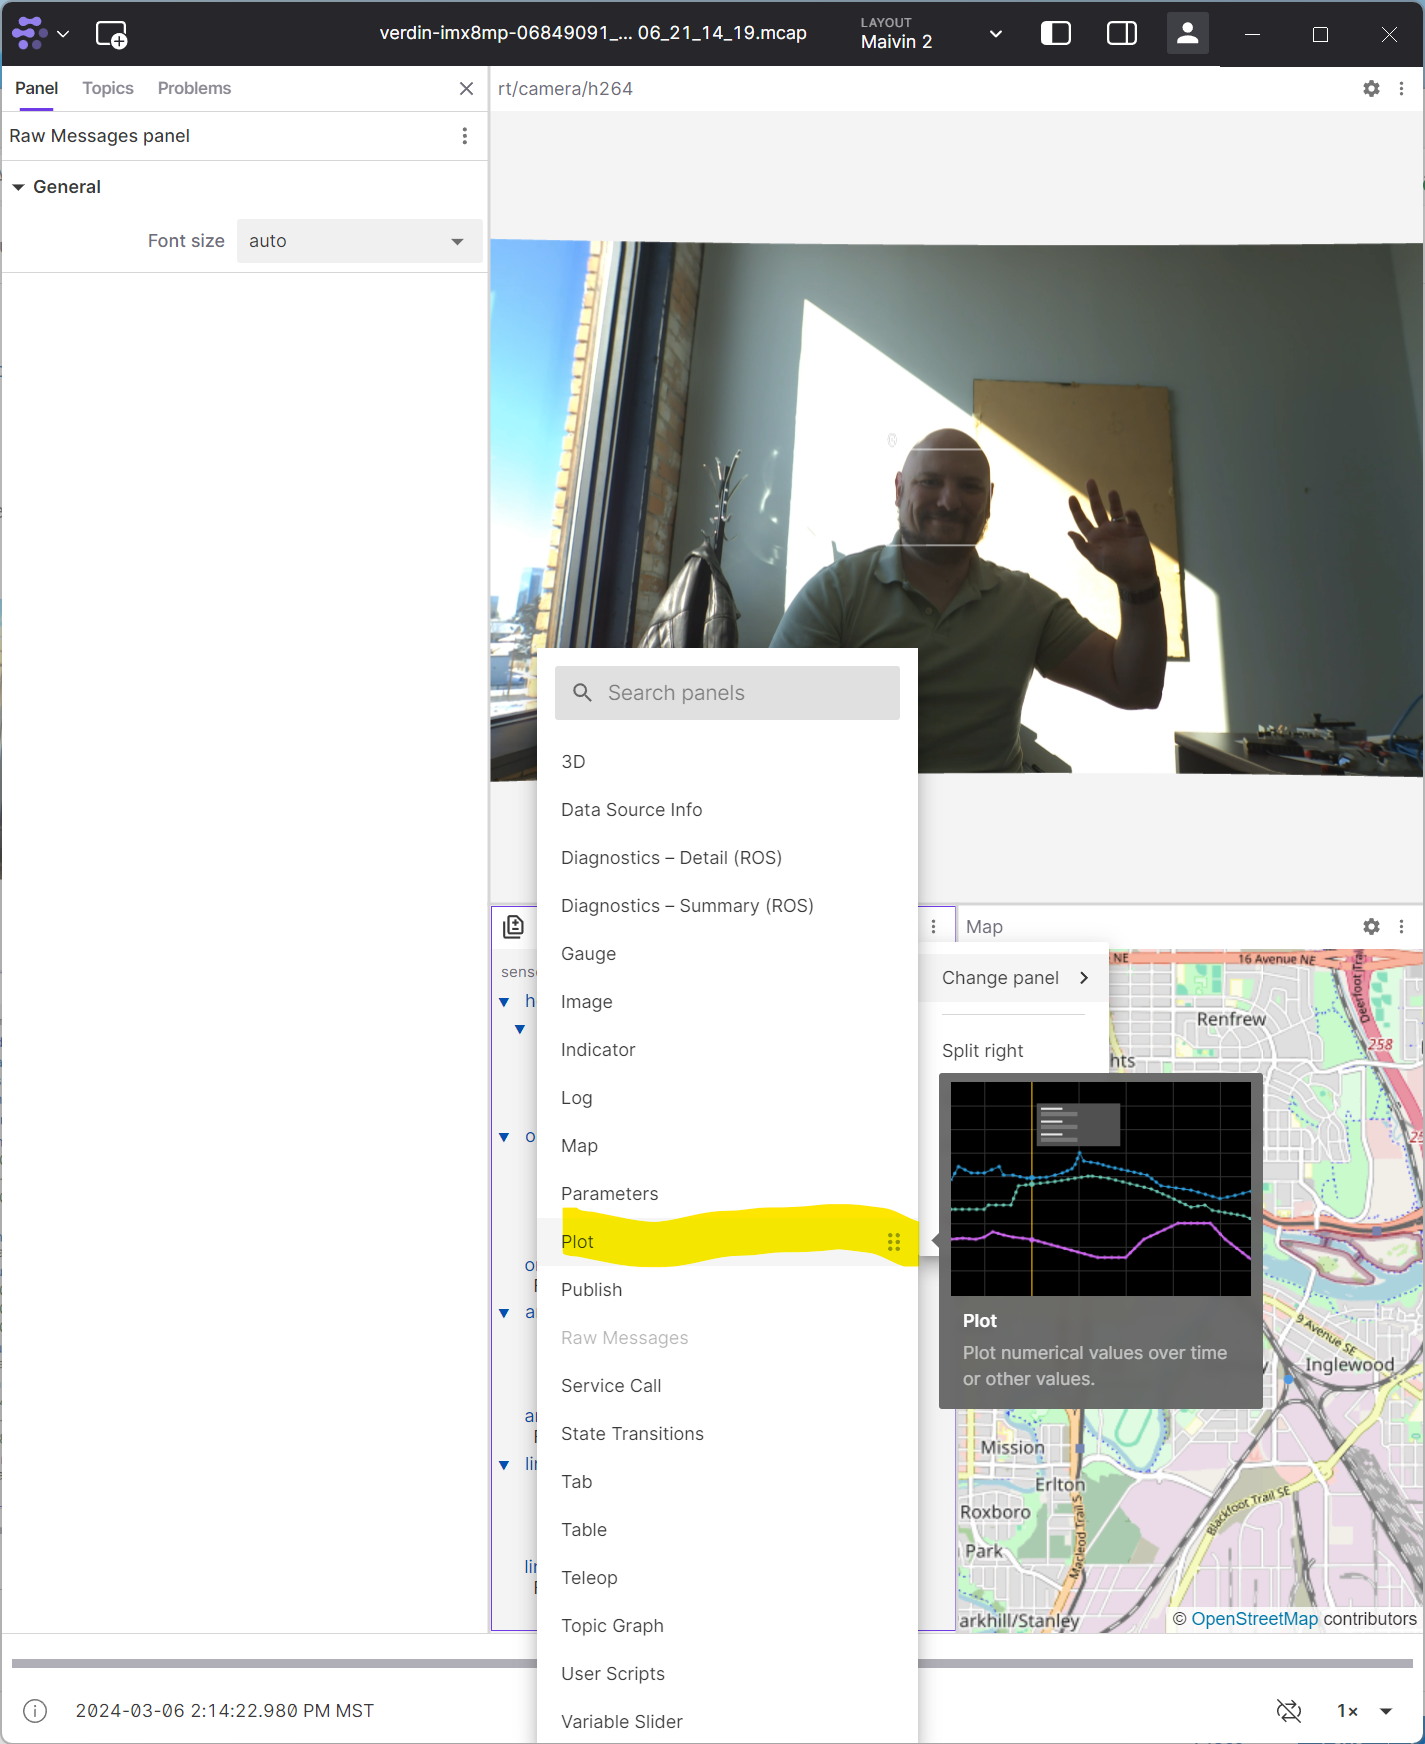
IMU to Plot 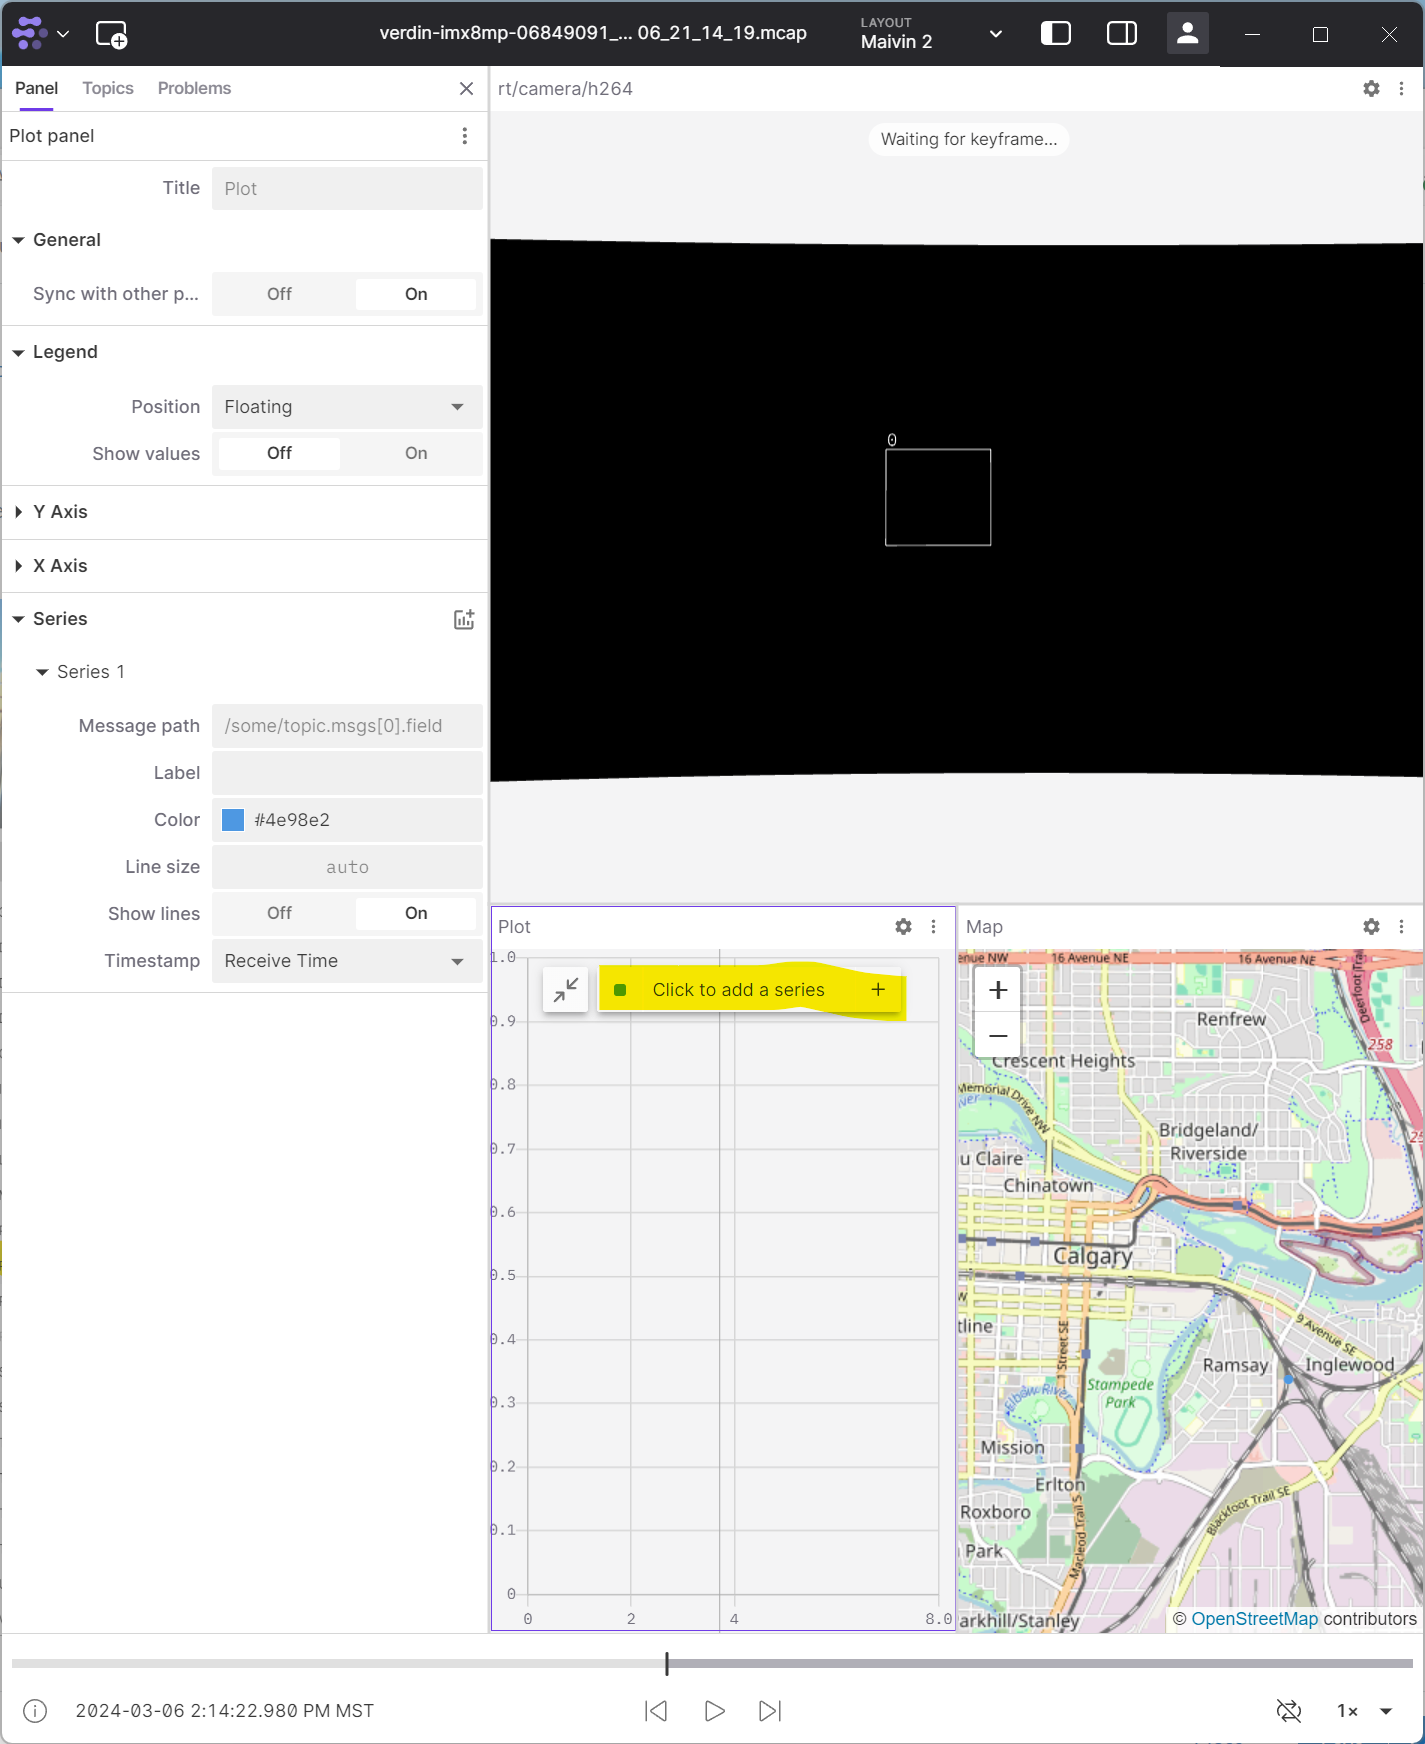
Plot 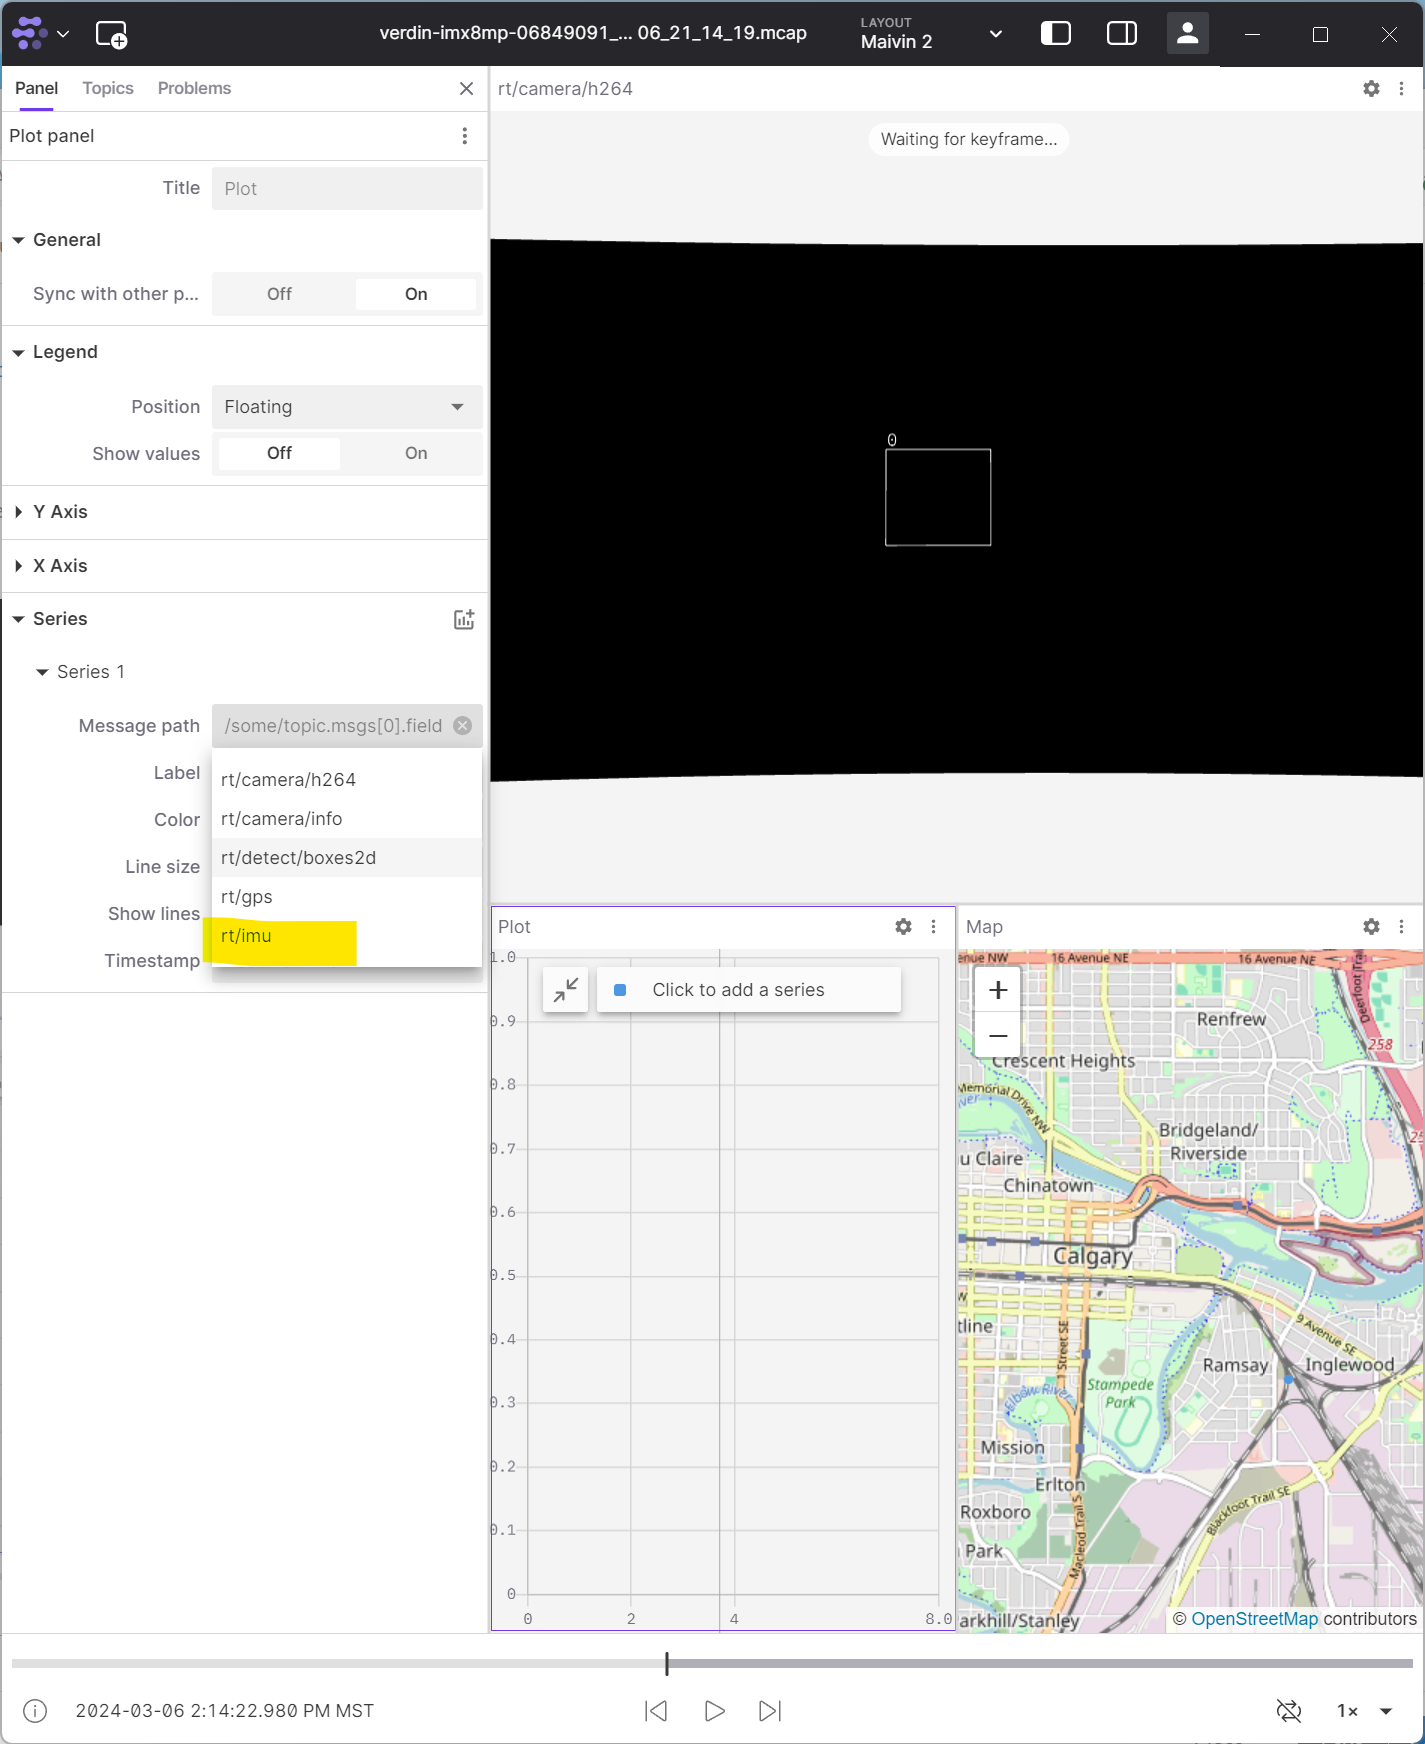
IMU Message 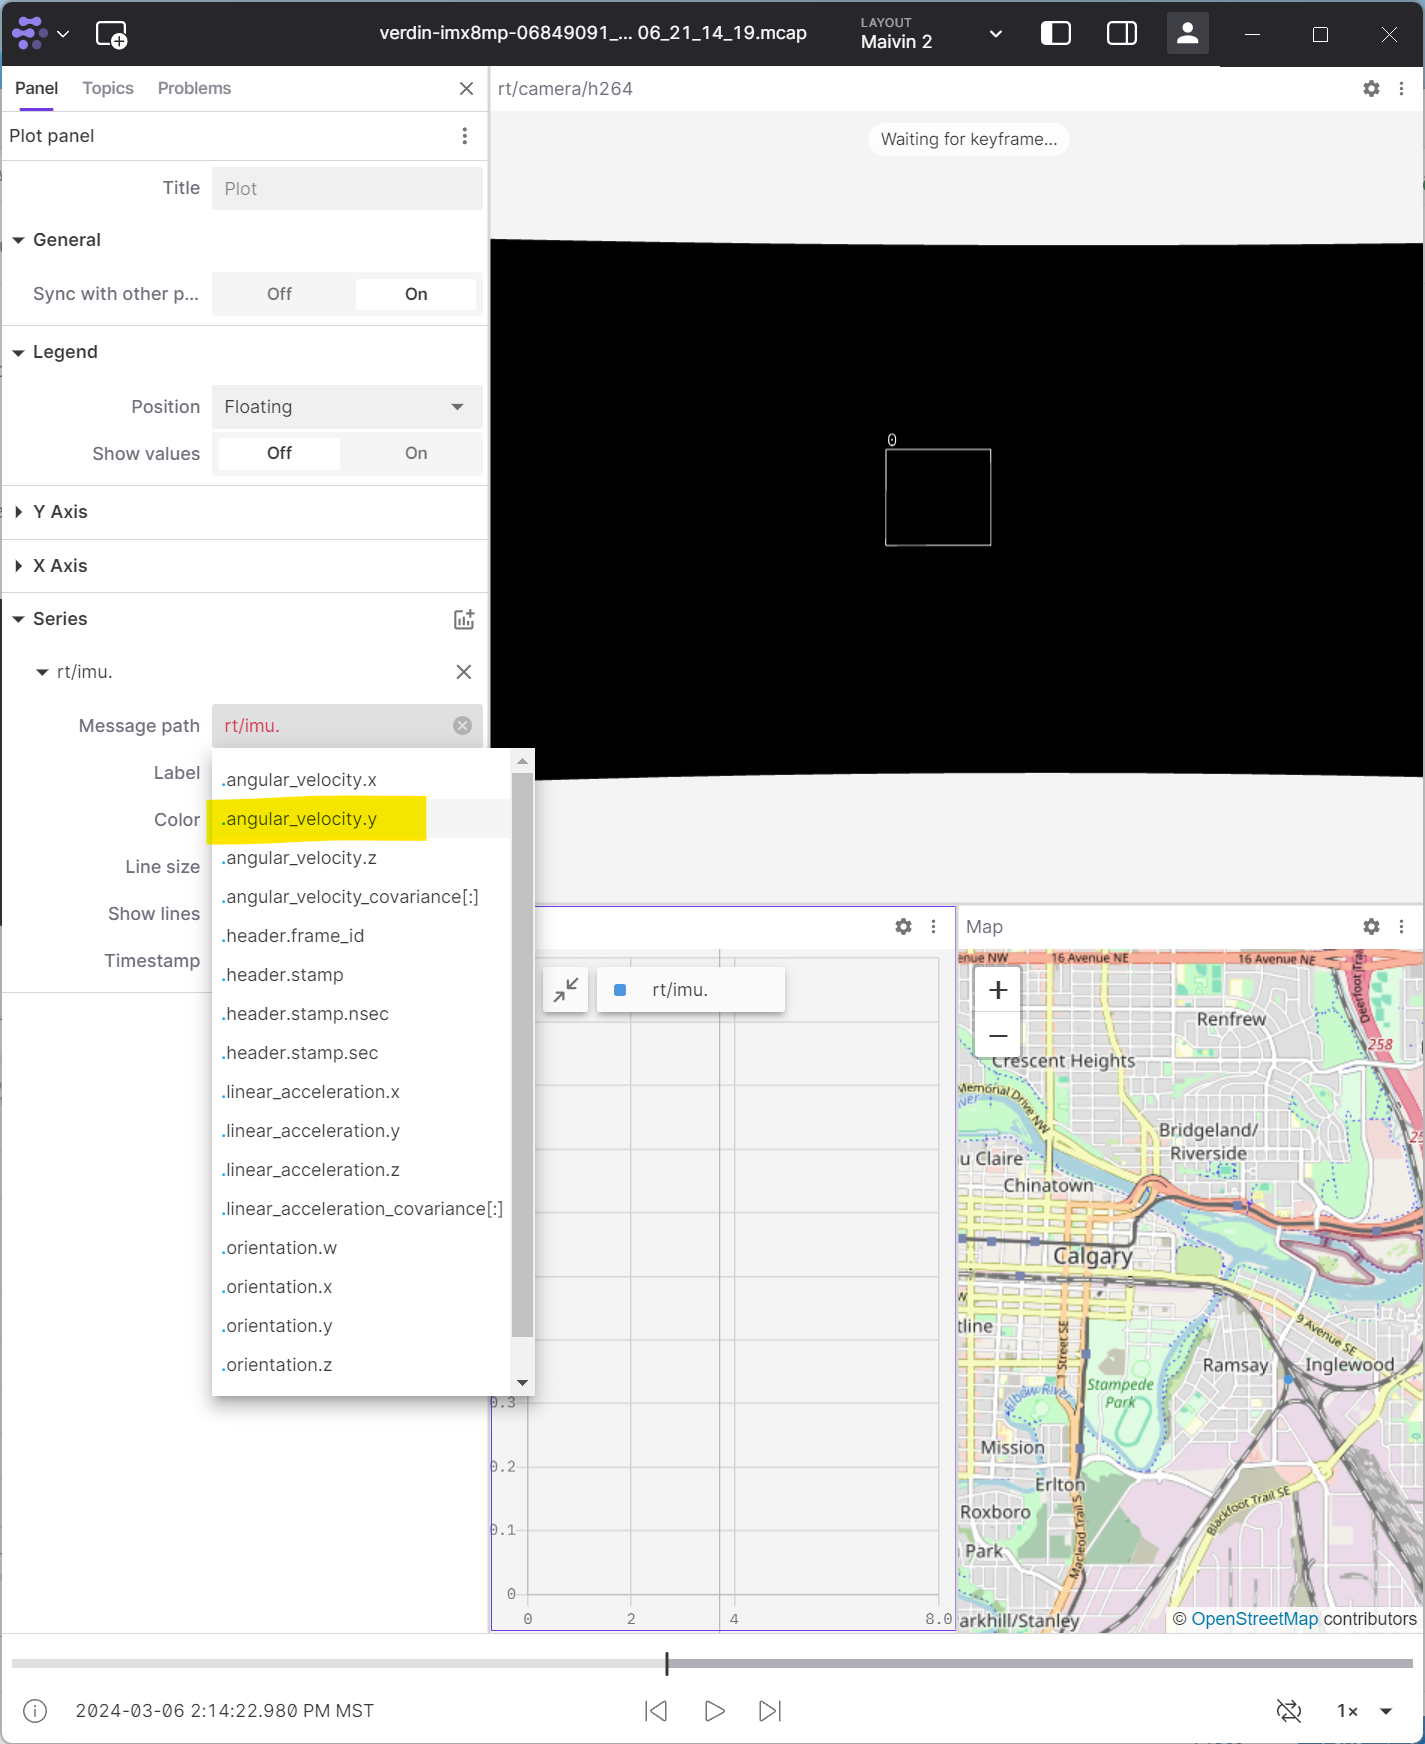
IMU Velocity 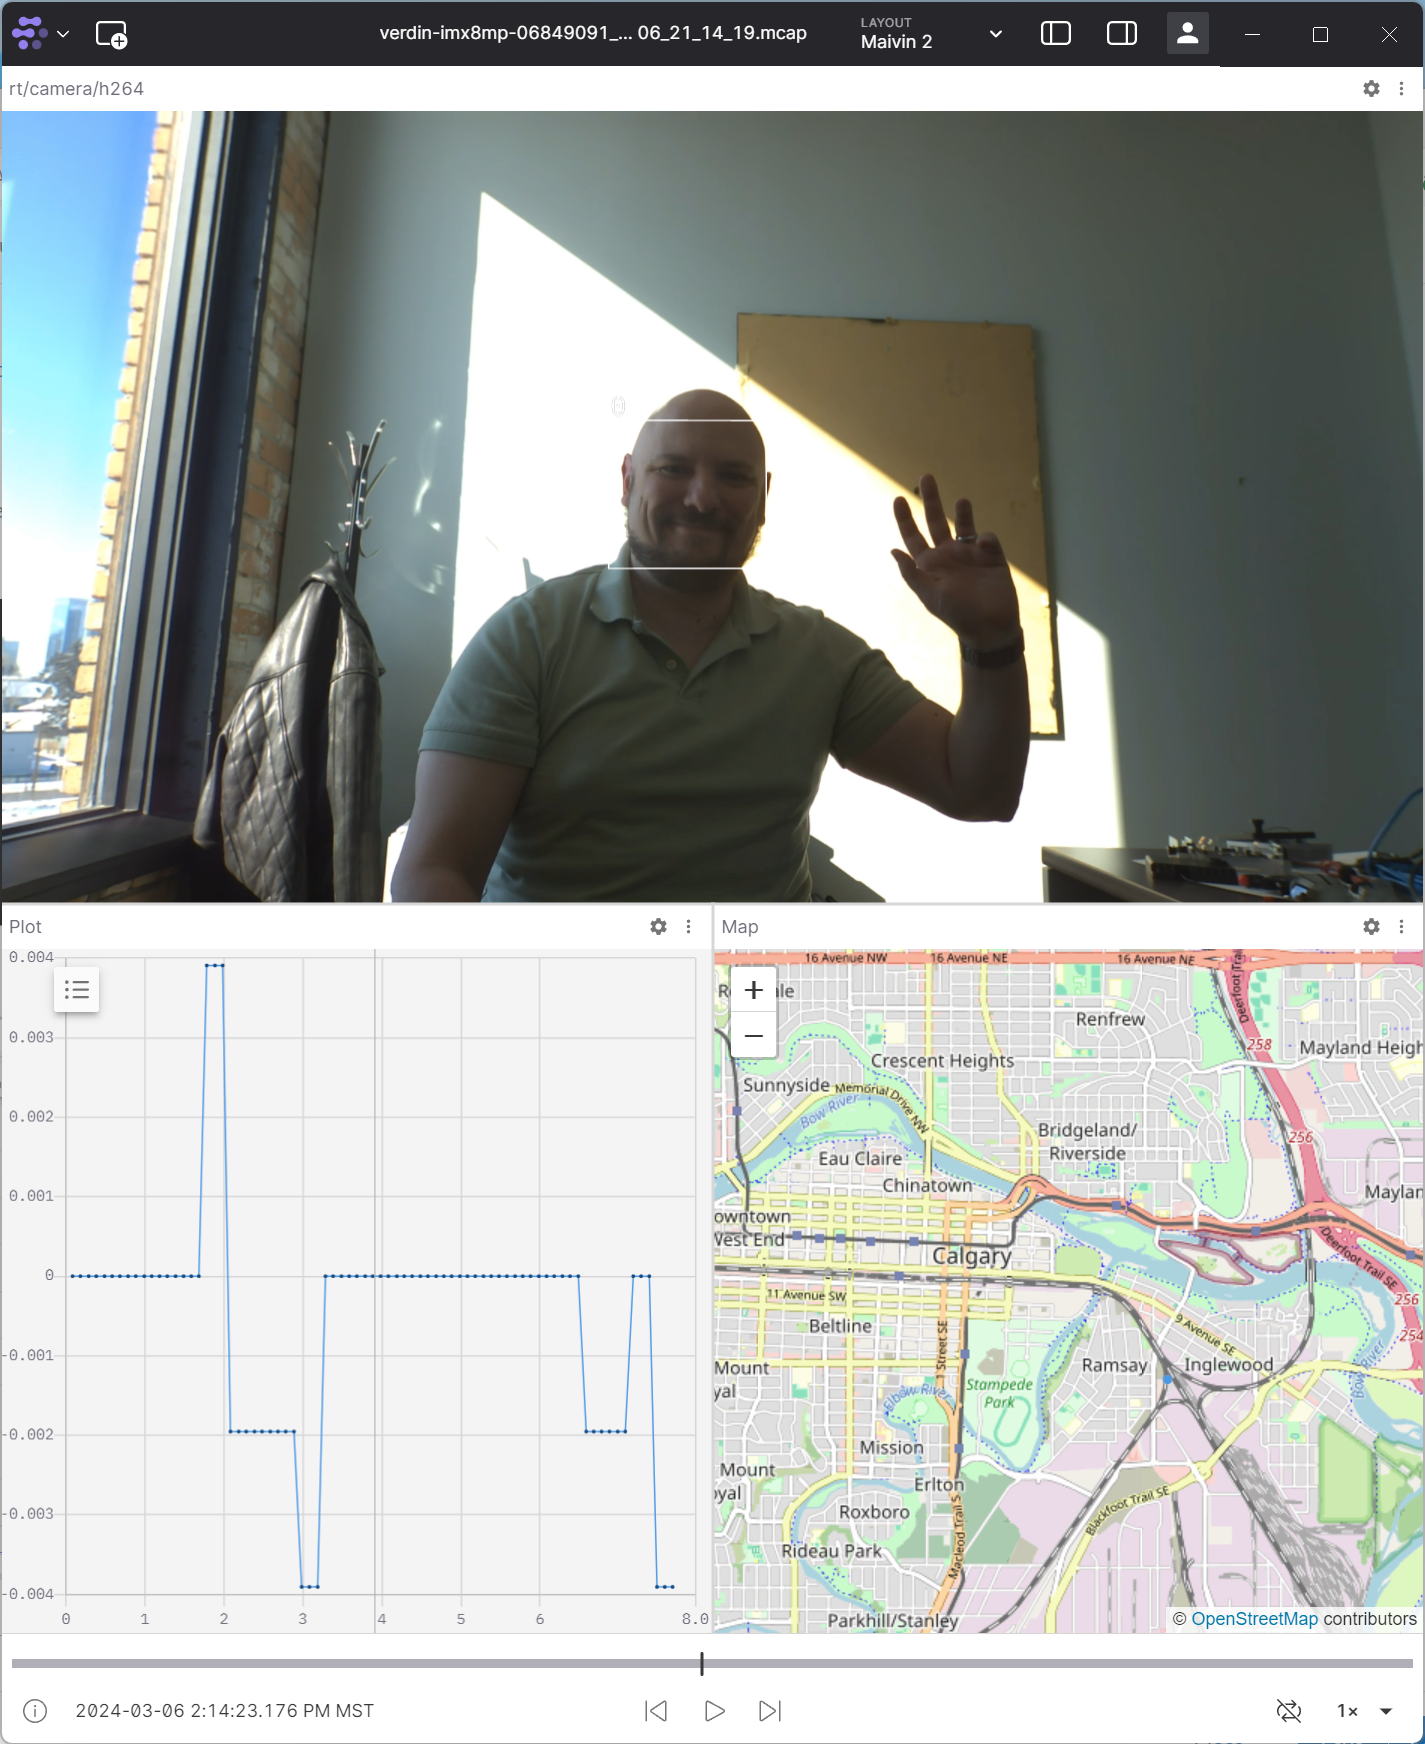
IMU Final View
Additional Resources
For more detailed information about Foxglove Studio features, visit the Foxglove Documentation website.