NXP i.MX 8M Plus Setup Guide
In this page you will find instructions to setup the i.MX 8M Plus from start to finish. For the official instructions to setup the i.MX 8M Plus, refer to the Getting Started Guide from NXP.
Requirements
- i.MX 8M Plus EVK running NXP Yocto BSP
- USB-C power cable
- Ethernet cable connected to live network connection
- MIPI CSI-2 Camera
- SSH and SCP clients (OpenSSH, PuTTY, etc.) to SSH into the EVK
-
If connecting to EVK via USB serial
- USB Micro B Cable
- Standard HDMI Cable
- Monitor
- Mouse and Keyboard
- Recommendation: USB Port Hub
Flash a microSD card with NXP Yocto BSP
BSP Size
The size of the BSP installed ~12GB.
-
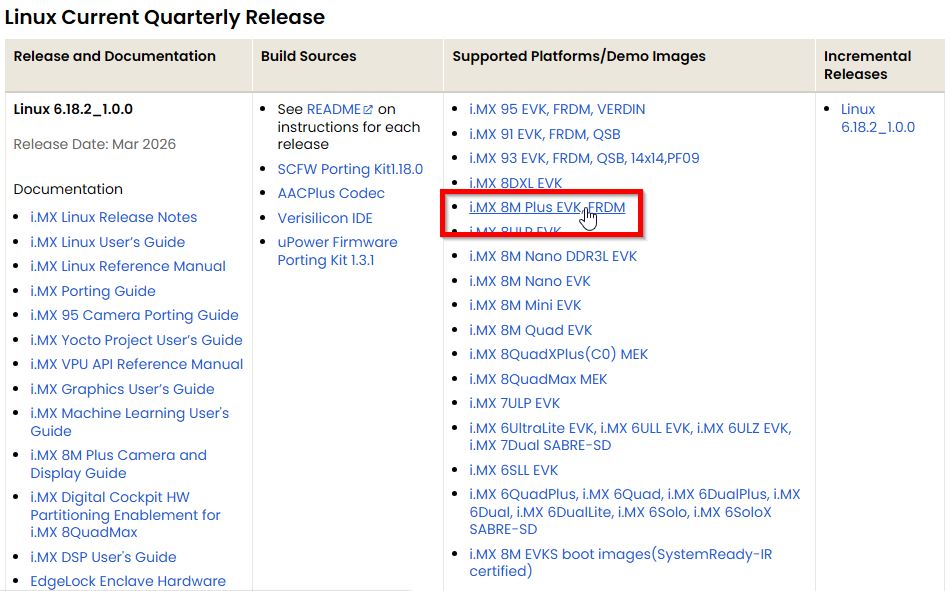
Download the "i.MX 8M Plus EVK,FRDM" BSP found under "Supported Platforms/Demo Images" in this page as shown below
i.MX 8M Plus -
You will need an NXP account to install this BSP. Enter your credentials. Otherwise create an account

NXP Account Login -
Once authenticated, accept the license agreement as shown
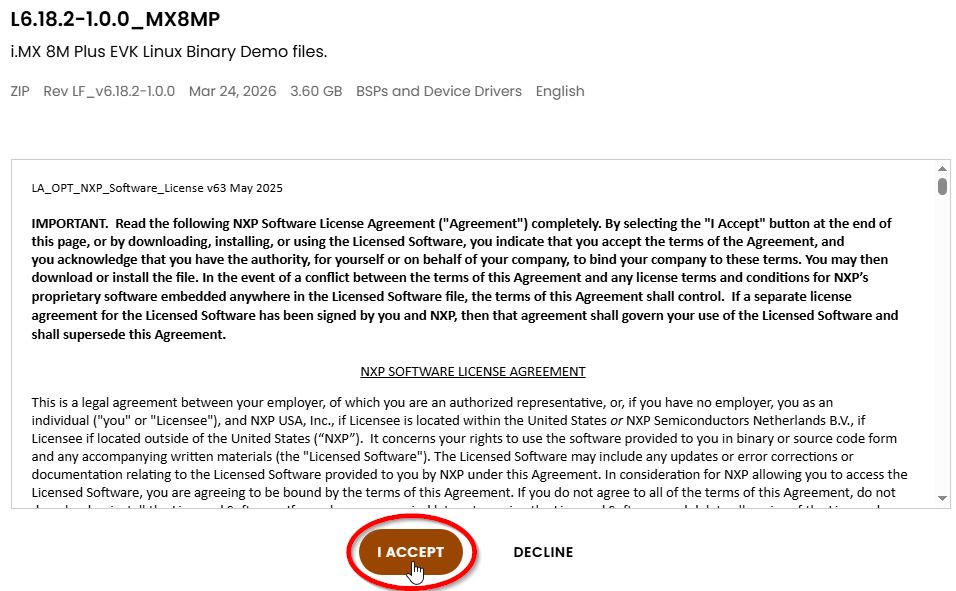
NXP License Agreement -
The BSP should start downloading to your PC as a ZIP file named "LF_v6.18.2-1.0.0_images_IMX8MPEVK.zip" or similar
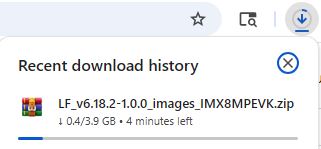
BSP Download Progress -
Use balenaEtcher to flash the SD card using an SD card reader connected to your PC. Select the ZIP file that was downloaded and select the SD card for the storage. Once selected, click "Flash!" to start
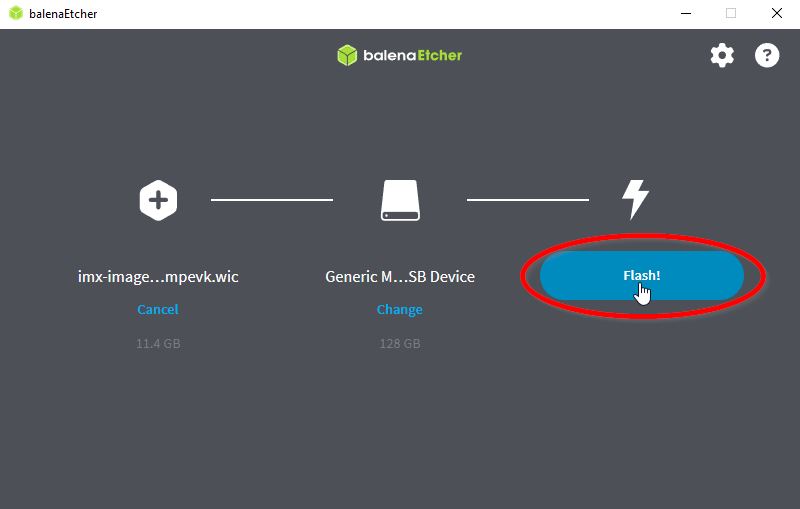
balenaEtcher -
Wait for the application to complete flashing ~5 mins depending on your machine
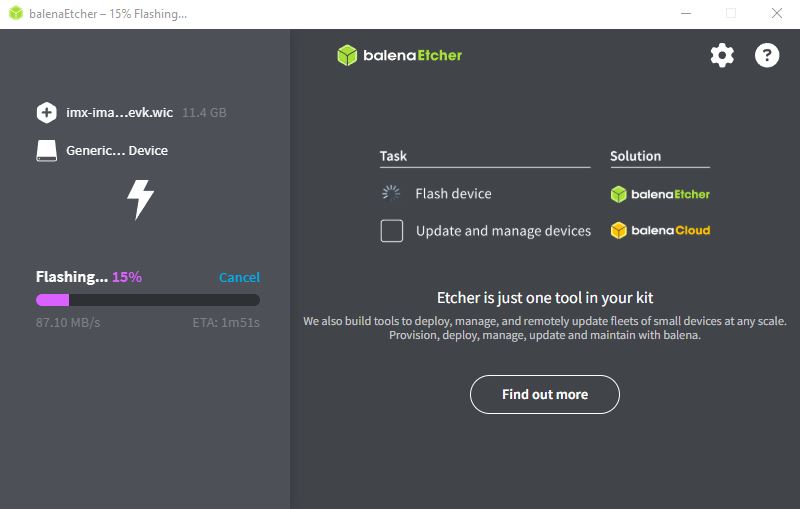
balenaEtcher -
Once completed, a complete status should appear. Proceed to the next steps to boot the board with the image flashed
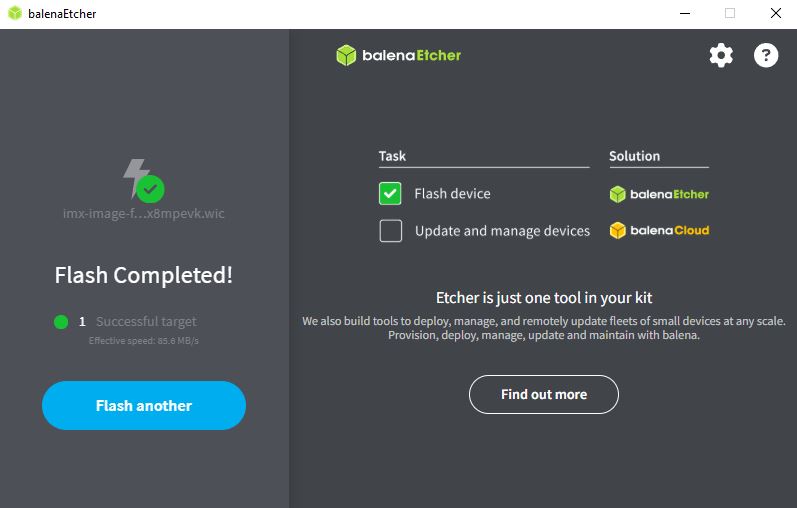
Completed Flashing
Boot the i.MX 8M Plus with the NXP BSP
Safety Precautions
As a safety precaution, ensure the Power Switch is turned OFF when connecting and disconnecting wires from the EVK.
-
In order to boot from the SD card, the BOOT jumpers need to be set properly. Set the BOOT MODE DIP switches (SW4) on the EVK to 0011 as shown. More information is provided in the Getting Started Guide from NXP
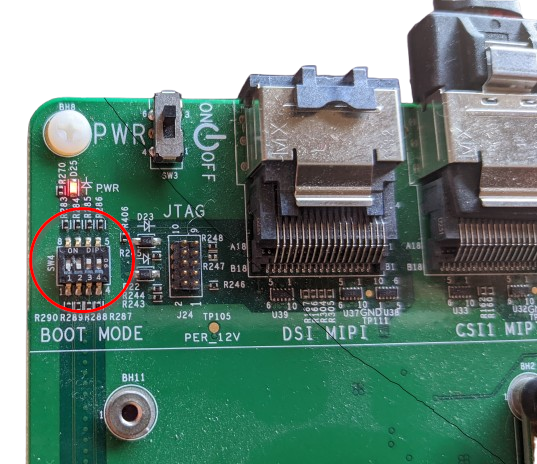
DIP Switches Set to 0011 -
Insert the microSD card into the module

Insert Micro SD Card -
Insert the 5V power supply to the Type C port 0 (2). Next connect the board to your network by attaching an ethernet cable to the Gigabit Ethernet port (4). Attach the MIPI CSI-2 Camera to the MIPI CSI Camera port (6)
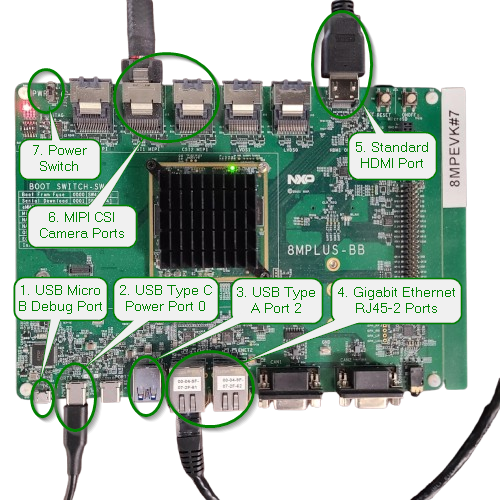
i.MX 8M Plus Physical Connections You can connect to your i.MX 8M Plus either connecting a mouse and keyboard, and monitor to the device; or via PuTTY - Debug Port.
Since there is only one USB Type A port (3) available, we recommend using a USB Port Hub to attach both the keyboard and mouse at the same time. Connect the monitor using a standard HDMI cable to the standard HDMI Port (5).
Power ON the EVK by switching the power switch (7).
You should now see the system boot on the monitor. Access the terminal of the EVK and enter the command.
# ip address
1: lo: <LOOPBACK,UP,LOWER_UP> mtu 65536 qdisc noqueue state UNKNOWN group default qlen 1000
    link/loopback 00:00:00:00:00:00 brd 00:00:00:00:00:00
    inet 127.0.0.1/8 scope host lo
    valid_lft forever preferred_lft forever
    inet6 ::1/128 scope host noprefixroute
    valid_lft forever preferred_lft forever
2: eth0: <BROADCAST,MULTICAST,UP,LOWER_UP> mtu 1500 qdisc mq state UP group default qlen 1000
    link/ether 00:04:9f:07:2f:61 brd ff:ff:ff:ff:ff:ff
    inet 10.10.40.210/21 metric 10 brd 10.10.47.255 scope global dynamic eth0
    valid_lft 27175sec preferred_lft 27175sec
    inet6 fe80::204:9fff:fe07:2f61/64 scope link proto kernel_ll
    valid_lft forever preferred_lft forever
3: eth1: <NO-CARRIER,BROADCAST,MULTICAST,UP> mtu 1500 qdisc mq state DOWN group default qlen 1000
    link/ether 00:04:9f:07:2f:62 brd ff:ff:ff:ff:ff:ff
4: can0: <NOARP,ECHO> mtu 16 qdisc noop state DOWN group default qlen 10
    link/can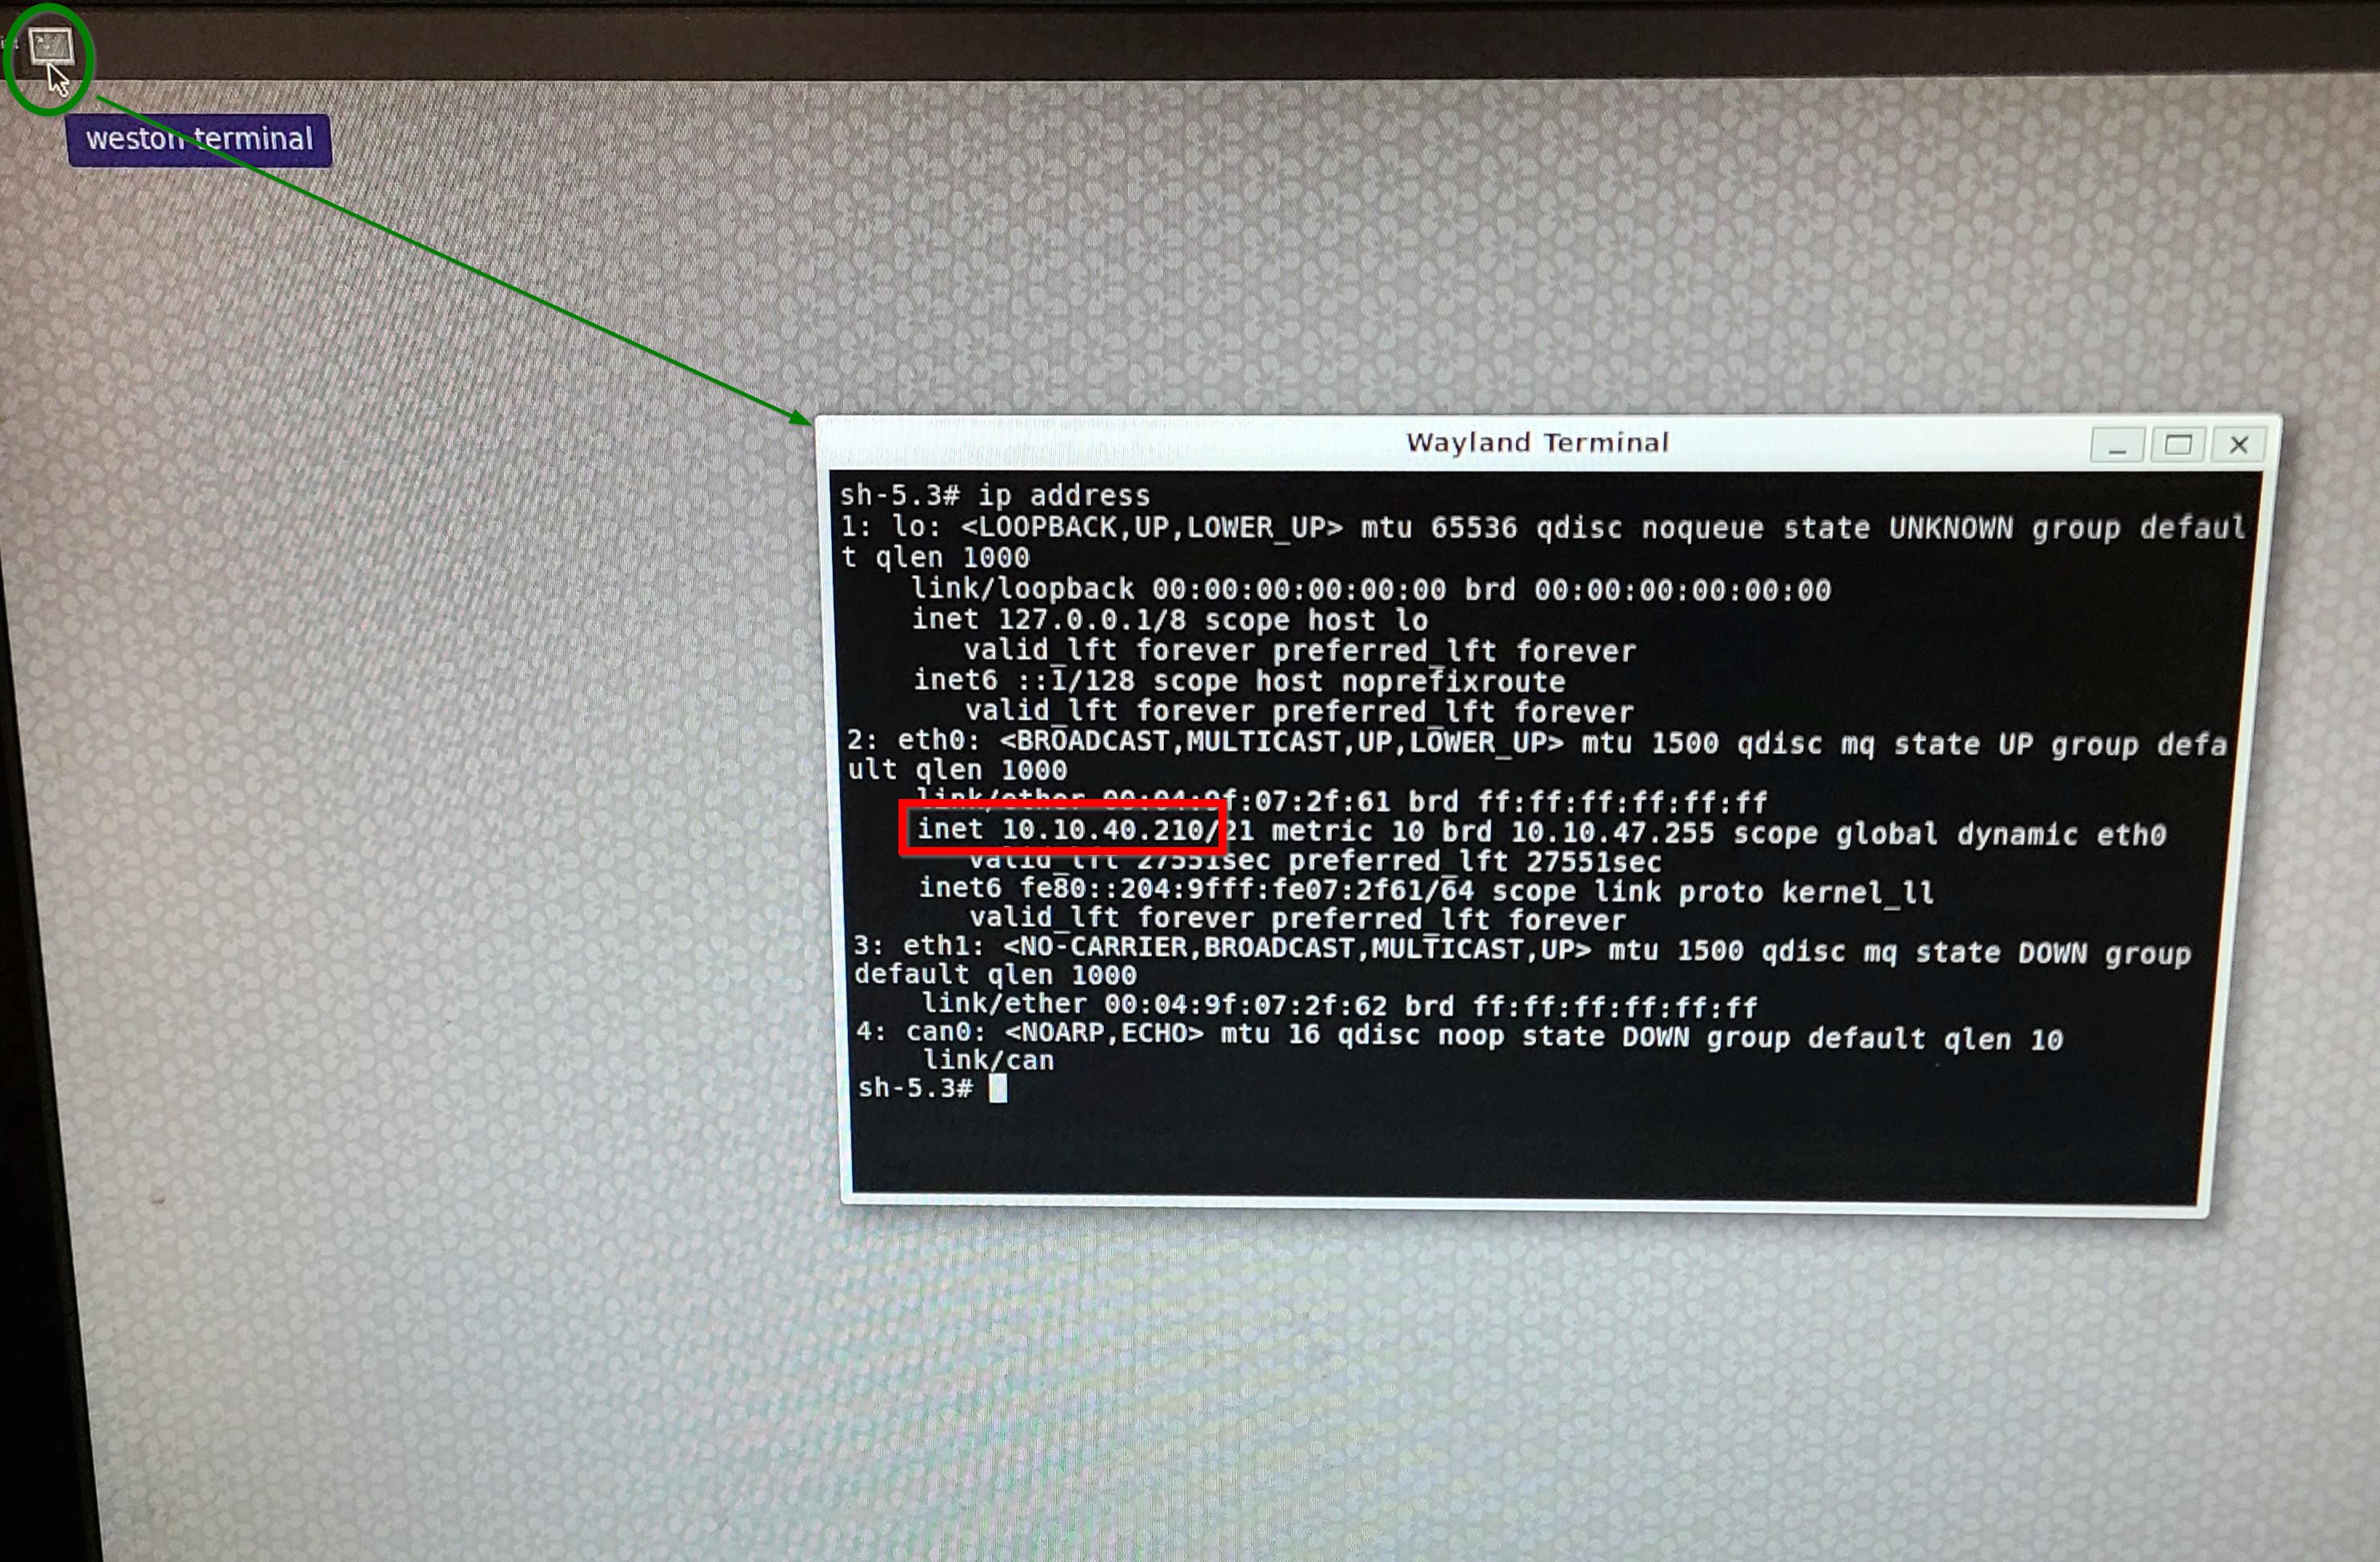
Weston Terminal The IP address of the EVK will be shown next to "inet". In this case, it is
10.10.40.210.Now that you have the IP address of the EVK, you can SSH to the EVK from any host connected to the same network as the EVK.
$ ssh root@10.10.40.210You can connect to the EVK from your PC using PuTTY.
Download PuTTY in your PC, by following the instructions in the link provided.
Connect a USB cable from your PC to the USB Micro B Debug Port (1) on the EVK.
Power ON the EVK by switching the power switch (7).
Open "Device Manager" in your PC and under "Ports (COM & LPT)" take a note of the list of available serial ports on your PC.
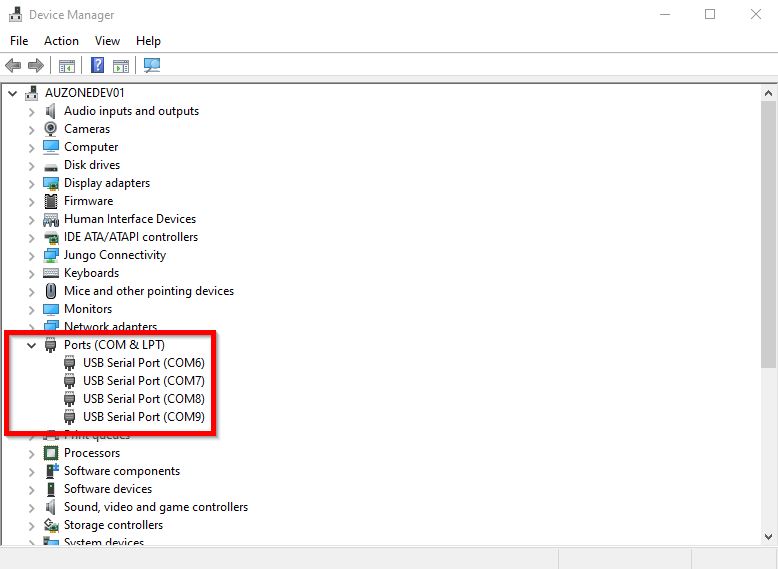
Device Manager The serial ports on this setup are (COM6, COM7, COM8, COM9).
Open PuTTY on your PC and under "Session", select the connection type to "Serial", specify the serial line to one of the COM ports listed, and change the BAUD rate "Speed" to 115200. Once the settings are set, click "Open" on the bottom right to open the connection.
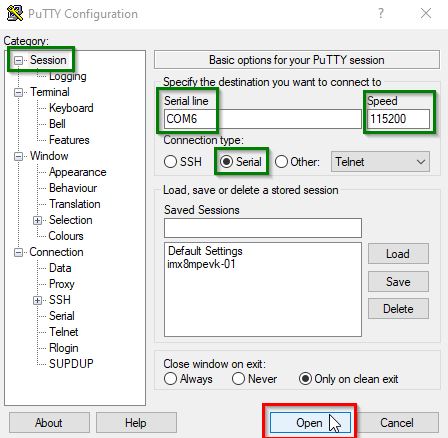
PuTTY Configuration This should open a terminal window. If the connection is successful, output will appear in the terminal. If nothing is displayed, try the other listed COM ports until the connection works. In some cases, you may need to press Enter on your keyboard to initiate the display.
A successful connection will show "imx8mpevk login: " on the terminal. Enter "root" to login to the device.
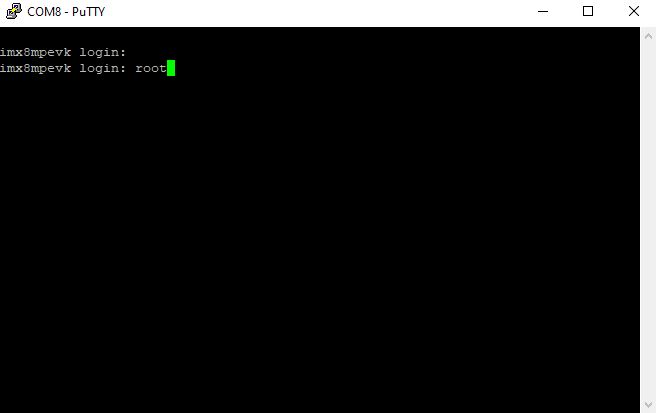
PuTTY Terminal Once logged in. Enter the command
ip address.# ip address 1: lo: <LOOPBACK,UP,LOWER_UP> mtu 65536 qdisc noqueue state UNKNOWN group default qlen 1000 link/loopback 00:00:00:00:00:00 brd 00:00:00:00:00:00 inet 127.0.0.1/8 scope host lo valid_lft forever preferred_lft forever inet6 ::1/128 scope host noprefixroute valid_lft forever preferred_lft forever 2: eth0: <BROADCAST,MULTICAST,UP,LOWER_UP> mtu 1500 qdisc mq state UP group default qlen 1000 link/ether 00:04:9f:07:2f:61 brd ff:ff:ff:ff:ff:ff inet 10.10.40.210/21 metric 10 brd 10.10.47.255 scope global dynamic eth0 valid_lft 27175sec preferred_lft 27175sec inet6 fe80::204:9fff:fe07:2f61/64 scope link proto kernel_ll valid_lft forever preferred_lft forever 3: eth1: <NO-CARRIER,BROADCAST,MULTICAST,UP> mtu 1500 qdisc mq state DOWN group default qlen 1000 link/ether 00:04:9f:07:2f:62 brd ff:ff:ff:ff:ff:ff 4: can0: <NOARP,ECHO> mtu 16 qdisc noop state DOWN group default qlen 10 link/can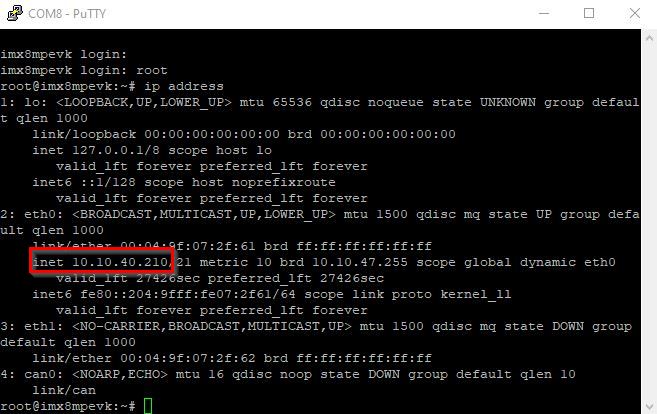
IP Address The IP address of the EVK will be shown next to "inet". In this case, it is
10.10.40.210.Now that you have the IP address of the EVK, you can SSH to the EVK from any host connected to the same network as the EVK.
$ ssh root@10.10.40.210
SD Card Partition
If you notice that in df -h the memory partition is not using the full capacity of the SD card used, you can resize this partition to the maximum capacity.
CPU Performance
You can set the CPU performance by visiting the page CPU Performance Scaling.
Next Steps
Now that you have set up your i.MX 8M Plus, you can begin training your Vision model for deployment on this platform. First, copy one of our ready-to-use datasets to use for training.