NVIDIA Jetson Orin Nano Setup Guide
This guide walks you through how to set up the NVIDIA Jetson Orin Nano from start to finish. You can also find the official Getting Started Guide provided by NVIDIA for setting up the Jetson Orin. This guide builds on top of the official documentation with a focus on adding support for deploying the EdgeFirst pipeline.
Device Specification
The device used in these examples has these specs.
- 1024-core NVIDIA Ampere architecture GPU with 32 Tensor Cores
- 6-core Arm Cortex-A78AE v8.2 64-bit CPU
- 8GB 128-bit LPDDR5
- microSD Card slot
I/O:
- Display Port
- 4x USB 3.2 Gen2 Type A
- USB Type-C UFP
- M.2 Key M 2280
- M.2 Key M 2230
- M.2 Key E (populated)
Flash a microSD card with Jetpack 6.x
It is recommended to use a microSD card that's 64GB and higher to flash Jetpack 6.2.1 which is ~24.1GB.
Official Docs
The official documentation links towards these instructions for flashing Jetpack 6.x.
-
Download Jetpack v6.2.1 by clicking the link provided. This should download a ZIP file named "jetson-orin-nano-devkit-super-SD-image_JP6.2.1.zip"
-
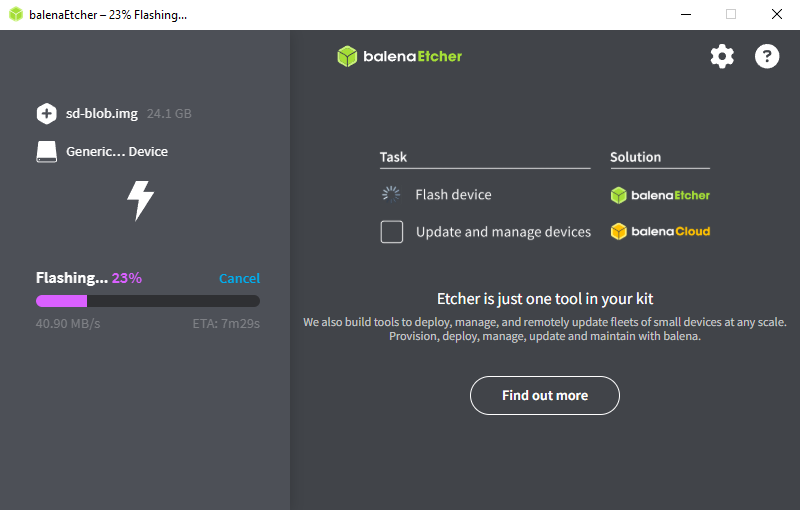
Use balenaEtcher to flash the SD card using an SD card reader connected to your PC. Select the ZIP file that was downloaded and select the SD card for the storage. Once selected, click "Flash!" to start

balenaEtcher -
Wait for the application to complete flashing ~10 mins. depending on your machine
balenaEtcher -
Once completed, a complete status should appear. Proceed to the next steps to boot the board with the image flashed
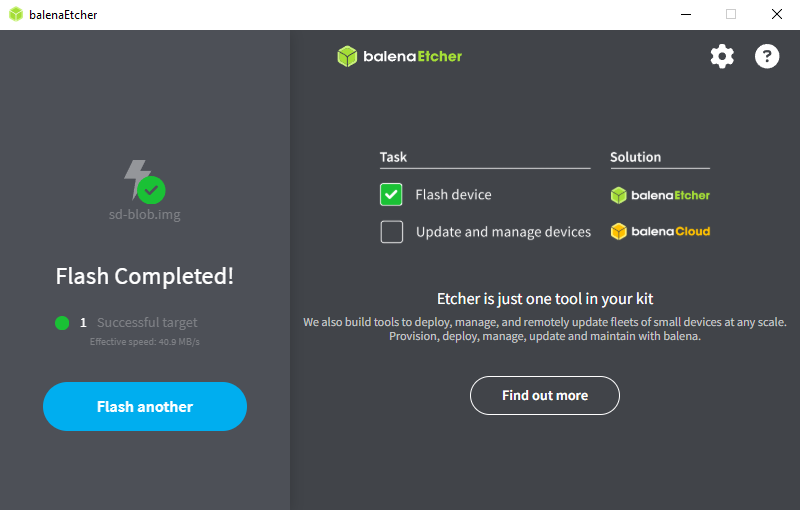
Completed Flashing
Boot the Jetson Orin with Jetpack 6.x
-
Insert the microSD card into the module
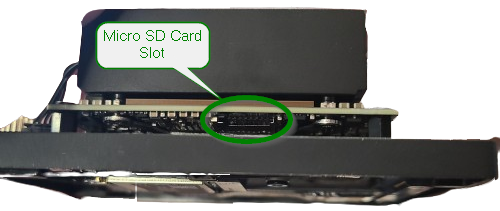
Insert Micro SD Card -
Power on the Jetson by inserting the 19V power supply to the DC Barrel jack (1). Next connect the board to your network by attaching an ethernet cable to the Gigabit Ethernet port (4). For the next steps a mouse and keyboard, and monitor will be needed to setup the system configuration which is connected to the USB3.1 Type A ports (3) and Display Port (2)
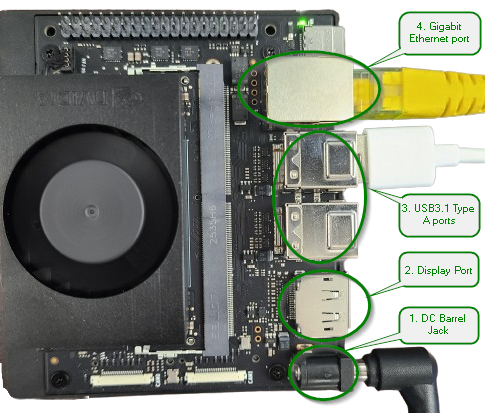
Jetson Orin Physical Connections -
Once powered on, the initial software setup (oem-config) will be initiated
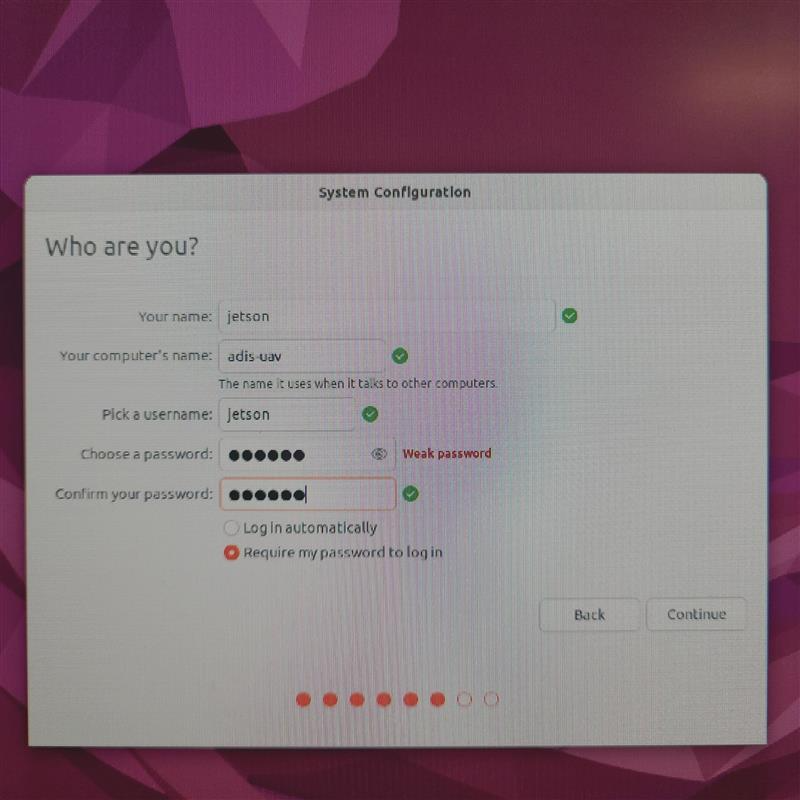
Setup System Configurations
Proceed with the setup configuration displayed on the monitor connected to the board. This setup should also allow you to setup your board's username, password, and hostname (“computer’s name”) as shown below. Otherwise, the hostname can be set with the command sudo hostnamectl set-hostname myhostname on the Jetson's terminal.
Set to Maximum Power
Set the board to 25W and prevent any power savings which could affect pipeline performance by running the following commands.
sudo nvpmodel -m 1
sudo jetson_clocks
Info
These commands have to be set each time the board boots up as it defaults to run power savings.
- You can find more information on the various power modes by entering
cat /etc/nvpmodel.confor visiting the page Set the Power Mode - You can see the current power mode set with
sudo nvpmodel -q
Setup Python
To run the examples for the model validation and model deployments in this Quick Start, certain python dependencies are required.
Install Python's pip and Virtual Environment
These instructions installs Python's pip and venv which does not come pre-installed in the BSP.
- Install Python pip
sudo apt install python3-pip -y - Install Python virtual environment
sudo apt install python3.10-venv - Create a python virtual environment
python3 -m venv path/to/myenv --system-site-packages - Activate the virtual environment
source path/to/myenv/bin/activate
Install PyCuda and ONNXRuntime
These instructions installs PyCuda and ONNXRuntime which does not come pre-installed in the BSP. The following steps were taken from this Setup Guide.
- Set
CUDA_HOMEenvironment variableexport CUDA_HOME=/usr/local/cuda - Add the CUDA compiler to the PATH
export PATH=$CUDA_HOME/bin:$PATH - Add the CUDA libraries
export LD_LIBRARY_PATH=$CUDA_HOME/lib64:$LD_LIBRARY_PATH -
Verify that the CUDA compiler driver is installed in the device.
$ nvcc --version nvcc: NVIDIA (R) Cuda compiler driver Copyright (c) 2005-2024 NVIDIA Corporation Built on Wed_Aug_14_10:14:07_PDT_2024 Cuda compilation tools, release 12.6, V12.6.68 Build cuda_12.6.r12.6/compiler.34714021_0 -
Install PyCUDA which is needed to run TensorRT models
pip install pycuda -
Install ONNXRuntime depending on your CUDA version which is needed to run ONNX models.
- CUDA 12.9
pip3 install onnxruntime-gpu --index-url https://pypi.jetson-ai-lab.io/jp6/cu129 'numpy>1.24,<2' - CUDA 12.6
pip3 install onnxruntime-gpu --index-url https://pypi.jetson-ai-lab.io/jp6/cu126 'numpy>1.24,<2'
- CUDA 12.9
Specific NumPy Version
- NumPy ≥ 1.24 is required since earlier versions causes
TypeError: 'numpy._DTypeMeta' object is not subscriptableuponimport pycuda - NumPy < 2 is also required since certain modules in the Jetson packages is compiled with NumPy < 2
Next Steps
Now that you have set up your Jetson Orin, you can begin training your Vision model for deployment on this platform. First, copy one of our ready-to-use datasets to use for training.